What is an ECC Certificate and why would you need one?
The main difference with an Elliptic Curve Cryptography (ECC) certificate is with how the certificate is signed, in this case the Elliptic Curve Digital Signature Algorithm (ECDSA) is used vs the standard RSA we are used to seeing. Once you have a certificate signed with ECDSA, you can then use the more robust ECDHE_ECDSA cipher suites that are available on Windows and get away from the DHE based cipher suites. This will also satisfy the “obsolete cipher suite” warning in Google Chrome as it now requires ECDHE with AES_128_GCM or CHACHA20_POLY1305 to be considered “Modern Cryotography”.
You can find more information about ECC certificates here – https://www.namecheap.com/support/knowledgebase/article.aspx/9503/38/what-is-an-ecc-elliptic-curve-cryptography-certificate
How and where to get an ECC certificate
As with any SSL Certificate, an ECC certificate starts with a certificate request or CSR which must be generated using ECDSA and then you will need a certificate authority who supports ECC certificates, but most major ones do. I use Namecheap.com for all my domain and SSL needs and have had great luck with the Comodo PositiveSSL certificates they offer.
Generating an ECDSA CSR on Windows 2012 R2
1.) Open the MMC and add the Certificate Snap-in to manage certificates for the “Computer Account”.
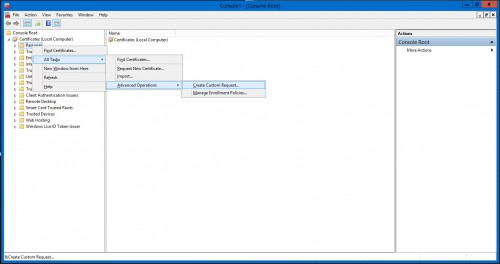
2.) Expand Certificates and right click on Personal > All Tasks > Advanced Operations > Create Custom Request
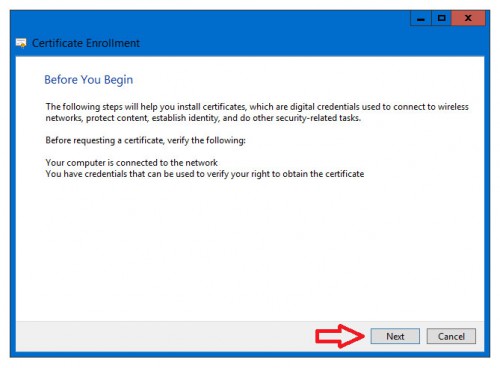
3.) Click Next on the “Before You Begin” page.
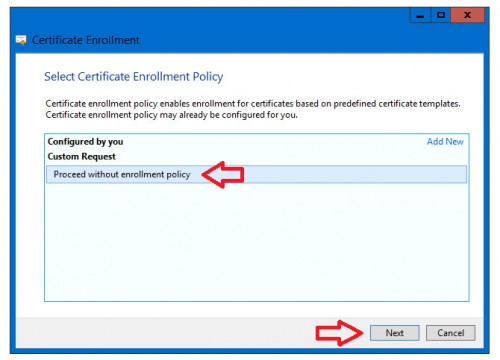
4.) On the Select Certificate Enrollment Policy page, select Process without enrollment policy and then, click Next.
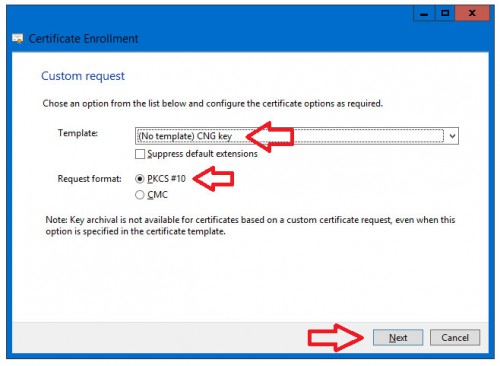
5.) On the Custom request page, leave the defaults (No template) CNG key and PKCS #10, click Next.
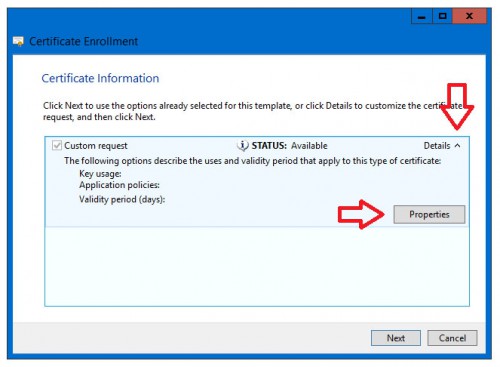
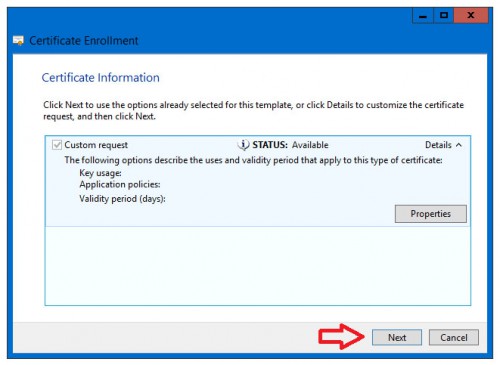
6.) On the Certificate Information page, expand Details (click the drop-down arrow) and then click Properties.
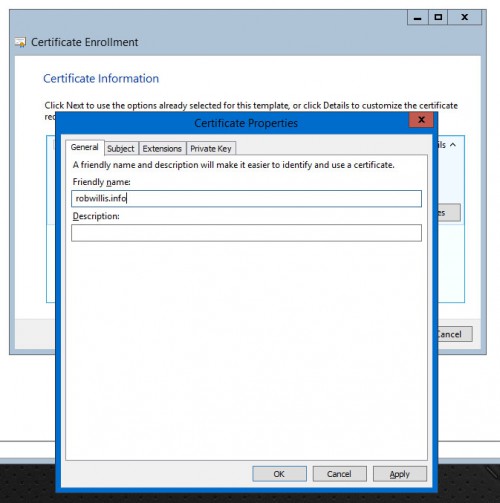
7.) In the Certificate Properties window, set the friendly name to your domain:
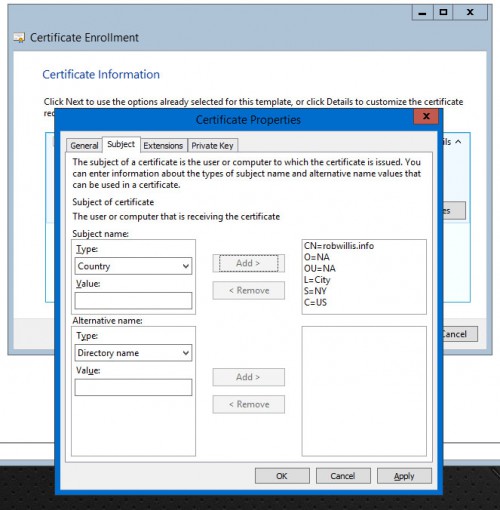
8.) On the Subject tab, under Subject name, select a Type, enter the appropriate Value for the type, and then click Add. Add the following items:
Common name (i.e. www.domain.com)
Organization
Organization unit
Locality
State
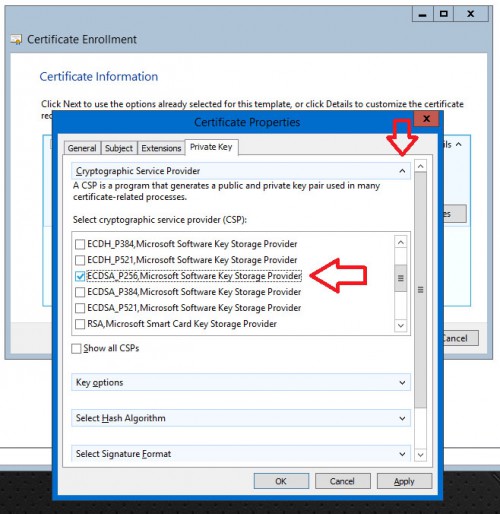
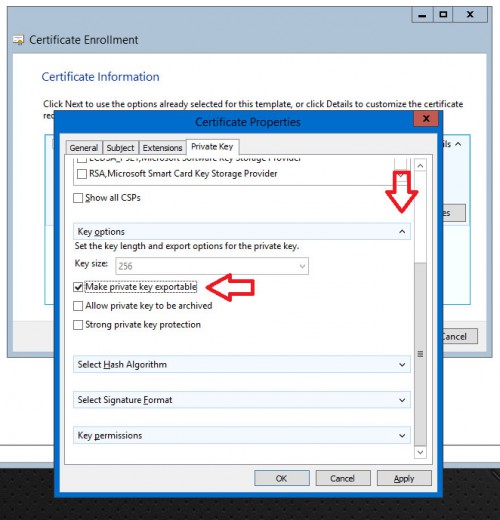
Country9.) On the Private Key tab, expand Cryptographic Service Provider and then under Select cryptographic service provider (CSP), uncheck any boxes and check ECDSA_P256, Microsoft Software Key Storage Provider
10.) Next, expand Key options and check Make private key exportable.
11.) Finally, click Apply and then click OK to exit the Certificate Properties window.
12.) Click Next on the Certificate Enrollment window.
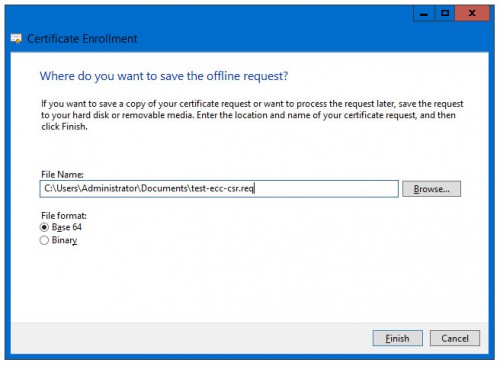
13.) On the Where do you want to save the offline request screen, select a file name for the CSR and select the Base 64 file format then click finish.
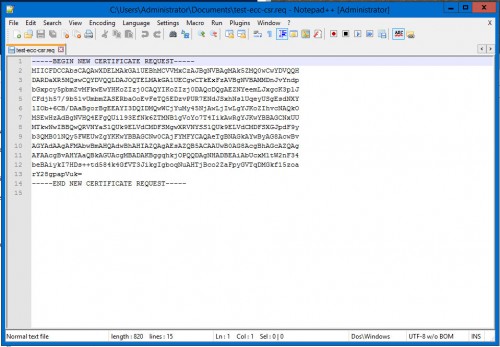
14.) Use a text editor (such as Notepad) to open the file. You can then copy and paste this CSR into your CA’s certificate request form.
Importing the certificate
1.) Once you have obtained the certificate from your certificate authority, open the MMC and add the Certificate Snap-in to manage certificates for the “Computer Account” just like we did to generate the CSR.
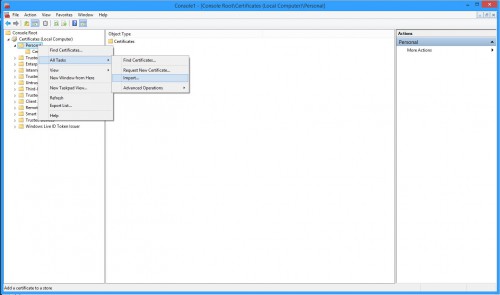
2.) Right click on the Personal store and go to All Tasks > Import…
3.) Follow the prompts to import the .cer file provided by your CA.
Verify the Private Key is associated with the Certificate
1.) In the MMC Certificate Snap-in, find the certificate that was just installed and double click on it.
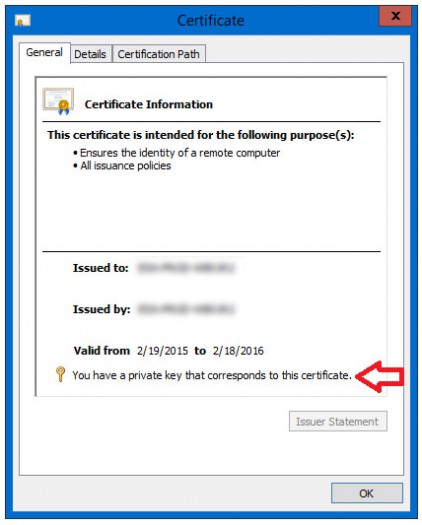
2.) At the bottom of the certificate you should see the message “You have a private key that corresponds to this certificate.” with a little key next to it.
3.) The certificate is now ready for use.
Reorder the Cipher Suites to utilize ECDSA
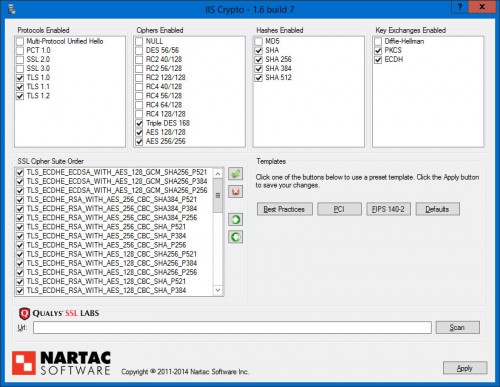
Now that we have a certificate that supports ECDSA we will need to reorder the cipher suites so that the ECDSA ciphers are negotiated first. I highly recommend using IISCrypto from Nartac to make the changes to ensure the process goes a smooth as possible.
Now there are certainly a few things to look out for when making changes to the SChannel configuration and you can find more in depth information in this post:
Hardening SSL & TLS connections on Windows Server 2008 R2 & 2012 R2
As always, you absolutely want to test these settings prior to putting them into production!
Using IISCrypto follow these simple steps:
1.) Apply Best Practices template
2.) Disable MD5 Hashes and Diffie-Hellman Key Exchanges (Optional)
3.) Move the following cipher suites to the top of the list:
TLS_ECDHE_ECDSA_WITH_AES_128_GCM_SHA256_P521
TLS_ECDHE_ECDSA_WITH_AES_128_GCM_SHA256_P384
TLS_ECDHE_ECDSA_WITH_AES_128_GCM_SHA256_P256
4.) Apply and reboot.
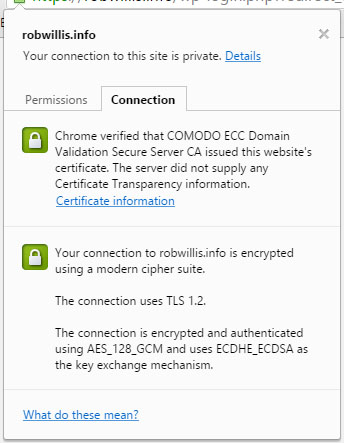
You should now be able to negotiate connections utilizing the stronger ECDHE_ECDSA cipher suites as verified by the “modern cipher suite” message in Google Chrome now:
