BloodHound is one of those tools that everyone in the industry seems to have heard of and it tends to generate a buzz amongst engineers anytime it’s brought up. This reputation is well-deserved with it being such a game changer when it comes to attacking and auditing Active Directory domains. Every organization running Active Directory should be running BloodHound on a regular basis, not just during penetration tests and red team engagements. However, there seems to be a limited pool of engineers with hands-on experience when it comes to deploying and operationalizing BloodHound, especially on the defensive/blue team side.
Understandably, frustration/issues/bugs with the tools and technology stack (Neo4j, Docker) used by BloodHound causes many engineers to throw in the towel during the initial deployment or first data ingest phases. Even with everything up and working, there is still the final hurdle of figuring out a way to get the data out of the BloodHound UI and into a usable format that can be easily reviewed by the teams that can act on it. I know because I’ve personally experienced all of these pain points.
This is exactly what I want to tackle with this post, everything from deploying and troubleshooting a local BloodHound Community Edition instance capable of generating AD-Miner reports with automated attack path analysis – all for free, well minus the cost of an engineer and the infrastructure to run it.
Post Outline & Goals
To keep this post concise, I’ll assume a general familiarity with Active Directory and BloodHound. For example, I won’t cover setting up a domain controller or explain the history of BloodHound or its development team (SpecterOps). However, I will do my best to include all relevant details and background information where necessary.
Here is a brief outline of what will be covered:
- BloodHound Enterprise vs BloodHound Community Edition
- Retroactive vs Proactive Approach
- Purple Teaming Active Directory
- What Components Make Up BloodHound CE?
- Host & System Requirements
- Lab Environment
- Building The BloodHound Server
- Installing Docker
- Installing BloodHound
- Running & Managing The BloodHound Server
- Installing AD-Miner
- Domain Data Collection
- Domain-Joined System
- Non Domain-Joined System
- BloodHound File Ingest
- Generating Reports With AD-Miner
- Tracking Changes Over Time With AD-Miner
- Repeating The Process
- Downloads
- Cheat Sheets
BloodHound Enterprise vs BloodHound Community Edition
The team at SpecterOps recognized the challenges users were experiencing running BloodHound, and they now offer a much more streamlined cloud based version known as BloodHound Enterprise – for a price of course. At the same time, as this space continues to mature, additional vendors have popped up with their own offerings. Unfortunately, nearly all of these services charge based off of the scale of the environment, which can easily lead to tens if not hundreds of thousands of dollars when talking about 100k+ user domains. Don’t get me wrong, most of the offerings I’ve seen are actually solid solutions and the built in automation makes continuous operation a breeze, but it may still be difficult to get budget for something like this even with Active Directory being considered a “crown jewel”.
Remaining true to their open source roots, SpecterOps still offers and maintains BloodHound Community Edition (aka BloodHound CE). The Community Edition offers all of the critical BloodHound features and when combined with another open source project like AD_Miner, can really rival some of these pay-for offerings. This combo can also serve as a great proof-of-concept to help justify the cost of those enterprise versions.
Retroactive vs Proactive
When it comes to how BloodHound is leveraged in the industry, the most common trend seems to be offensive/red teams use BloodHound on an engagement, typically only focusing on attack paths targeted during the operation. This leads to limited/scoped information being provided to the defensive/blue teams in the form of the final post-operation report.
By doing this, the blue teams are at an immediate disadvantage as they are forced to retroactively investigate and remediate, often without the necessary logs due to retention issues or limitations in telemetry. As a result, additional time and resources are required to recreate the original test, assess the available telemetry, and validate any developed content.
Furthermore, the inability to analyze the original BloodHound data captured during the operation often means valuable insights are missed, insights that could help put the Active Directory and security teams in a position to proactively harden and monitor potential attack paths within the environment. Keep in mind though, the dump data by itself is not very useful without access to a functioning BloodHound instance and someone with the expertise to analyze the data.
Moving beyond attack path analysis, it can also be tricky to detect the “collector” tooling used by BloodHound for enumeration, partly due to the challenges of separating out normal Active Directory traffic vs “malicious” on the domain controller side, and then there is everything that can go wrong at the end point – telemetry/visibility limitations, evasion techniques, etc. However, by using a proactive approach and actively auditing, monitoring and remediating any potential attack paths, the output from the collector tools is essentially rendered useless.
Purple Teaming Active Directory
This is an ideal scenario to leverage Purple Teaming, where offensive and defensive teams collaborate on an ongoing, long-term testing operation. There’s no need for evasion or secretive tactics, as these approaches often hinder progress rather than help.
Think of it going something like this:
- Engineer captures domain information using dedicated internal host
- Engineer uploads capture to BloodHound server and generates AD_Miner Report
- Offensive Engineers optionally review and augment the data/report
- Defensive and Active Directory Engineers review and address all issues that can be resolved
- Defensive and Content Engineers review logs and develop content to monitor any critical non-resolvable issues
- Rinse and repeat – Monthly? Quarterly? Annually?
Most of these steps can be accomplished with just a few commands, making it easy to create a streamlined/automated process.
What Components Make Up BloodHound CE?
In its most basic form, BloodHound CE is a web application deployed as a series of containers along with “collectors” that are to be executed on the client hosts used to gather domain information.
- BloodHound CE Server
- BloodHound CE (Application)
- Neo4j (Graph DB)
- Postgresql (App DB)
- Collectors
Host & System Requirements
Hosts
BloodHound CE will require a server host to deploy the BloodHound related containers and a client host that will be used to execute the collector software.
Additional Requirements/Notes:
- Whitelisting & Exceptions – It is highly likely that security tooling will detect/block the operation of the BloodHound server and client side collector components. Do not fall into the trap of trying to flex and bypass or evade controls here, that is not the goal. Use the initial testing to validate any existing detections but ultimately expect and plan to make exceptions/whitelist as needed.
Server Host – System Requirements
Server OS – Windows, Linux, Mac with Docker Support
Hardware recommendations from SpecterOps:
- Minimum specifications:
- 4GB of RAM
- 4 processor cores
- 10GB hard disk space
- For large environments (>50,000 users):
- 96GB of RAM
- 12 processor cores
- 50GB hard disk space
I’d recommend starting somewhere in the middle, especially with the additional load from AD_Miner:
- 32GB of RAM
- 8 processor cores
- 120GB hard disk space
Additional Requirements/Notes:
- Docker & Nested Virtualization – Docker on Windows virtual machines will require hardware-assisted virtualization, but does not appear to have the same requirement on Linux. This is important as many production virtualization environments do not enable these features by default, and it will prevent the service from running.
-
PodMan – Need to run BloodHound using PodMan? I highly suggest checking out the following project:
https://github.com/SySS-Research/Single-User-BloodHound - AD_Miner Memory/CPU – AD_Miner is very resource intensive, the more you RAM/CPU you can throw at it the better.
- HDD Space – When analyzing larger environments, the collector dumps can really expand as they are processed. 150MB of zipped SharpHound output can easily expand to 4GB once uploaded to BloodHound and then expand another 20GB after AD_Miner.
- Crashing – BloodHound/Neo4j can be super sensitive, if you run out of system resources while uploading or processing collector dump data, Neo4j usually explodes and then takes everything else out, often requiring a complete reset of the containers.
Collector Host – System Requirements
The Collector host can be pretty low powered, the following requirements are a great place to start:
- Host OS – Windows, Linux, Mac
- 4GB of RAM
- 4 processor cores
- 60GB hard disk space
The main requirement here is that the host must be able to run one of the collectors mentioned earlier, which is generally going to be .Net or Python. The output from the collector will be stored as a series of json files that are then compressed into a zip, depending on the environment this can range from just a few megabytes up to a couple hundred megabytes.
Additional Requirements/Notes:
- Domain Joined? – Host does not have to be domain joined, but must be able to resolve DNS to the AD Domain and requires valid credentials.
- Location, location, location – Be cognizant of the network location (LAN vs VPN) of this host and what data is being collected, for example local and session related collections can create a large amount of connections to many hosts.
Lab Environment
The lab environment I will be using for this post consists of 3 virtual machines that are all on the same local network:
| Hostname | Address | OS | Notes |
| VMW-L-BHCE | 192.168.90.60 | Ubuntu 24.04.1 | BloodHound Server |
| VMW-L-DC | 192.168.90.70 | Windows Server 2019 | Domain – adlab.robwillis.info AD & DNS Roles Installed Domain Populated via BadBlood after initial collection |
| VMW-L-W10 | 192.168.90.71 | Windows 10 | Non domain-joined system |
Building The BloodHound Server
There are three main parts to building out the BloodHound server:
- Installing Docker
- Installing BloodHound CE
- Installing AD_Miner
I will be installing AD_Miner on the same server as BloodHound, but it can also be hosted separately as long as it has network access to the Neo4j instance. To get the most out of AD_Miner, there are some changes that need to be made to the base BloodHound docker-compose.yml, but more on that later.
I am only going to focus on installing BloodHound with Docker, but as previously mentioned if you prefer PodMan, check out the following project:
https://github.com/SySS-Research/Single-User-BloodHound
Ubuntu 24.04 is going to be the OS of choice for my server side, all commands referenced will reflect this.
Installing Docker
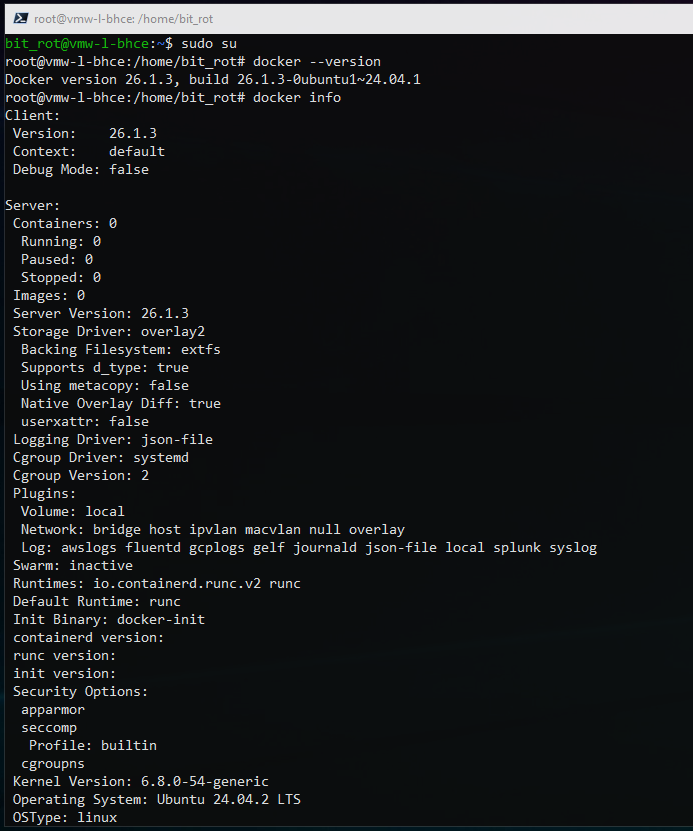
Before BloodHound can be deployed, we need to verify a working Docker environment. You can use the following commands to check the version and status:
root@vmw-l-bhce:/home/bit_rot# docker --version
root@vmw-l-bhce:/home/bit_rot# docker info
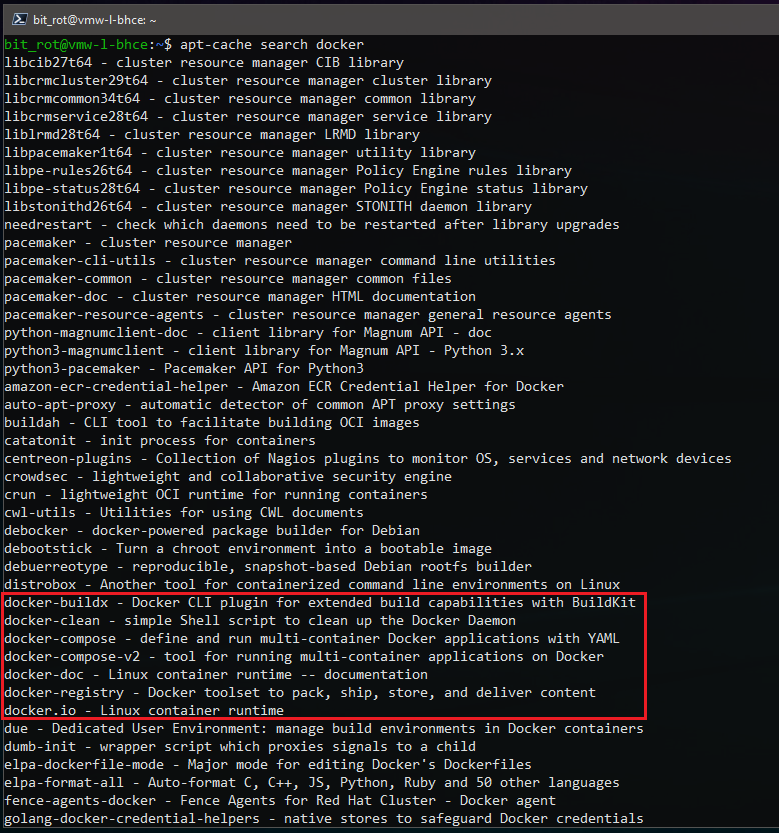
If Docker is not installed, you can locate the available packages using apt-cache:
root@vmw-l-bhce:/home/bit_rot# apt-cache search docker
We’re looking for the “docker.io” and “docker-compose” packages:
To install the Docker and Docker-Compose packages:
root@vmw-l-bhce:/home/bit_rot# apt -y install docker.io docker-compose
Installing BloodHound
Installing BloodHound is very straight forward when following the official documentation:
https://github.com/SpecterOps/BloodHound
As mentioned earlier, I am going to deviate from the BloodHound documentation just a bit, adding in some changes to help optimize AD-miner.
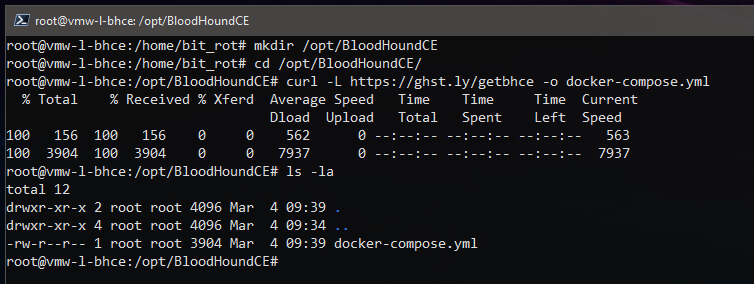
Let’s start by making a directory for BloodHound in /opt:
root@vmw-l-bhce:/home/bit_rot# mkdir /opt/BloodHoundCE
root@vmw-l-bhce:/home/bit_rot# cd /opt/BloodHoundCE
Next, we want to download but not execute the docker-compose.yml file from the SpecterOps github:
root@vmw-l-bhce:/opt/BloodHoundCE# curl -L https://ghst.ly/getbhce -o docker-compose.yml
There’s a few changes and additions that need to be made to the docker-compose.yml before the containers are started, open it in your editor of choice:
root@vmw-l-bhce:/opt/BloodHoundCE# nano docker-compose.yml
Add the following line under the graph-db environment section to load the Graph Data Science Plugin for Neo4j/AD_Miner:
- NEO4J_PLUGINS=["graph-data-science"]
While this plugin is optional, AD_Miner will perform better if it is available and it enables use of Smartest Path vs the built-in shortestPath(), resulting in paths that are easier to exploit rather than the least amount of hops. AD_Miner will still function without this plugin.
Another optional step, depending how you want to expose the BloodHound server instance, you change the following line to make the BloodHound instance accessible via IP:
# Original
- ${BLOODHOUND_HOST:-127.0.0.1}:${BLOODHOUND_PORT:-8080}:8080
# Updated
- ${BLOODHOUND_HOST:-0.0.0.0}:${BLOODHOUND_PORT:-8080}:8080
If you would like the containers to restart with the host, add the “restart: always” line under each of the three services:
services:
  <Service-Name>:
    restart: always
The docker-compose.yml should look something like this when done:
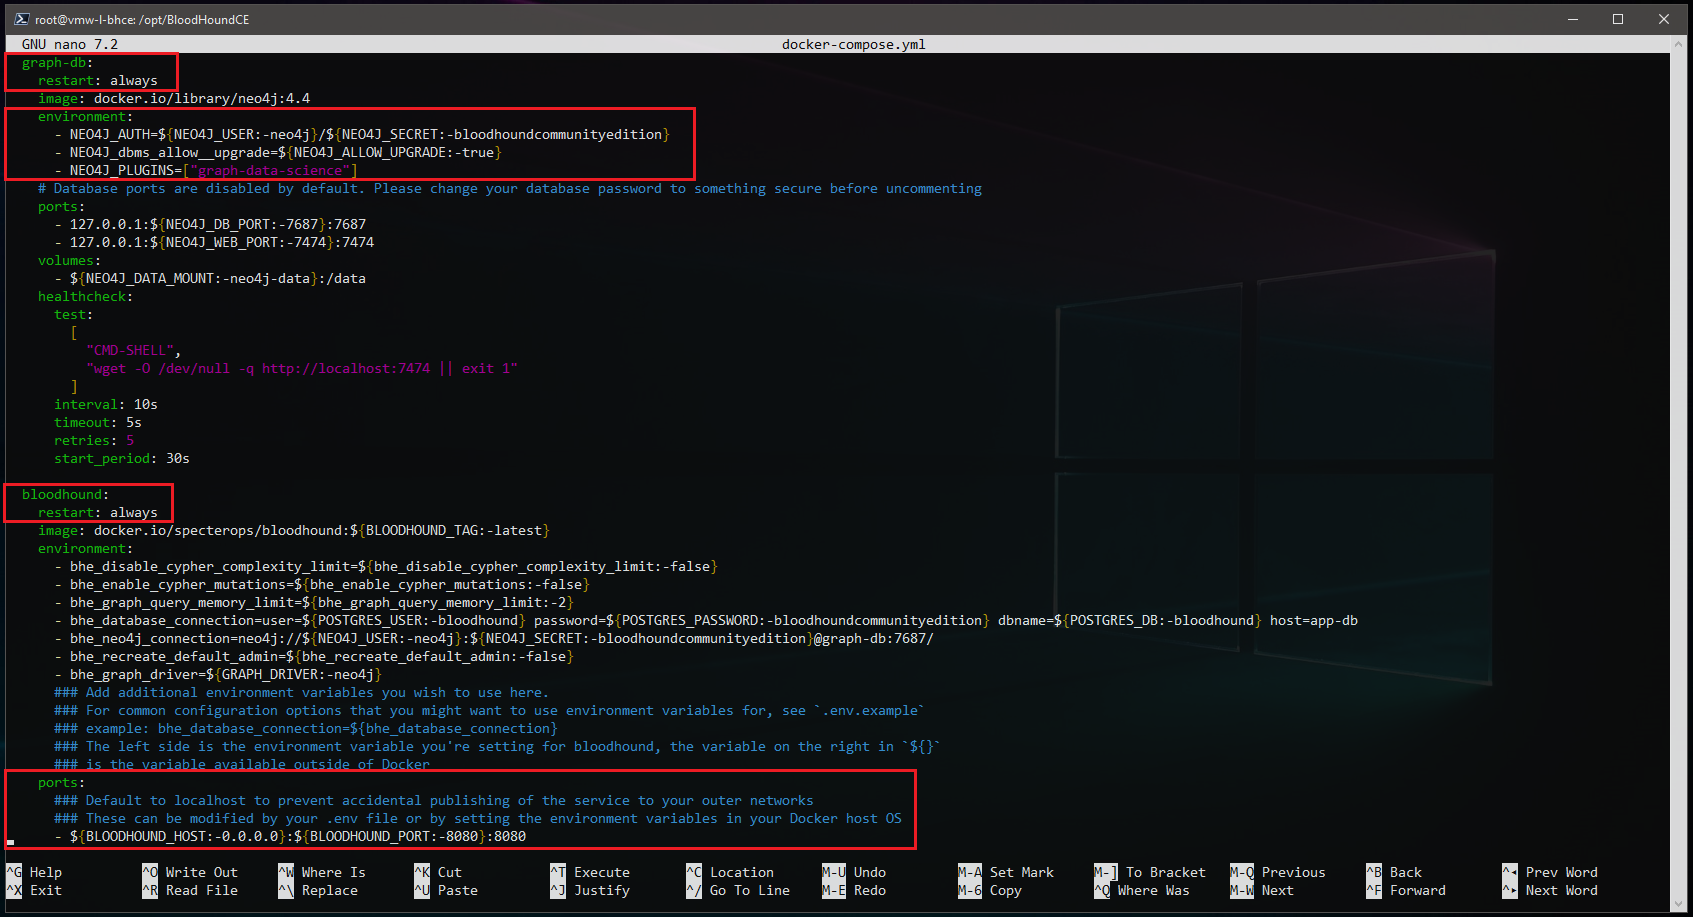
You can find an example copy of the modified docker-compose.yml in the Downloads section at the bottom of this post.
Additional Notes:
- YAML/.yml Is Indentation Sensitive – Make sure to follow the structure!
- Docker-compose.yml – “restart: always” – The “restart: always” option requires that Docker also be enabled at system start:
root@vmw-l-bhce:/opt/BloodHoundCE# systemctl is-enabled docker
root@vmw-l-bhce:/opt/BloodHoundCE# systemctl enable docker
-
Crashing After Changes? – If you recently made changes to the docker-compose.yml and the containers have been previously started and were in a working state but will not start now, try resetting the BloodHound containers back to their original state:
root@vmw-l-bhce:/opt/BloodHoundCE# docker-compose down -v
- Bloodhound.config.json – You can also make some of these changes in the bloodhound.config.json file, like exposing the BloodHound service via IP. I like to keep things simple – #yolosec.
Running & Managing The BloodHound Server
Now that the docker-compose.yml has been modified, it’s time to start the containers, making sure to be in the same path where the docker-compose.yml exists:
root@vmw-l-bhce:/opt/BloodHoundCE# docker-compose up
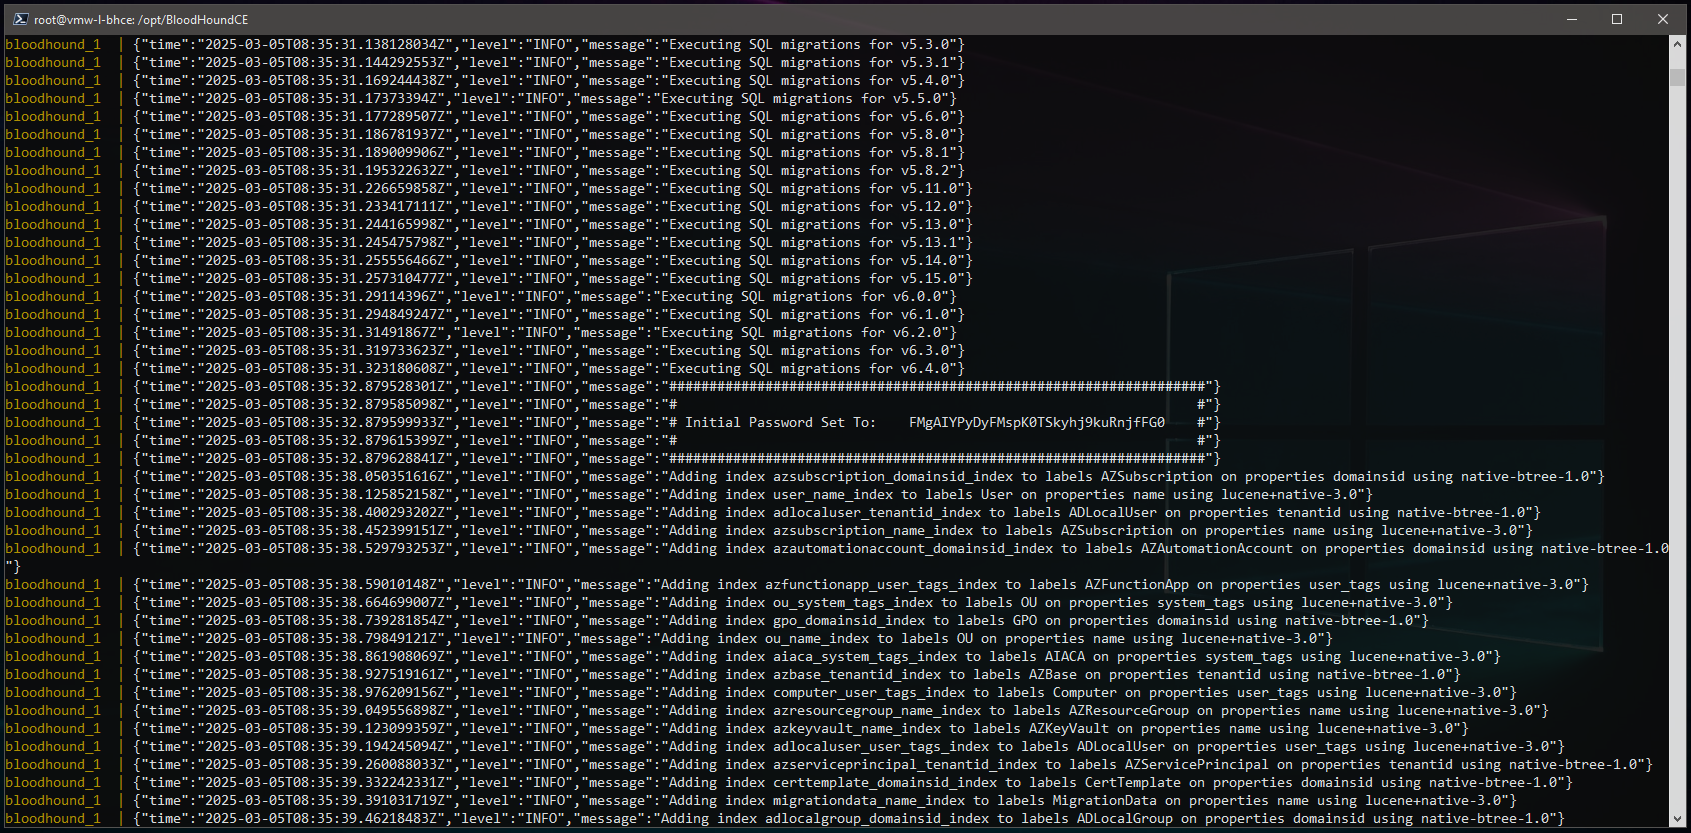
What you will see next is the main logging associated with the BloodHound containers, you will want to monitor this output for any critical errors as this will be the starting point for any troubleshooting. Hopefully the containers start successfully, and you see something like the following:
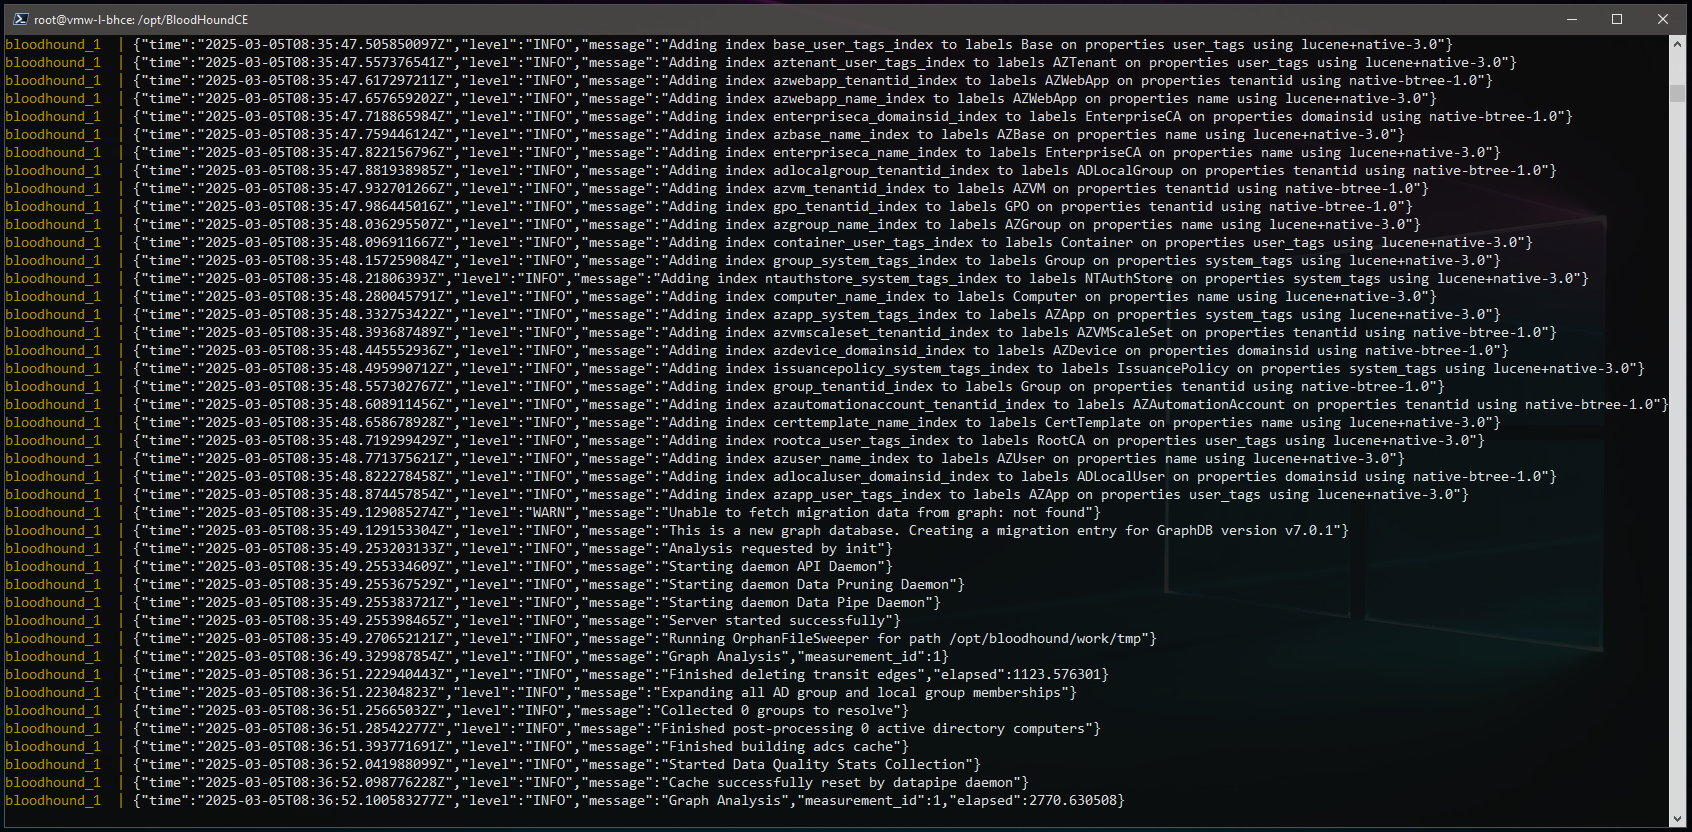
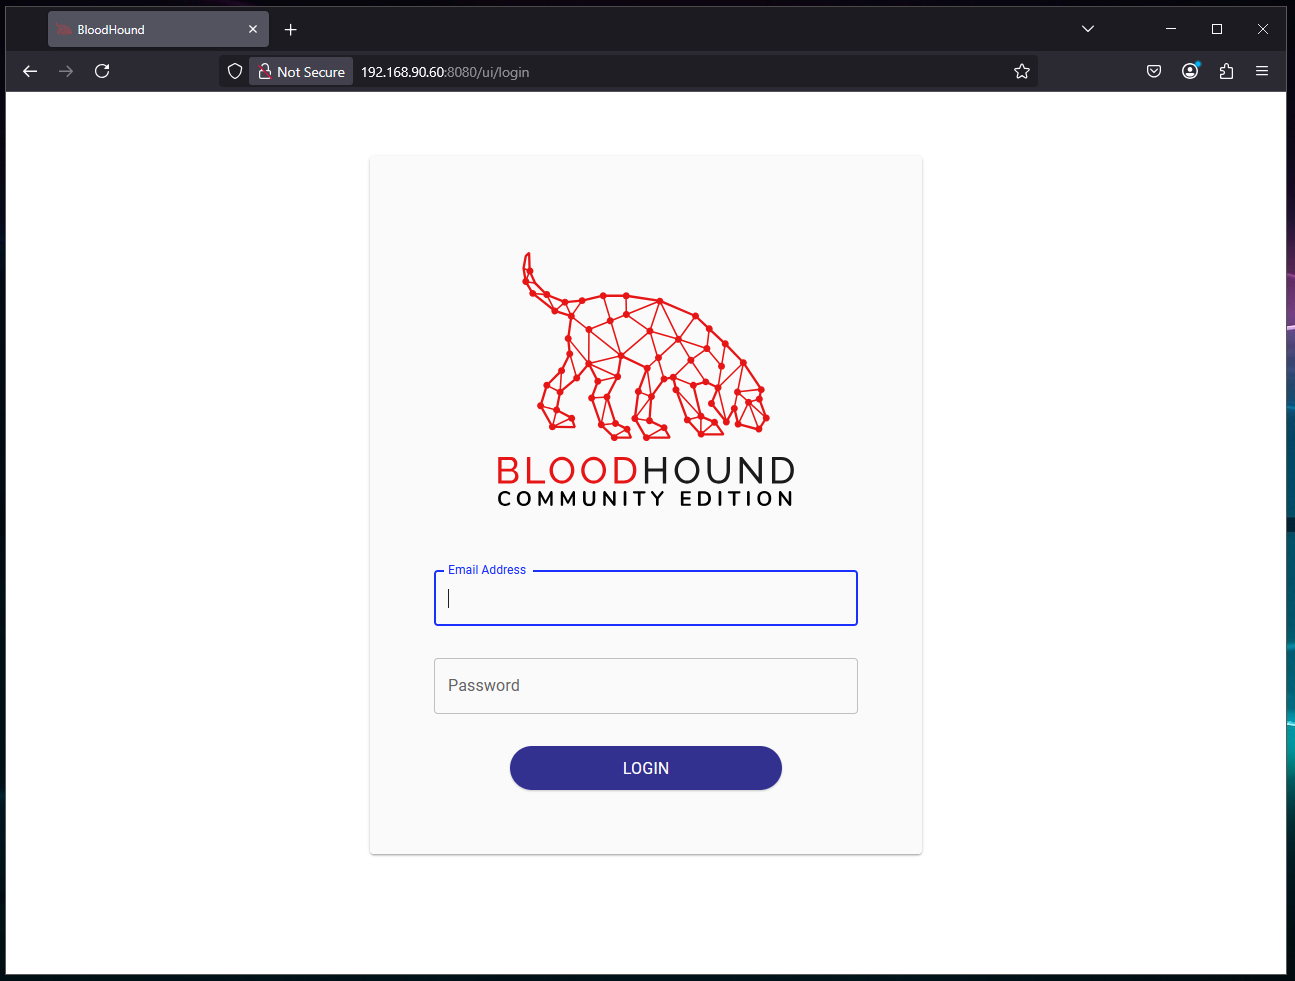
And then to verify the instance is working via web browser by browsing to the server IP on port 8080 – which in this case is will be http://192.168.90.60:8080/:
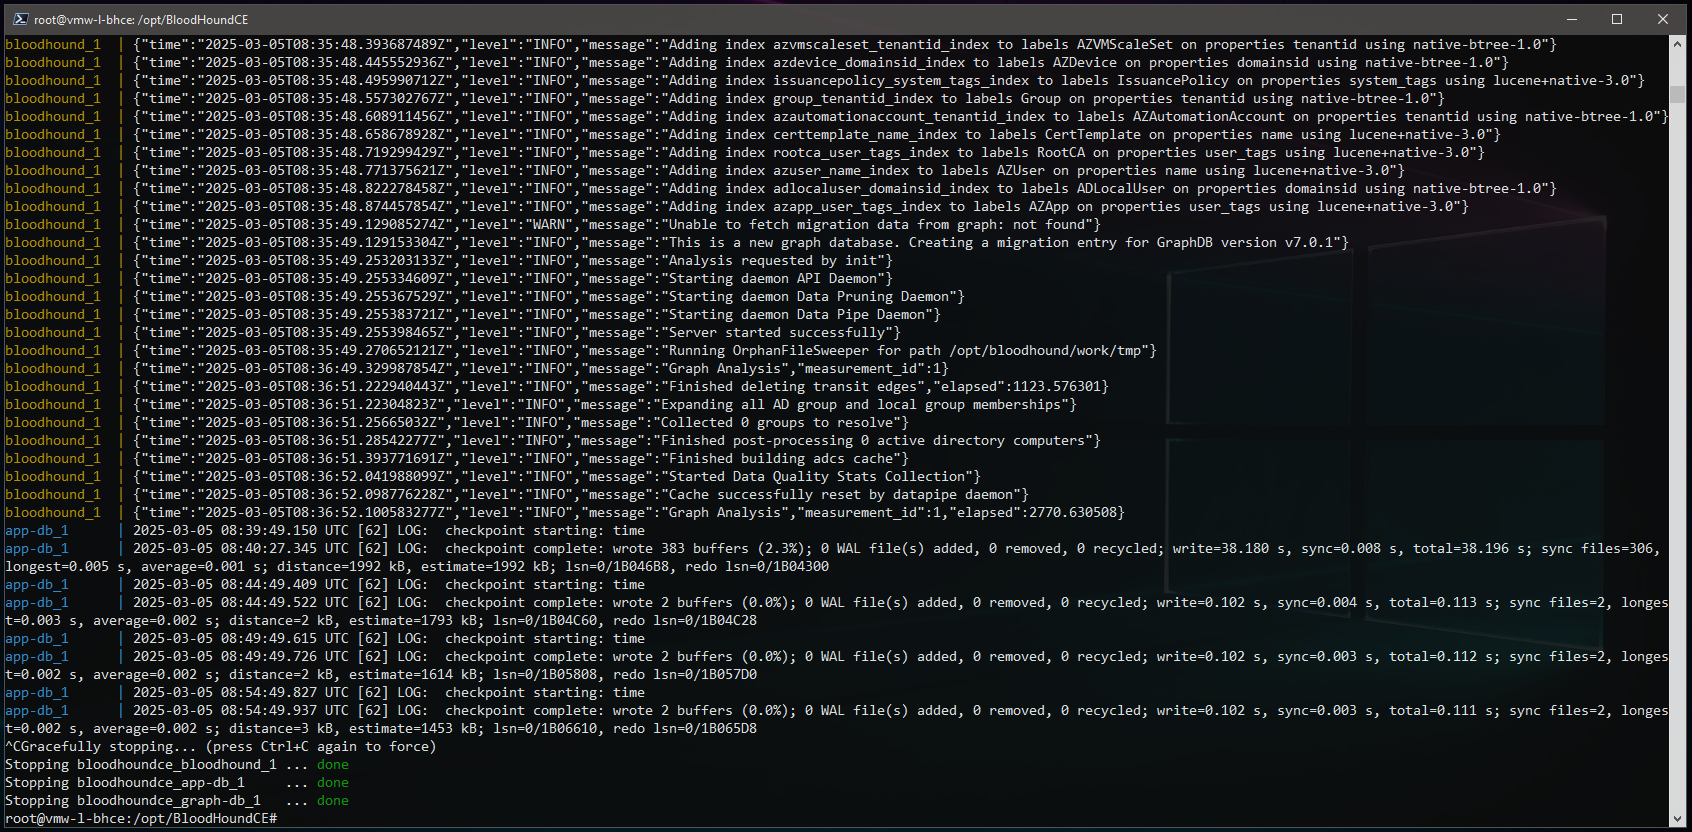
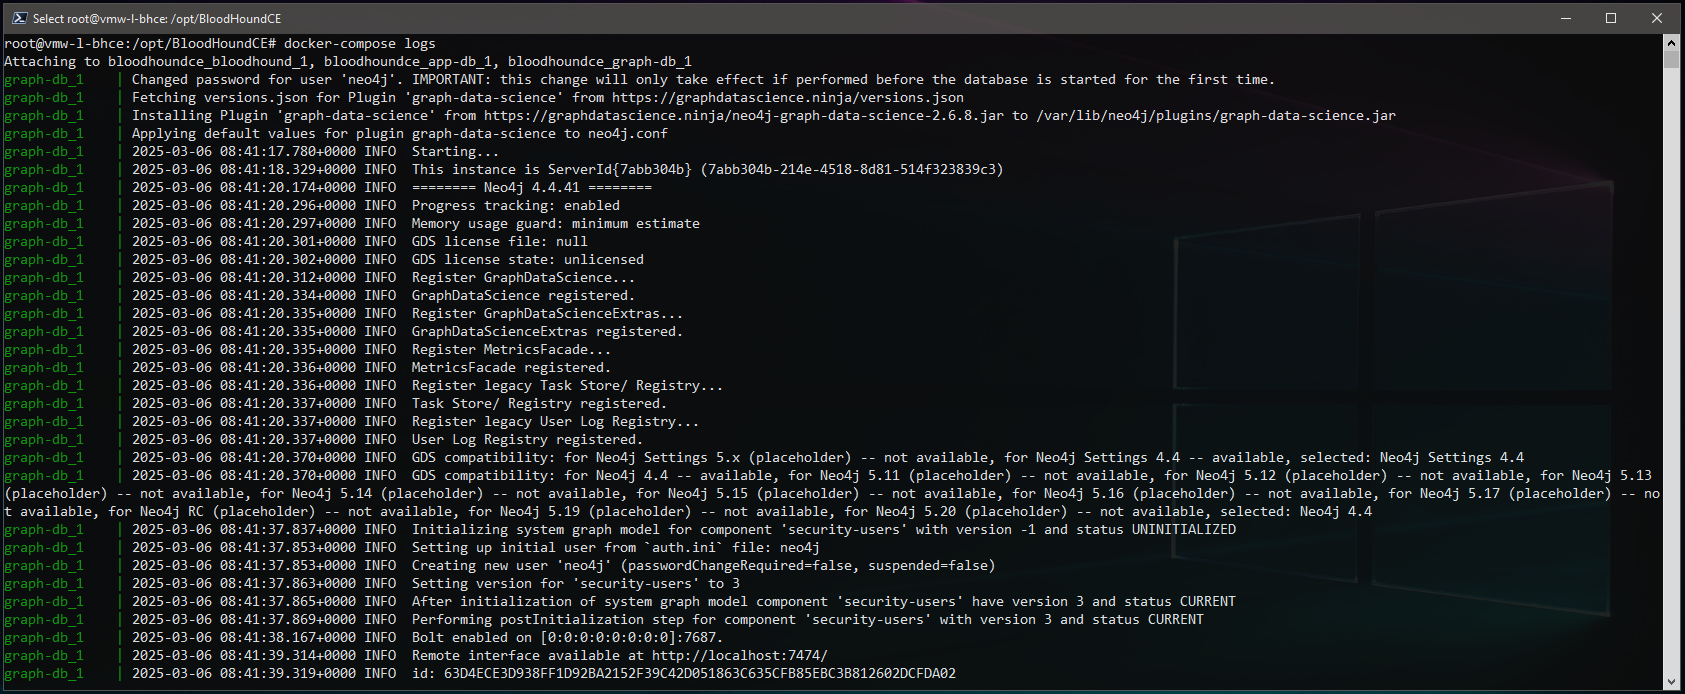
Scrolling back up through initial docker container logs seen within the SSH session, there are a few items that are important to review. First up is the status of the Neo4j Graph Data Science plugin and whether or not it loaded successfully. It is fairly common to have version mismatches between Neo4j and the plugin which will result in a failure but in this case it appears the plugin did register successfully:
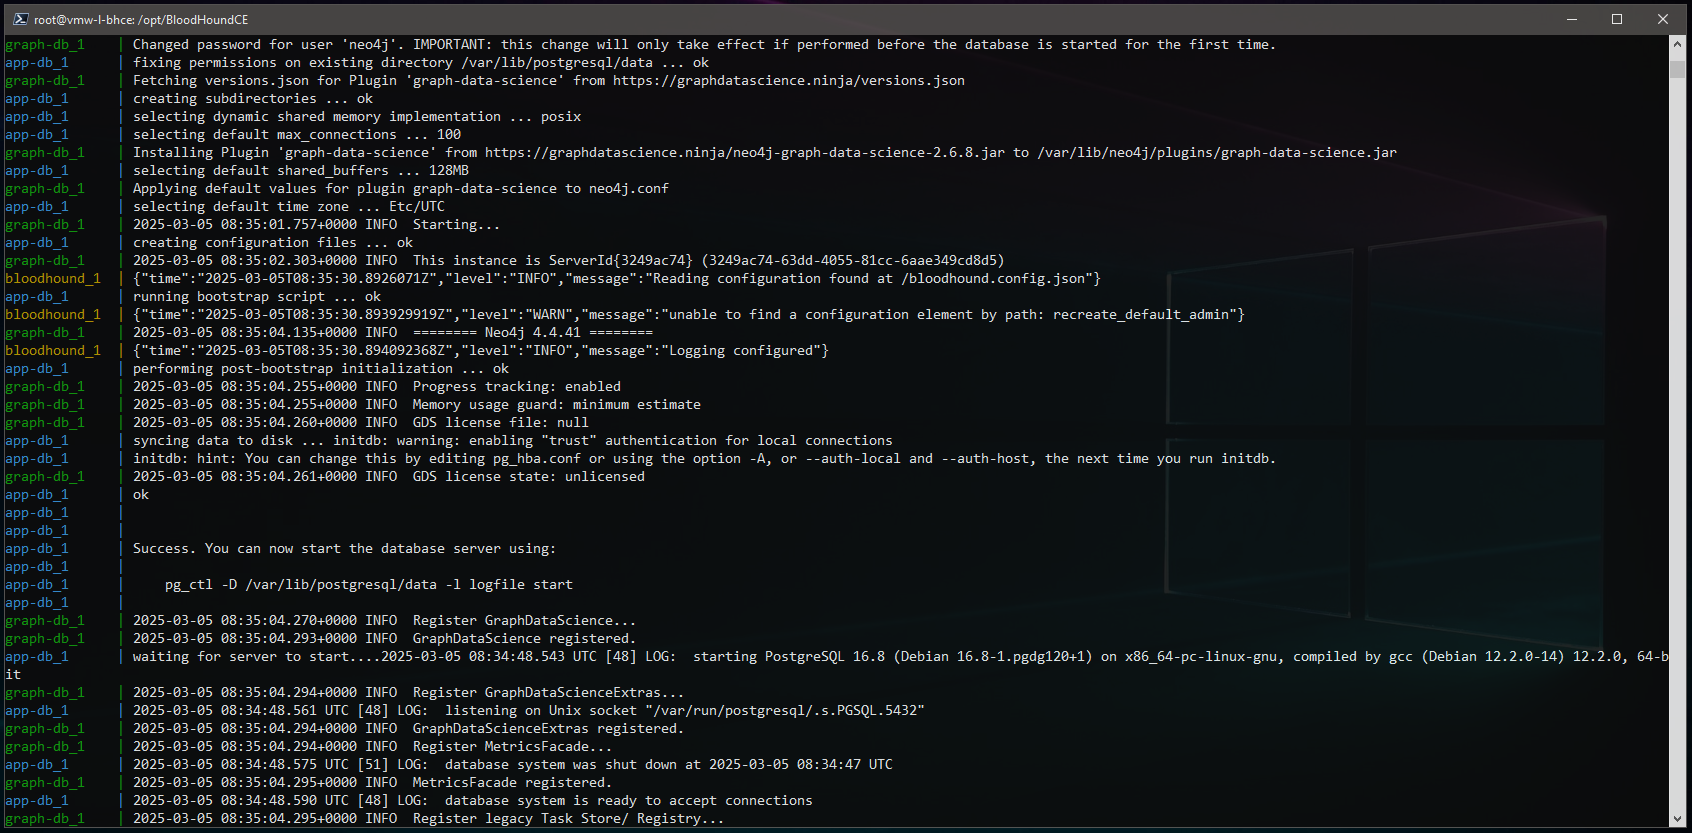
This is also where you will find the initial admin account password:
Exiting this session or hitting CTRL+C at this point, will result in the containers shutting down:
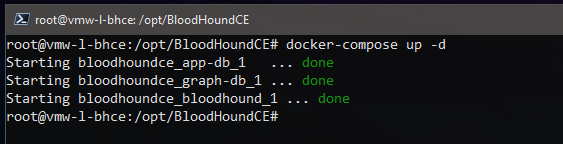
To work around this behavior, you can start the Docker containers in detached mode with the -d flag:
root@vmw-l-bhce:/opt/BloodHoundCE# docker-compose up -d
The downside to doing this is that we no longer see the useful logging output from the containers, but this is easily resolved with the logs option:
root@vmw-l-bhce:/opt/BloodHoundCE# docker-compose logs
To view the running containers:
root@vmw-l-bhce:/opt/BloodHoundCE# docker ps
![]()
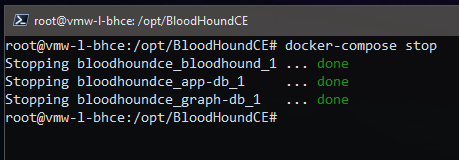
To stop the running containers:
root@vmw-l-bhce:/opt/BloodHoundCE# docker-compose stop
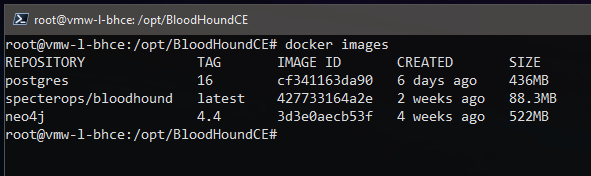
To view the available local docker images:
root@vmw-l-bhce:/opt/BloodHoundCE# docker images
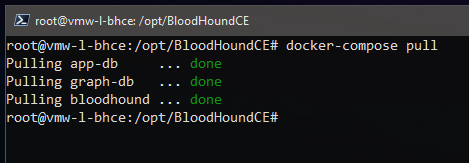
To update the BloodHound containers to the latest images:
root@vmw-l-bhce:/opt/BloodHoundCE# docker-compose pull
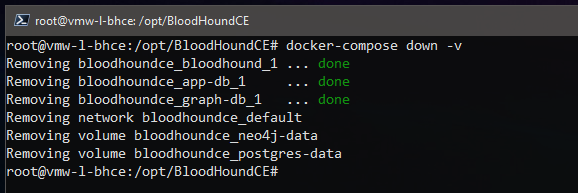
And finally, when all else fails, to reset the BloodHound containers back to their original state:
root@vmw-l-bhce:/opt/BloodHoundCE# docker-compose down -v
Installing AD-miner
The AD-miner install is super simple and just a few commands that are all found on the project page here:
https://github.com/AD-Security/AD_Miner
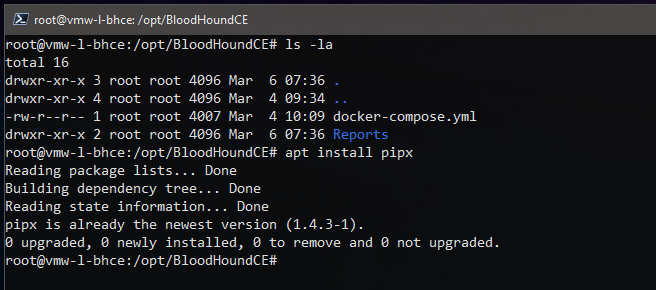
Verify pipx is installed:
root@vmw-l-bhce:/opt/BloodHoundCE# apt install pipx
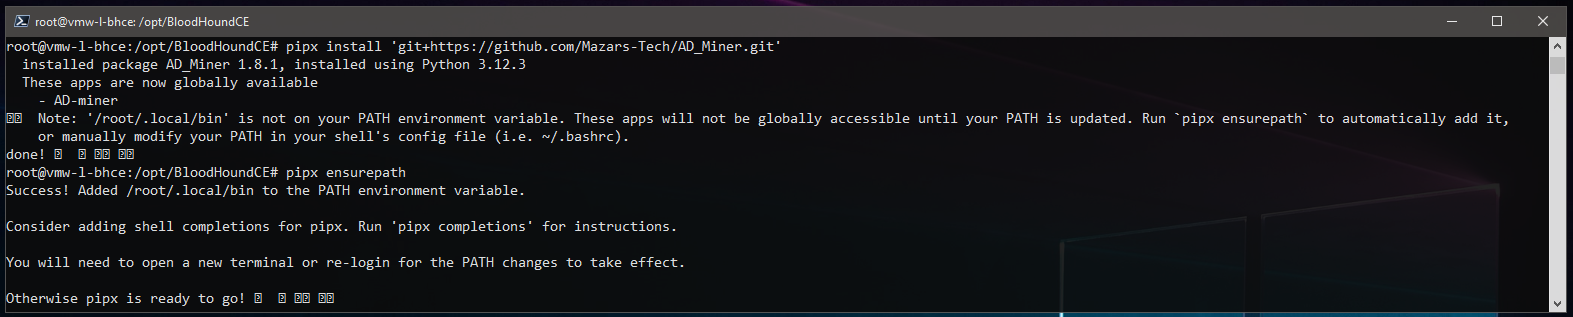
Installing AD-miner:
root@vmw-l-bhce:/opt/BloodHoundCE# pipx install 'git+https://github.com/Mazars-Tech/AD_Miner.git'
Ensure that AD-miner is accessible via system path (will require a restart of the terminal session):
root@vmw-l-bhce:/opt/BloodHoundCE# pipx ensurepath
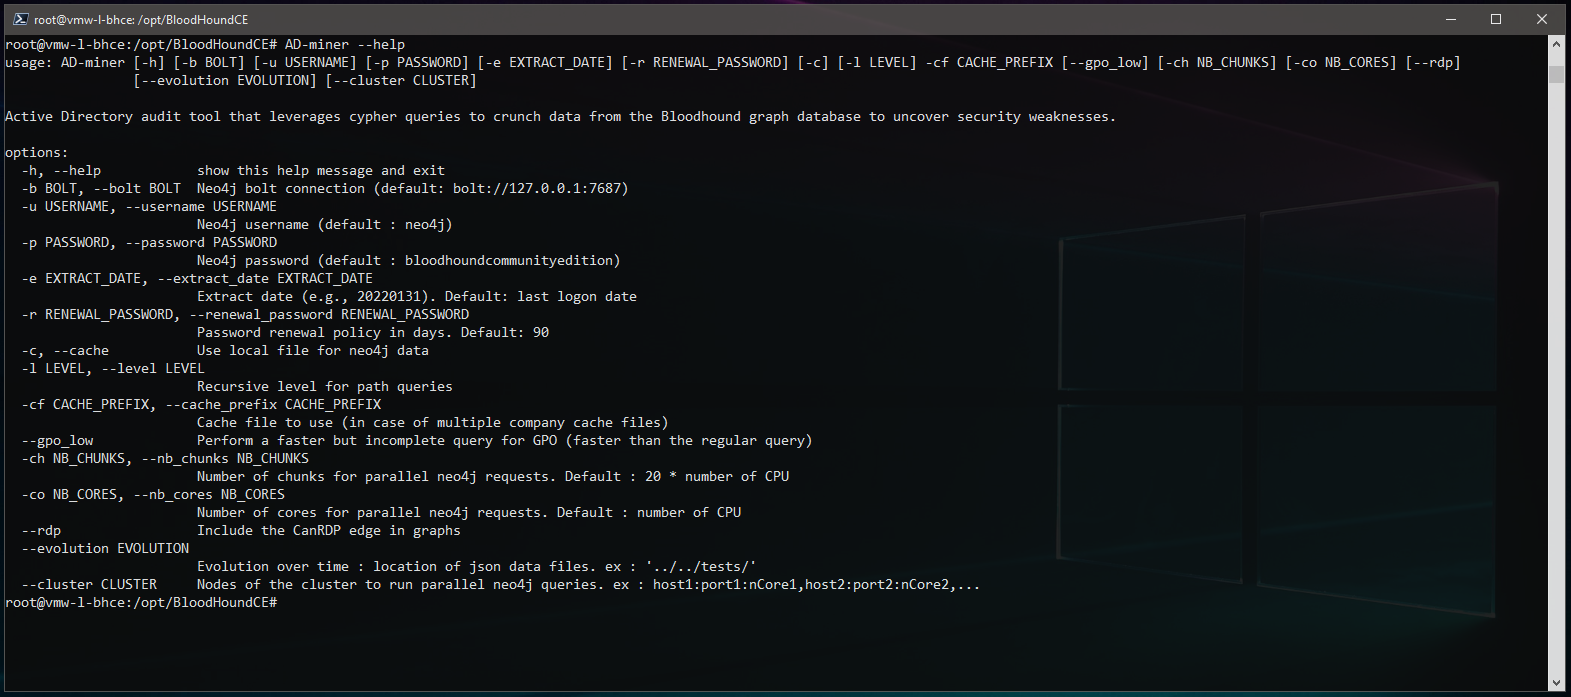
Verify AD-miner is installed:
root@vmw-l-bhce:/opt/BloodHoundCE# AD-miner --help
Domain Data Collection
Now that the BloodHound server is up and running with AD-miner installed, it’s time to collect some information from the domain and validate everything is working.
To keep things as simple and reliable as possible I am going to stick with using SharpHound as my collector of choice. There is nothing wrong with using the other collector options, but you have to be careful matching up the collector versions to the BloodHound version. I generally recommend to test and verify the BloodHound instance using the SharpHound version provided via the BloodHound server and then move on to the other ones if interested. Again, the focus here is not on evasion or bypassing controls, it’s about ensuring reliability for continuous retesting.
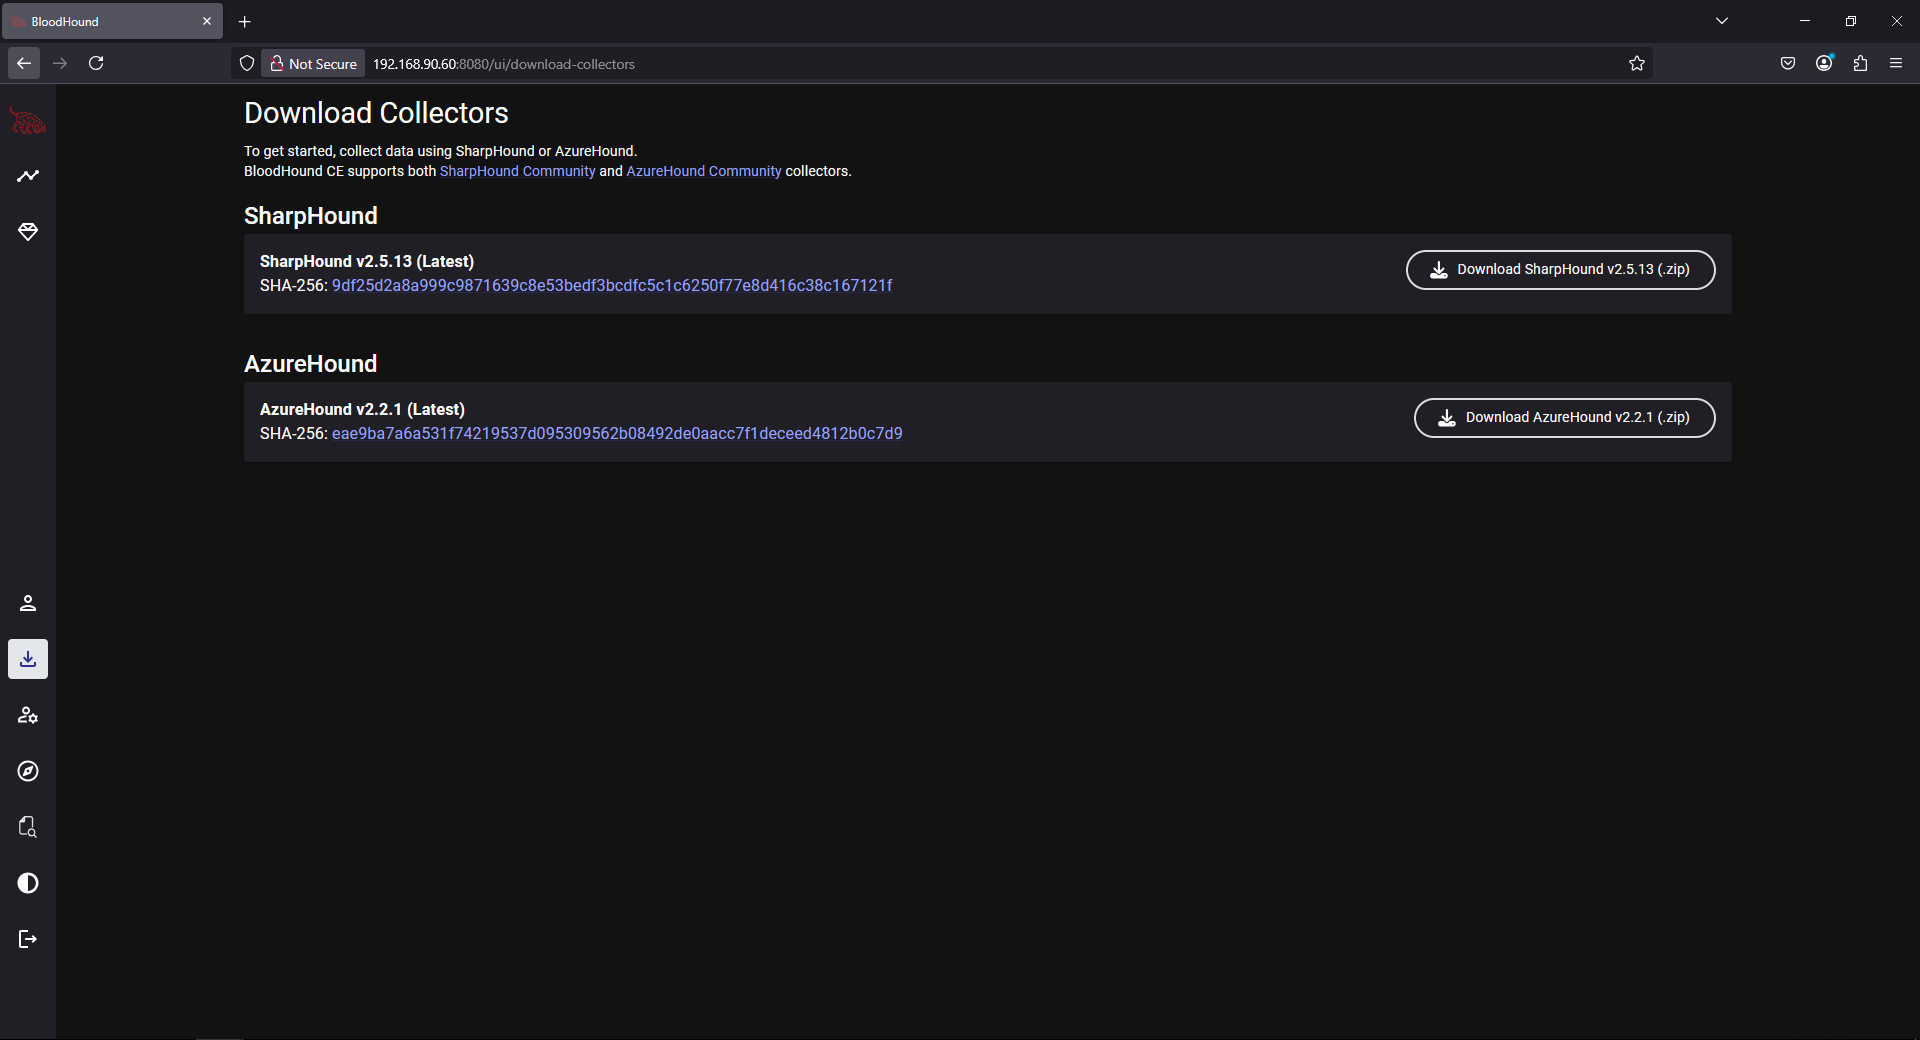
You can find a copy of SharpHound on the BloodHound server by going to “Download Collectors” on the left-hand menu:
Additional Notes:
- SharpHound Errors – While SharpHound is running, it’s super common to see errors related to additional domains, don’t sweat it as long as it runs to completion.
- Run Time – Depending on the size of the domain and network conditions, I usually expect SharpHound to take anywhere from a few minutes to an hour to run.
- Network Location – As mentioned previously, pay close attention to the network location (LAN vs VPN) of this host and what data is being collected, SharpHound can create many connections depending on the level of collection.
Domain-Joined System
To view all of the SharpHound options are available, use –help:
PS C:\Users\Administrator\Downloads\sharphound-v2.5.13> .\Sharphound.exe --help
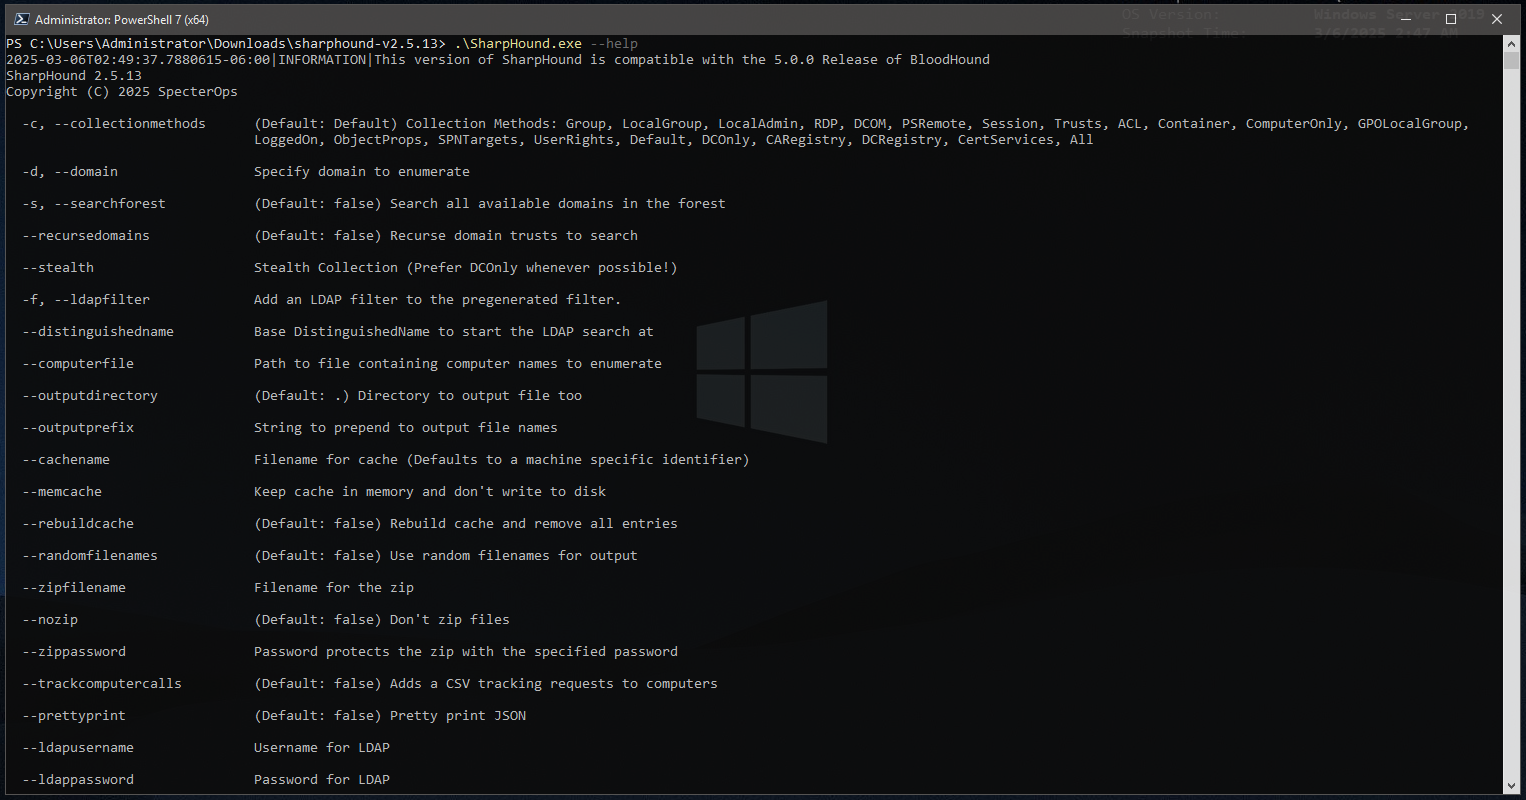
I usually start out with a simple but fairly limited collection just to keep the run time down, verify everything is working and of course make sure there is no impact to production.
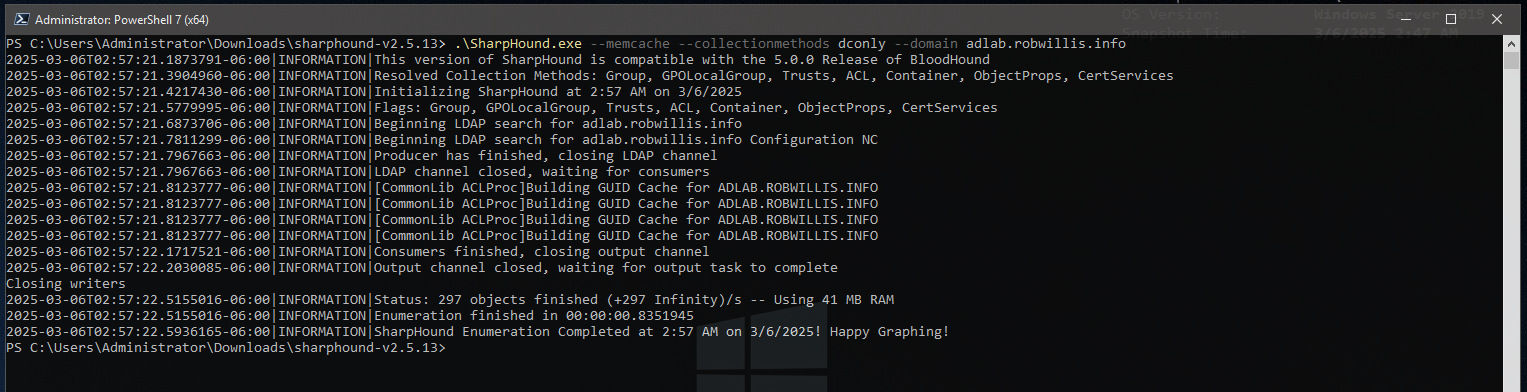
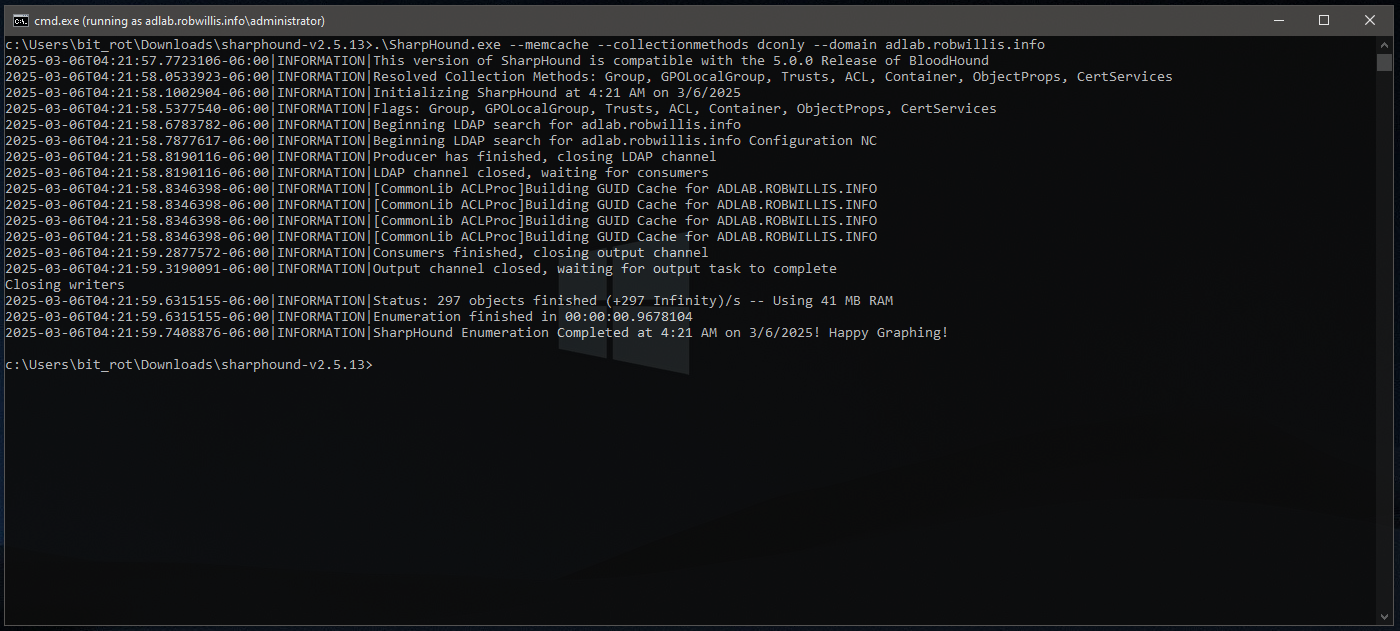
For a first run, I try to avoid using caches by leveraging the “–memcache” option to keep everything in memory, collect only from the domain controllers using the dconly collection method and finally limit the scope to the targeted domain:
PS C:\Users\Administrator\Downloads\sharphound-v2.5.13> .\SharpHound.exe --memcache --collectionmethods dconly --domain adlab.robwillis.info
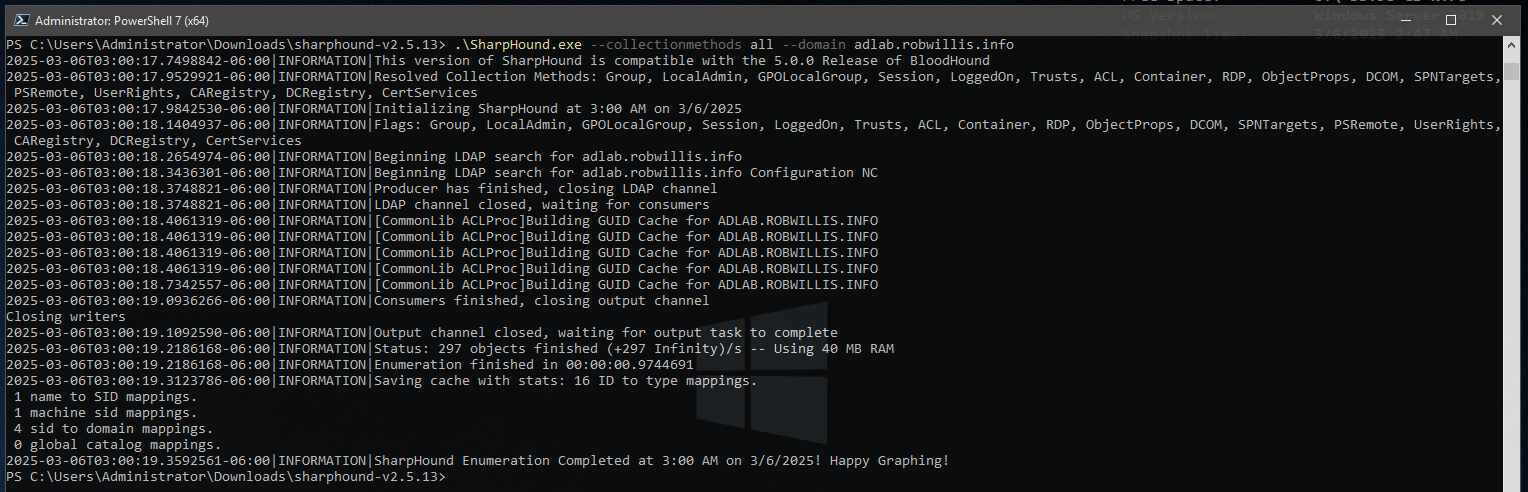
Once everything is verified working, I’ll follow up with the “–collectionmethods all” to grab everything else including the session information:
PS C:\Users\Administrator\Downloads\sharphound-v2.5.13> .\SharpHound.exe --collectionmethods all --domain adlab.robwillis.info
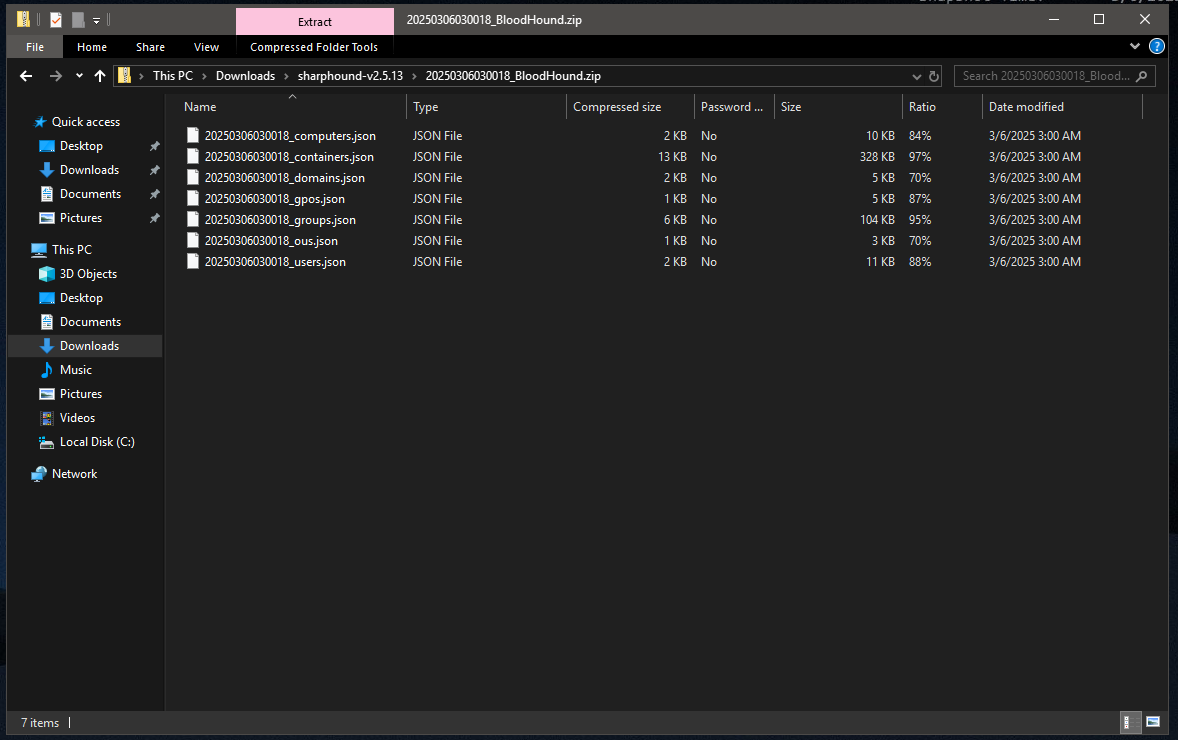
The output will be a series of json files compressed as zip:
Non Domain-Joined System
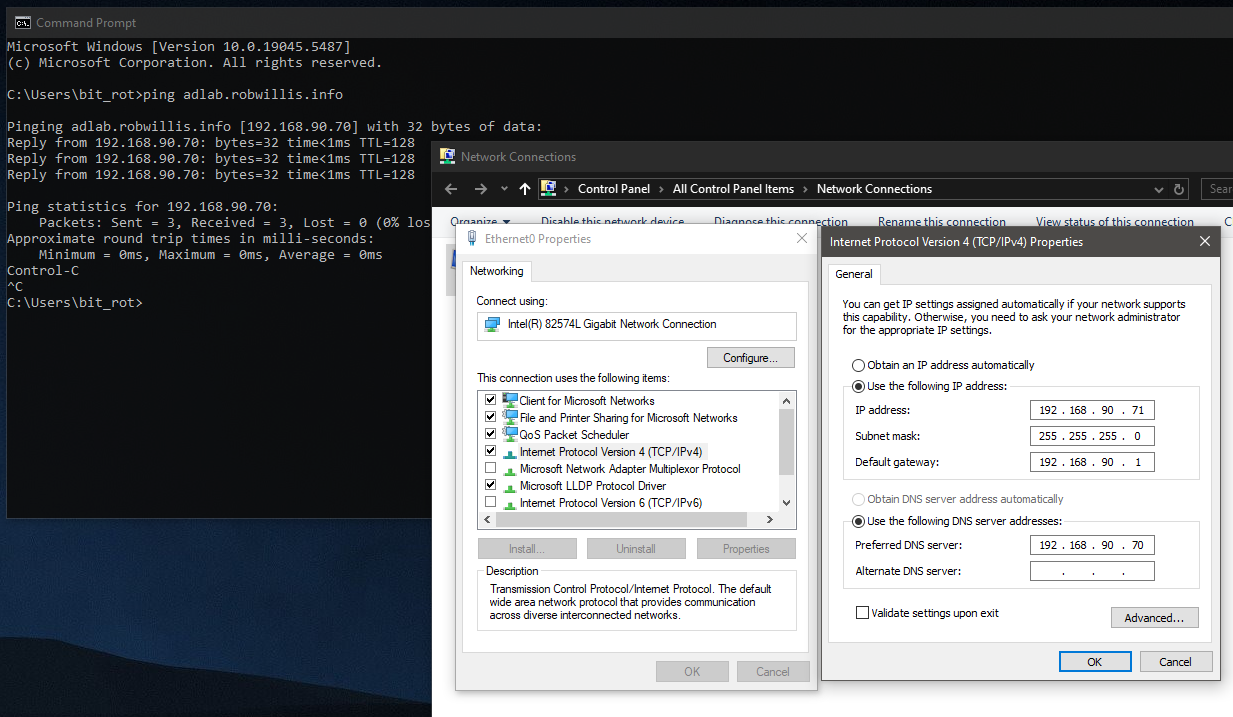
Collecting from a non domain-joined system is very similar to a domain-joined system with the addition of the RunAs command, but the host must be able to resolve DNS to the domain:
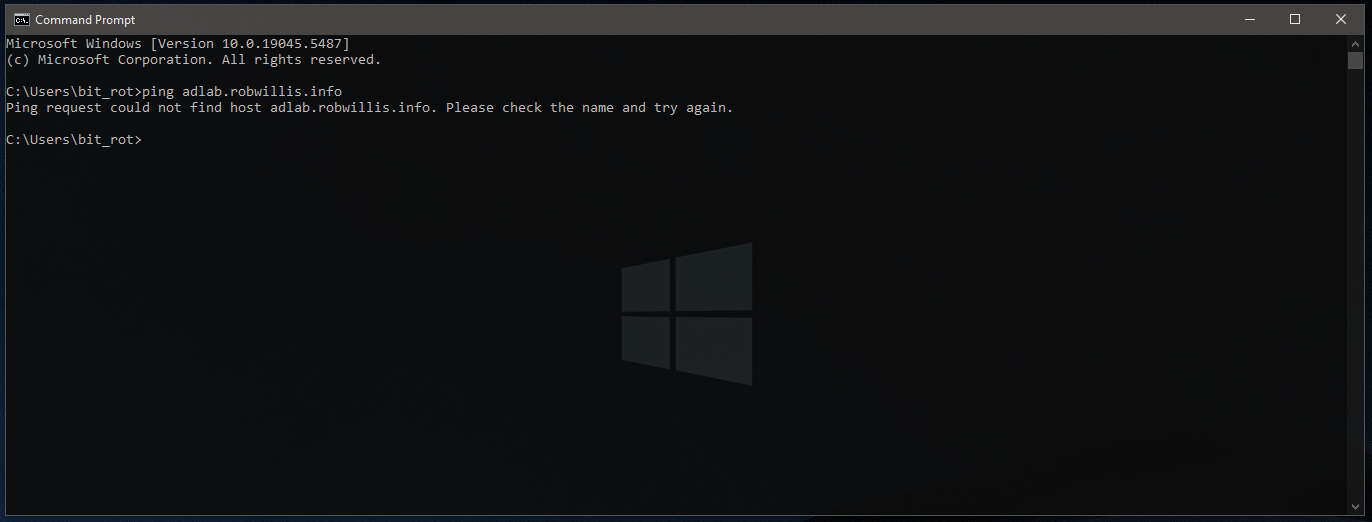
The easiest way to accomplish this by pointing the DNS entry on the network adapter to the IP of an AD DNS server:
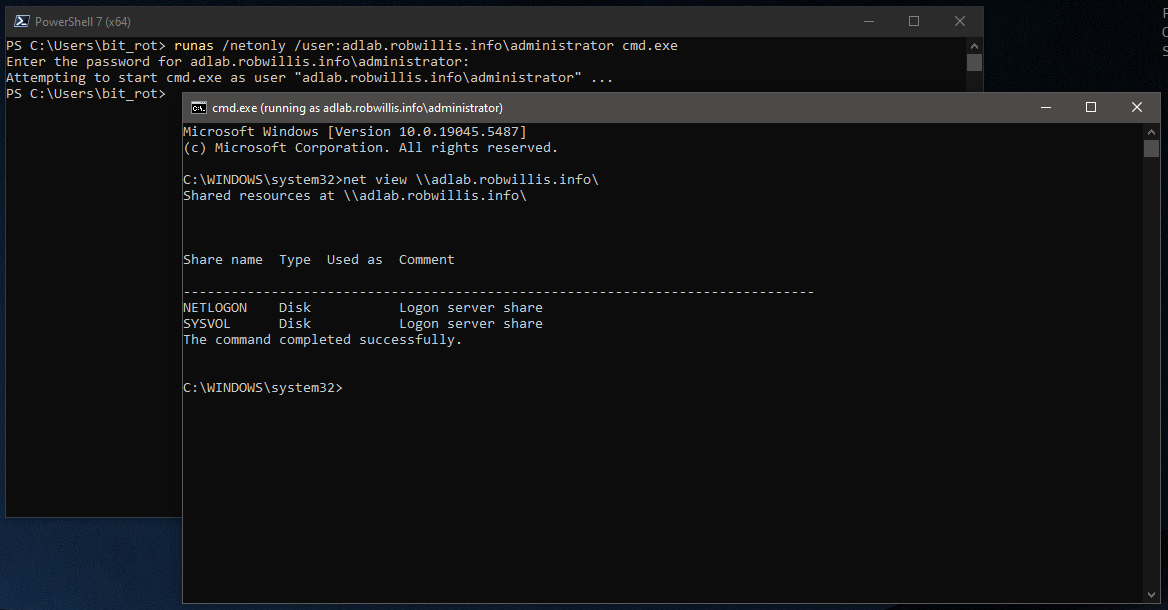
Now to launch a cmd.exe prompt using the domain user credentials (it will interactively ask for the password):
C:\> runas /netonly /user:adlab.robwillis.info\administrator cmd.exe
Note: I am using the domain administrator account here to keep things simple, but this user only needs to be a normal domain user account.
And then to verify the access is working by attempting to view the domain shares, you should see the SYSVOL and NETLOGON:
C:\> net view \\adlab.robwillis.info\
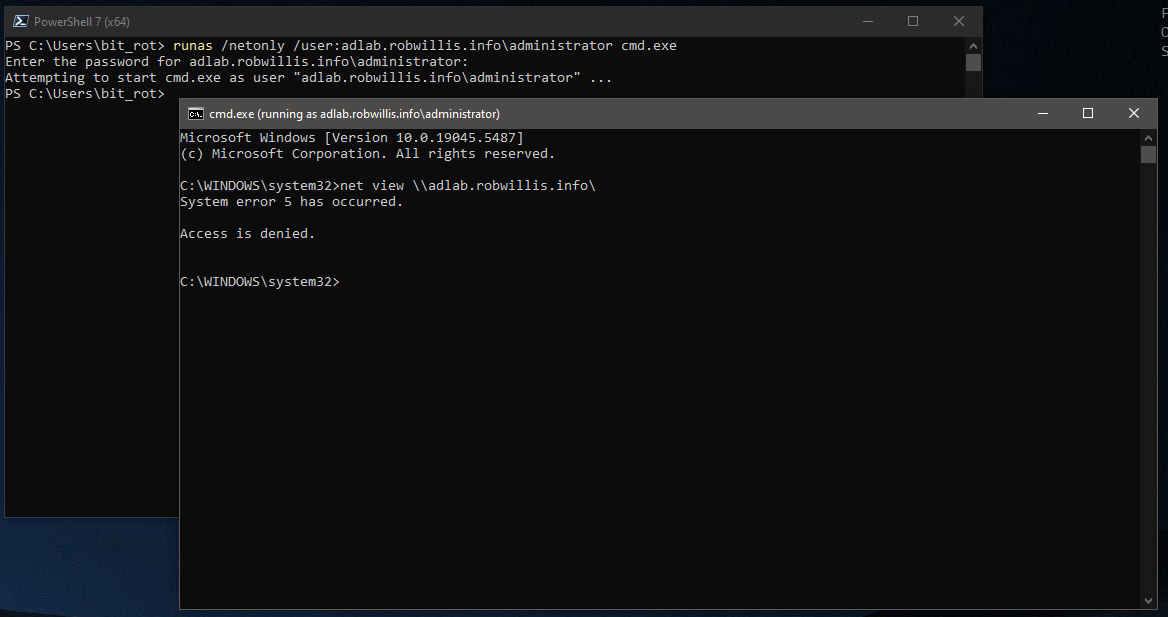
If it didn’t work you’d see something like this:
Running SharpHound via the RunAs cmd prompt works the same as the domain-joined system:
C:\> .\SharpHound.exe --memcache --collectionmethods dconly --domain adlab.robwillis.info
BloodHound File Ingest
Now that we have successfully acquired some information about the domain, it is finally time to start uploading and analyzing data in the BloodHound UI.
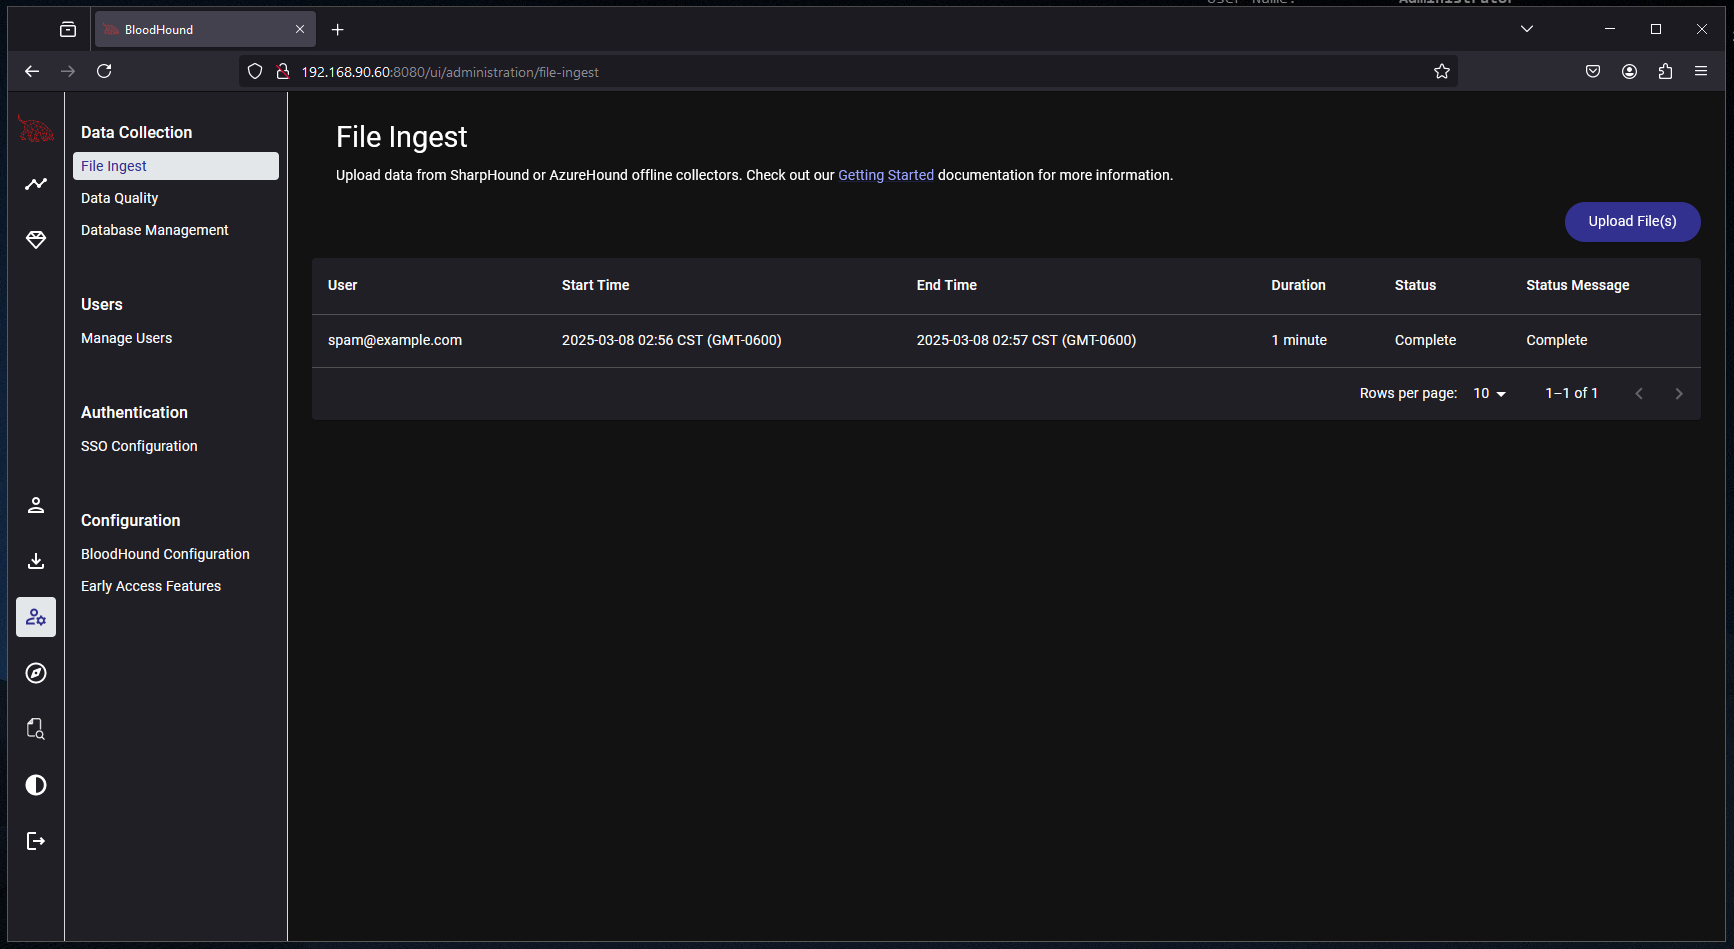
Start by browsing to the BloodHound instance and going to Administration > Data Collection > File Ingest:
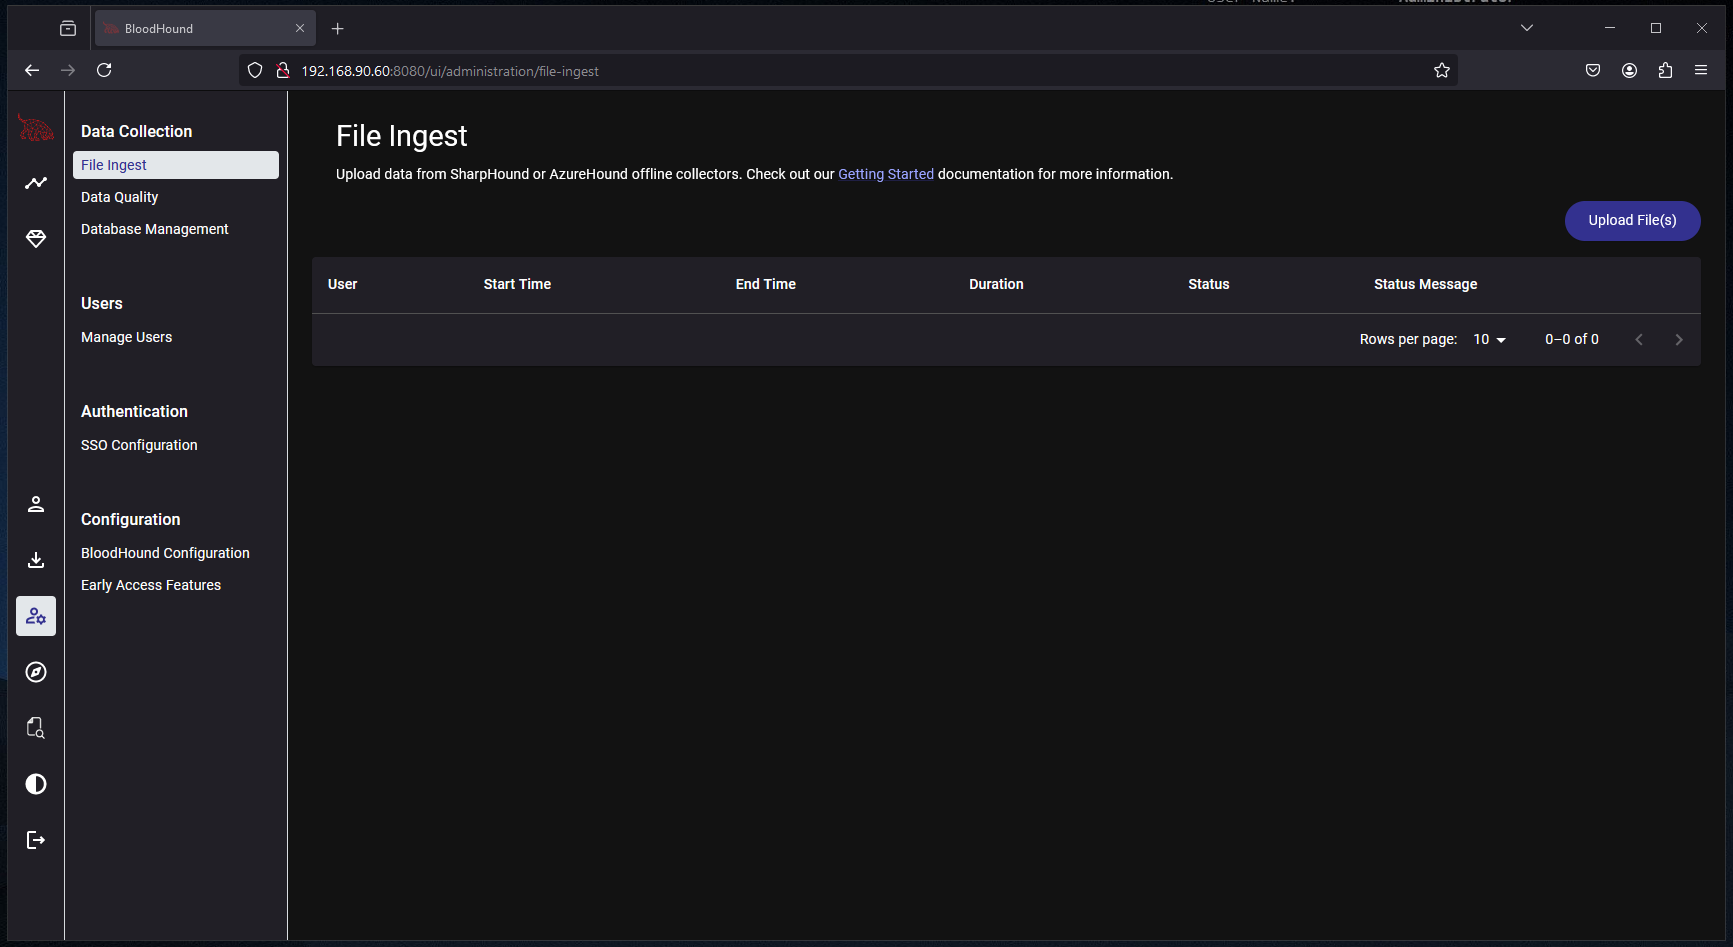
Click “Upload File(s)” and then select the zipped file generated by SharpHound:
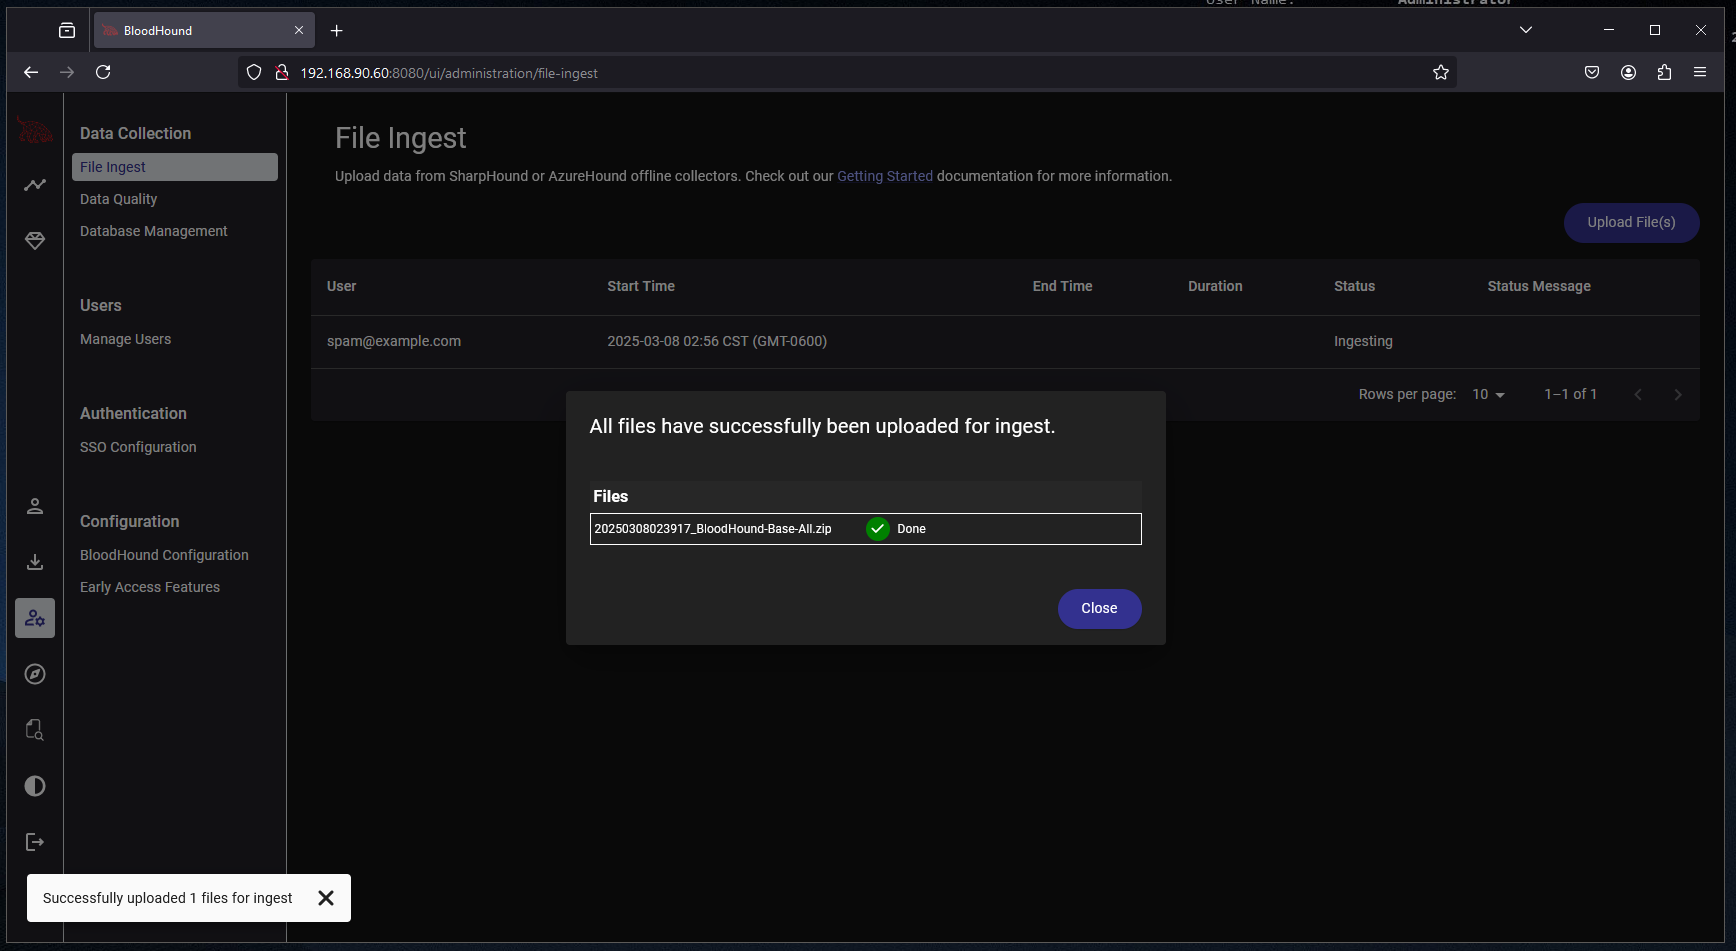
Give it a few minutes to ingest the files:
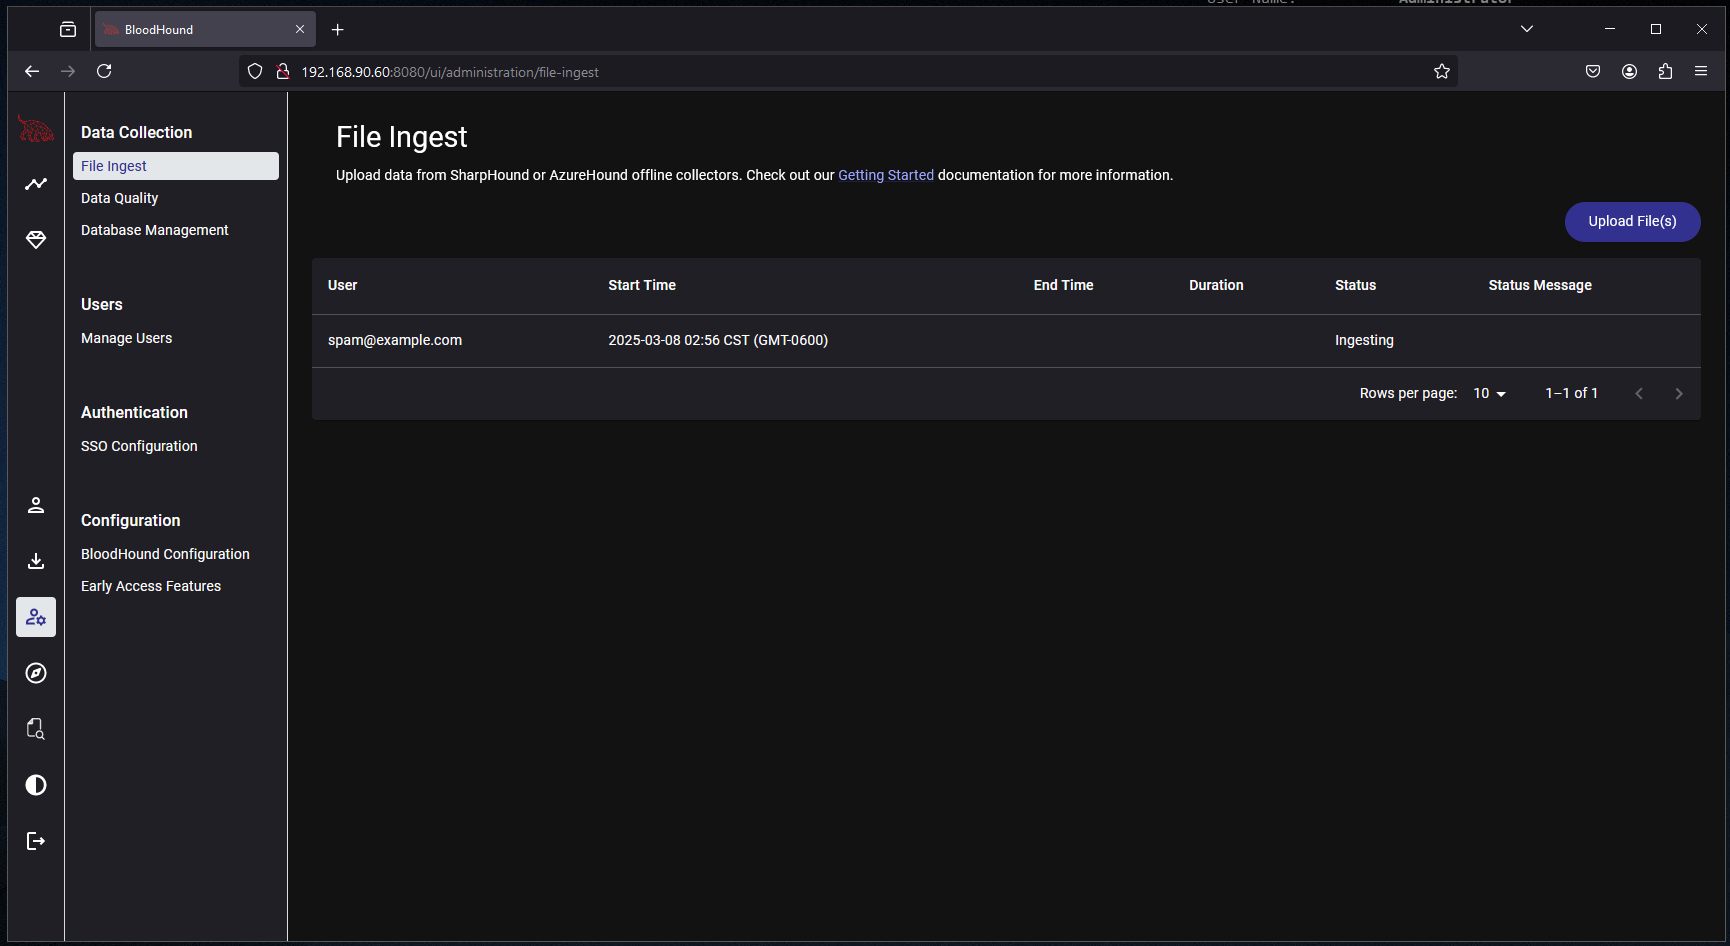
Assuming the versions of everything match, during the “ingesting” phase is where I’ve experienced the most failures, see the notes section below for more tips if you are experiencing issues.
Once it has completed it should look like this:
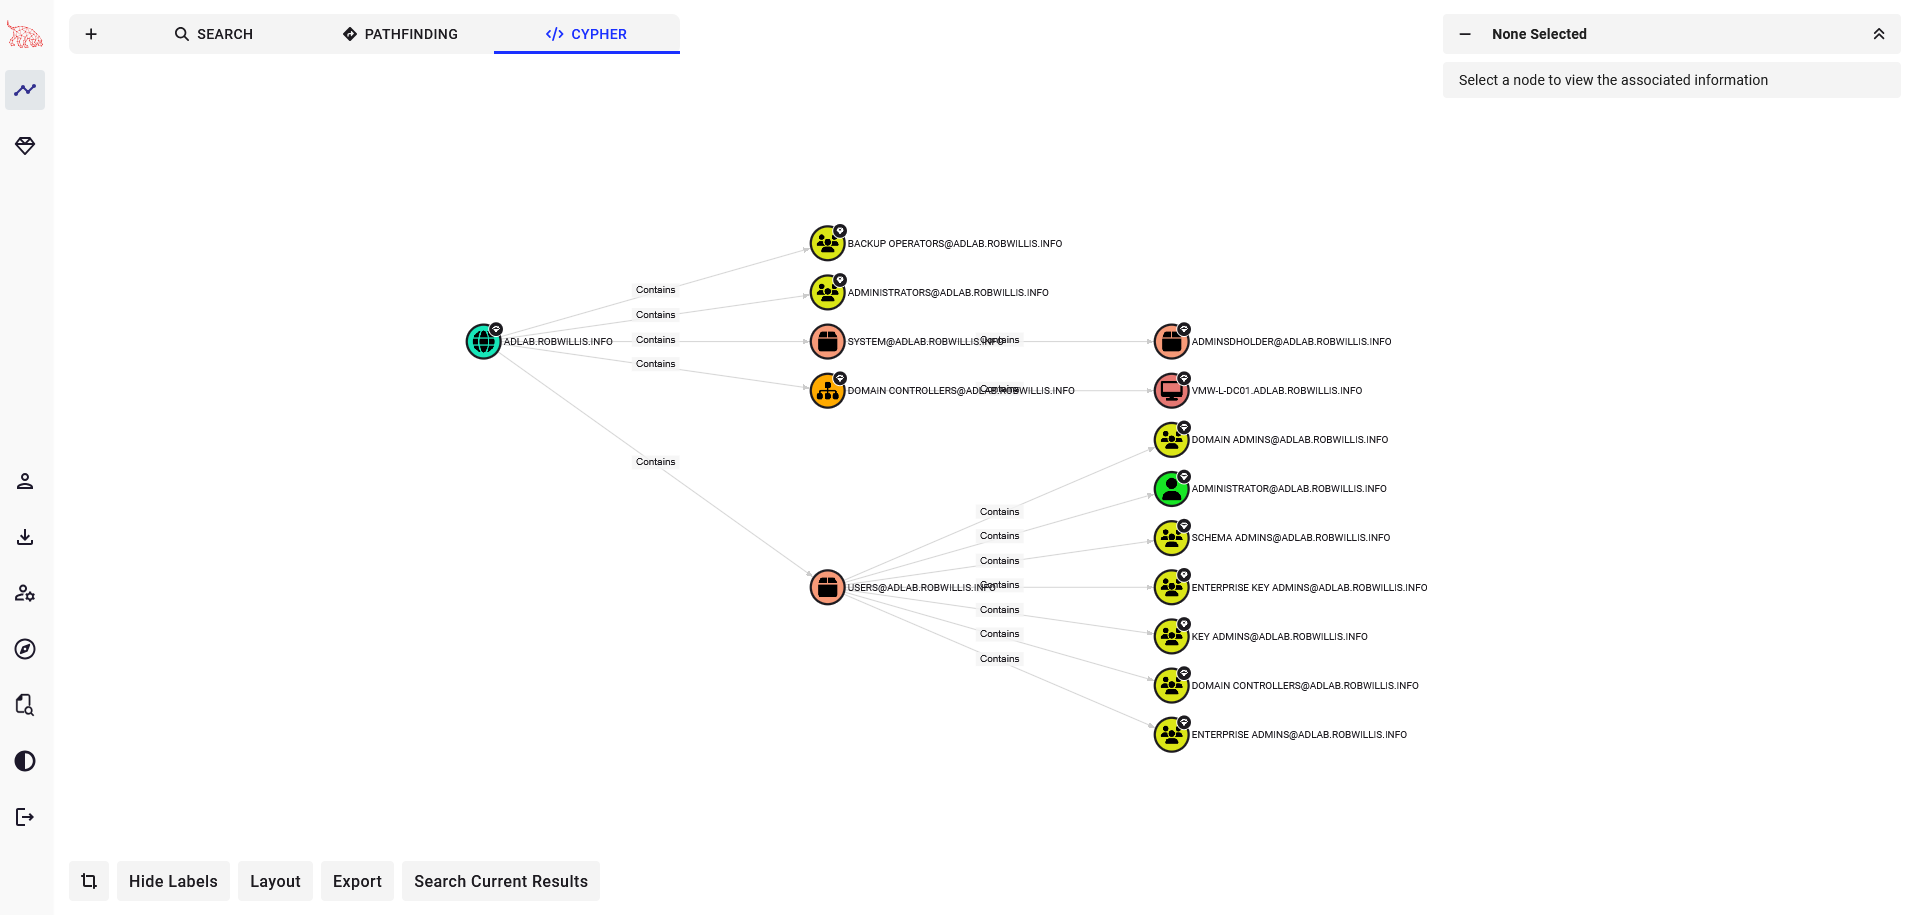
Verify everything is working by running some basic built-in cypher queries:
Additional Notes:
- Upload & Analysis Time – Depending on the size of the domain, it usually takes anywhere from a few minutes up to an hour to upload and analyze a collection.
- Docker-Compose Container Output/Logging – While uploading/ingesting the collector data, make sure to monitor the container output for any errors:
root@vmw-l-bhce:/opt/BloodHoundCE# docker-compose logs

- Upload Failures – This is one of the most frustrating parts of BloodHound, you made it all this way and then run into issues getting the collection analyzed. Luckily this usually boils down to one of the following issues:
- BloodHound & Collector Version Mismatch – Make sure the collector version is supported by the version of BloodHound being used.
- Split Large Collector Output – If experiencing upload failures while trying to analyze a very large domain, sometimes it can be beneficial to split up the collector json output using something like the following:
ShredHound - System Resources – If you run out of system resources (disk or memory) while uploading, Neo4j is usually the first to crash, often with cryptic messages in the container output (Failed to unwind $p into $p). It is critical to monitor and ensure enough system resources are available while processing uploads. As mentioned previously a 150MB SharpHound dump can easily expand into a few GB while uploading, and then even more when running AD-miner. Make sure you have the disk space.
- BloodHound Crashing “Unexpected Error” After A Failed Upload – If Neo4j crashes while uploading, the BloodHound UI will often display a blue banner that says “Unexpected Error”, this often requires a complete reset of the containers:
root@vmw-l-bhce:/opt/BloodHoundCE# docker-compose down -v
Generating Reports With AD_Miner
This is usually the part where we would be excited to finally dig into the collector data and start exploring attack paths, instead AD-miner is going to do the majority of the heavy lifting for us. Plus just being honest here, the Active Directory team was probably not going to want to be logging into BloodHound to run stuff…
The reports will be generated under the path where the AD-miner command is initially executed from, so the first thing I usually do is create a reports directory under the BloodHoundCE directory and move into it:
root@vmw-l-bhce:/opt/BloodHoundCE# mkdir Reports
root@vmw-l-bhce:/opt/BloodHoundCE# cd Reports
Using the –help option provides all of the useful options available:
root@vmw-l-bhce:/opt/BloodHoundCE/Reports# AD-miner --help
A basic run, leveraging the caching options and default neo4j credentials should look something like this:
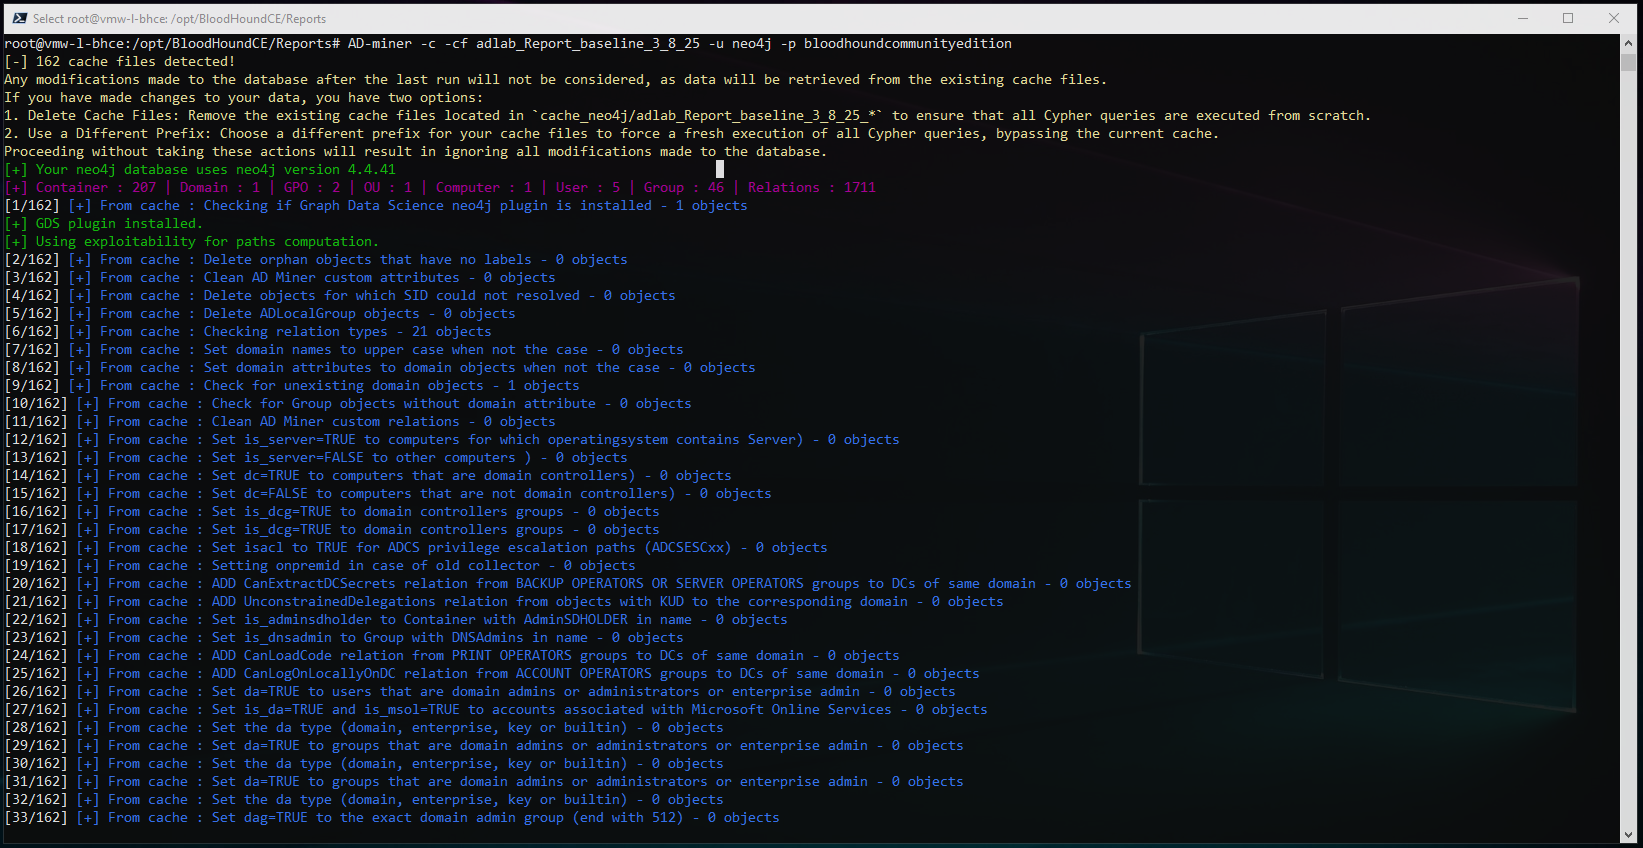
root@vmw-l-bhce:/opt/BloodHoundCE/Reports# AD-miner -c -cf adlab_Report_baseline_3_8_25 -u neo4j -p bloodhoundcommunityedition
AD-miner generates a considerable amount of console output, but you can see that there’s over a 100+ modules and that the graph data science plugin appears to be working:
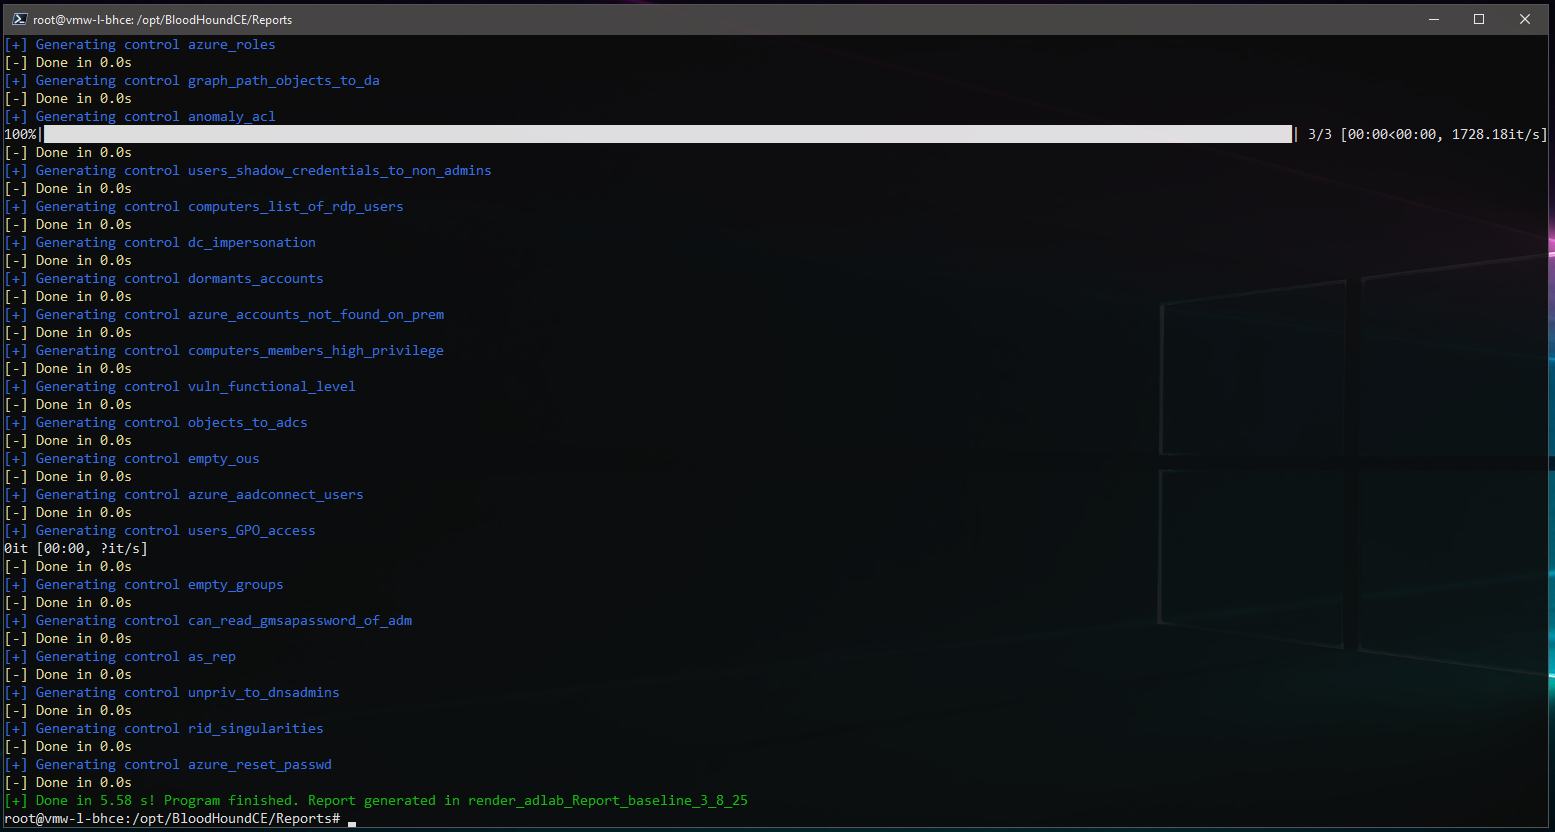
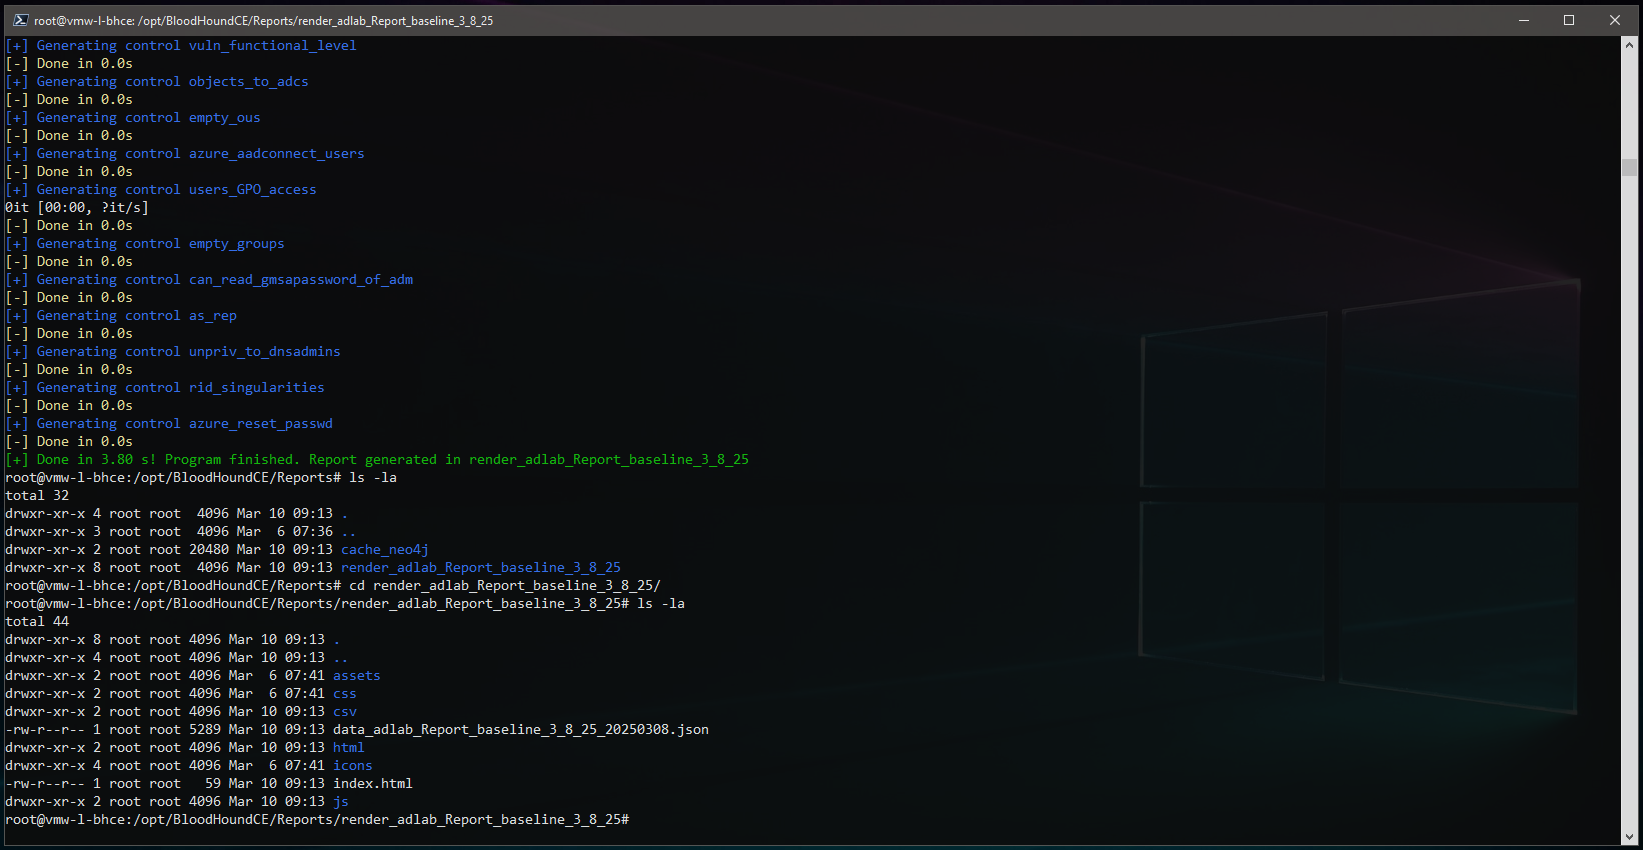
And this is what it looks like once the report has completed:
The output is a static HTML style report:
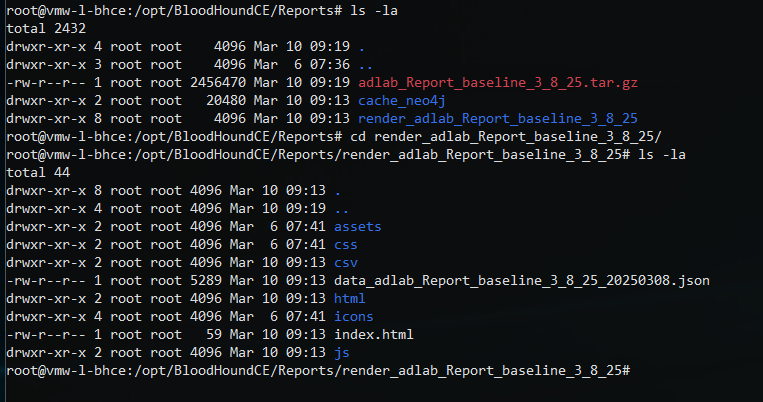
The reports can be fairly large, so I usually compress it down into a tar.gz:
root@vmw-l-bhce:/opt/BloodHoundCE/Reports# tar -zcvf adlab_Report_baseline_3_8_25.tar.gz render_adlab_Report_baseline_3_8_25/
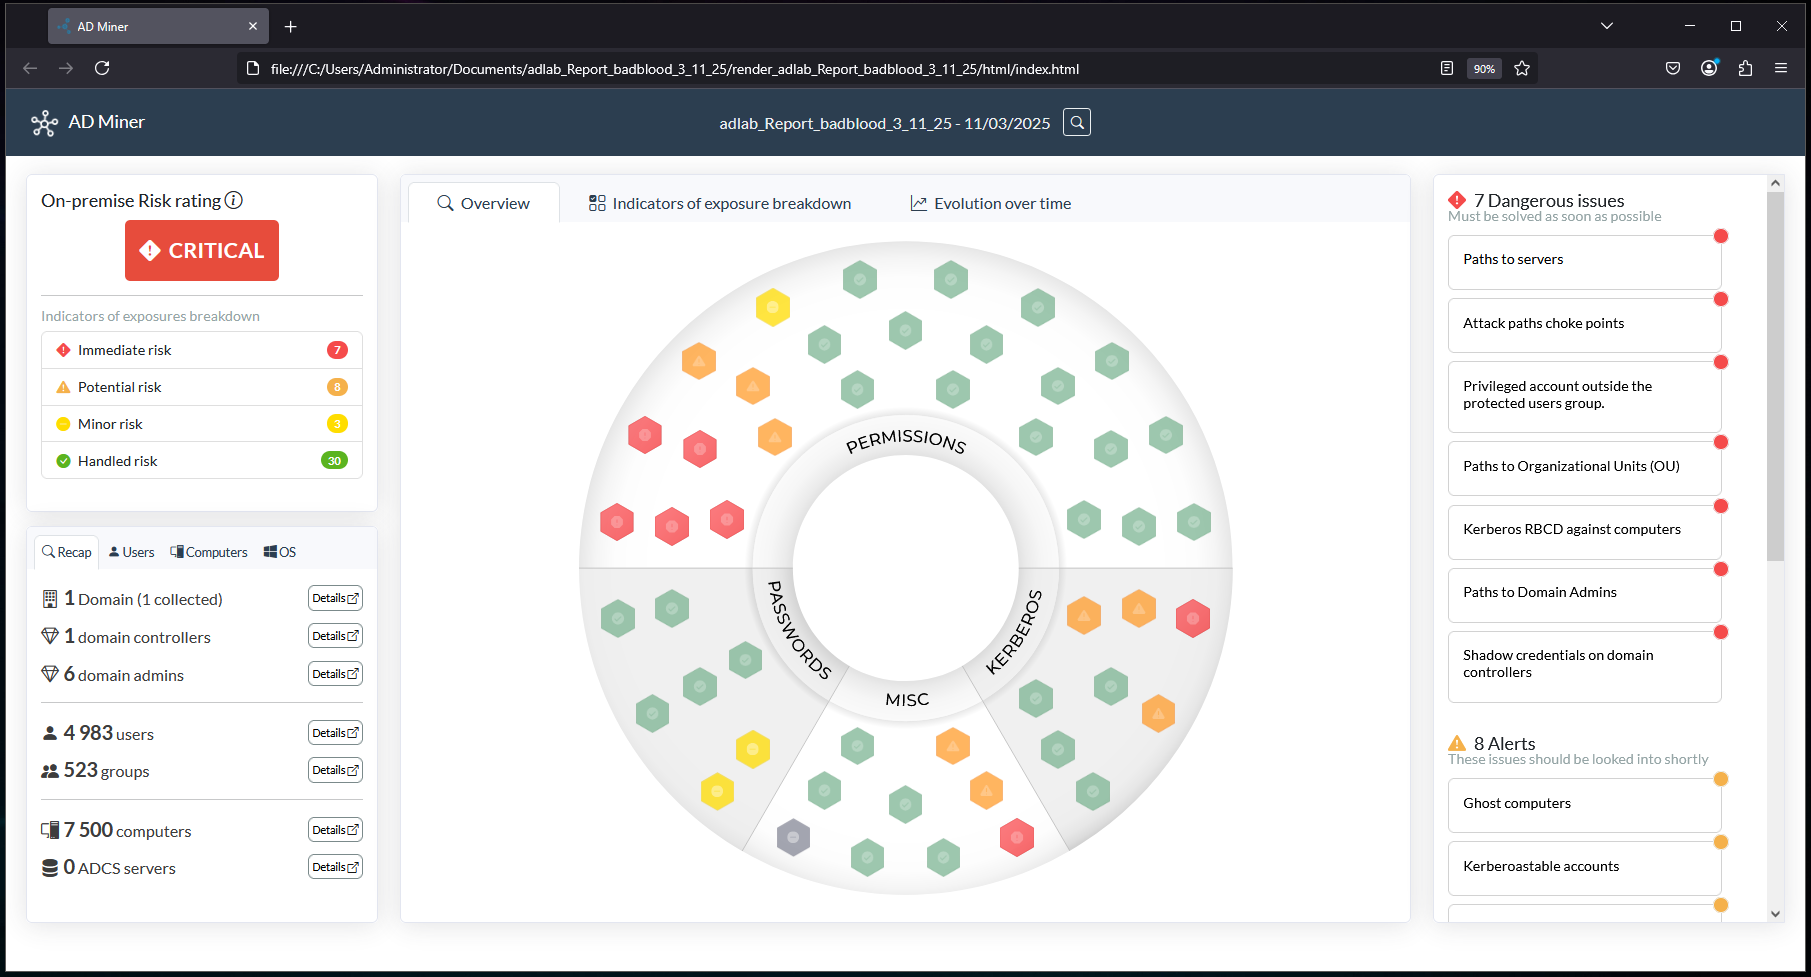
Viewing the final report in a browser:
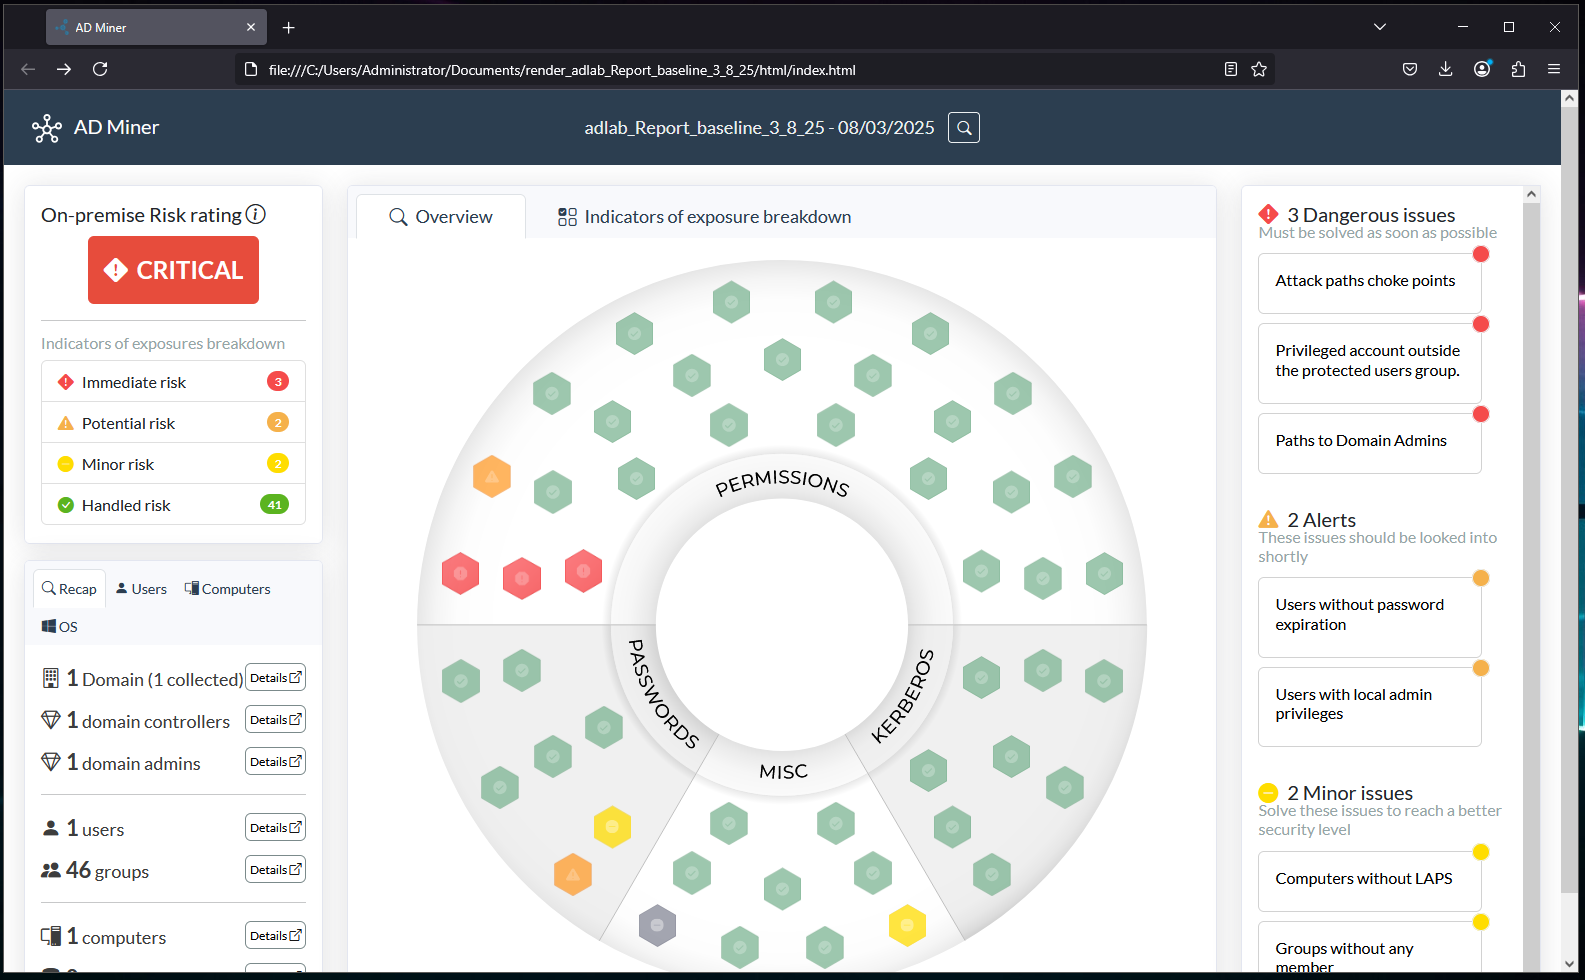
You may notice from the report, that this domain is looking a little…empty. This is intentional since the next section will be focusing on tracking changes over time. After this report was executed, the test domain was populated out with 5k+ users, 7.5k+ computers, and 500+ groups using BadBlood.
Additional Notes:
- Credentials – The credentials referenced in the AD-miner command are just the default BloodHound container credentials.
- Long Run Times – AD-miner can be a very long running process, depending on the size of the environment and local system resources, I’ve seen it take anywhere from a few minutes to days to reach completion. This is part of the reason for making sure the Neo4j Graph Data Science plugin is present and working, it can help cut down on runtime.
- Resource Usage – As mentioned AD-miner runs long but it also runs hard on resources, CPU usage will typically spike to and stay at 90+%, monitor accordingly. Make sure to leverage the caching options to enable resuming.
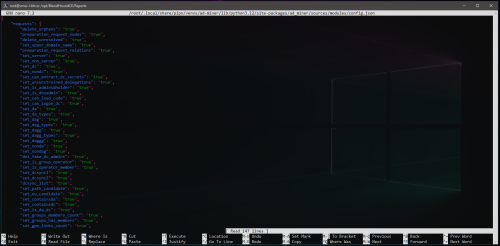
- Disable Problematic Modules – Depending on the environment, some modules may never complete, you can try disabling these modules in the config.json:
- Find the AD-Miner modules directory:
root@vmw-l-bhce:/opt/BloodHoundCE/Reports# sudo find / -type d -name modules
/root/.local/share/pipx/venvs/ad-miner/lib/python3.12/site-packages/ad_miner/sources/modules
- Edit the configuration file:
root@vmw-l-bhce:/opt/BloodHoundCE/Reports# nano /root/.local/share/pipx/venvs/ad-miner/lib/python3.12/site-packages/ad_miner/sources/modules/config.json
- Set the problematic module to “false”:
- Find the AD-Miner modules directory:
- Compressed Report Extraction Issues – Running into issues extracting a report compressed into .zip format on Windows? Try using tar.gz and then extracting it using 7-zip.
- Clustering – AD-Miner supports an interesting “–cluster” argument that can be used to spread the workload across multiple hosts/threads, definitely something worth looking into if you are running into issues or have a very large data set.

Tracking Changes Over Time With AD_Miner
All of this work would be for nothing is there wasn’t a way to show and sell the value observed over time, and that’s where AD-Miner’s Evolution feature comes in.
With each AD-Miner report, a data_(reportname)_(timestamp).json file is generated in the root directory with various information and statistics about the domains current state:

By gathering these files into a single folder and using the “–evolution” argument at the next report run, AD-Miner will add-in a “Evolution over time” tab on the report.
I’ll start by creating an “Evolution” directory under /opt/BloodHound/Reporting:
root@vmw-l-bhce:/opt/BloodHoundCE/Reports# mkdir Evolution
root@vmw-l-bhce:/opt/BloodHoundCE/Reports# cd Evolution/
Then to copy over the json file from the previous report:
root@vmw-l-bhce:/opt/BloodHoundCE/Reports/Evolution# cp ../render_adlab_Report_baseline_3_8_25/data_adlab_Report_baseline_3_8_25_20250308.json .

Everything should be good to go at this point, we just need a new domain collection dump and to generate another report.
I’ve gone ahead populated out the domain with BadBlood, captured a new collection following the same SharpHound commands used previously and the collection has been uploaded to BloodHound.
Now to generate a new AD-Miner report making sure to use the “–evolution” feature:
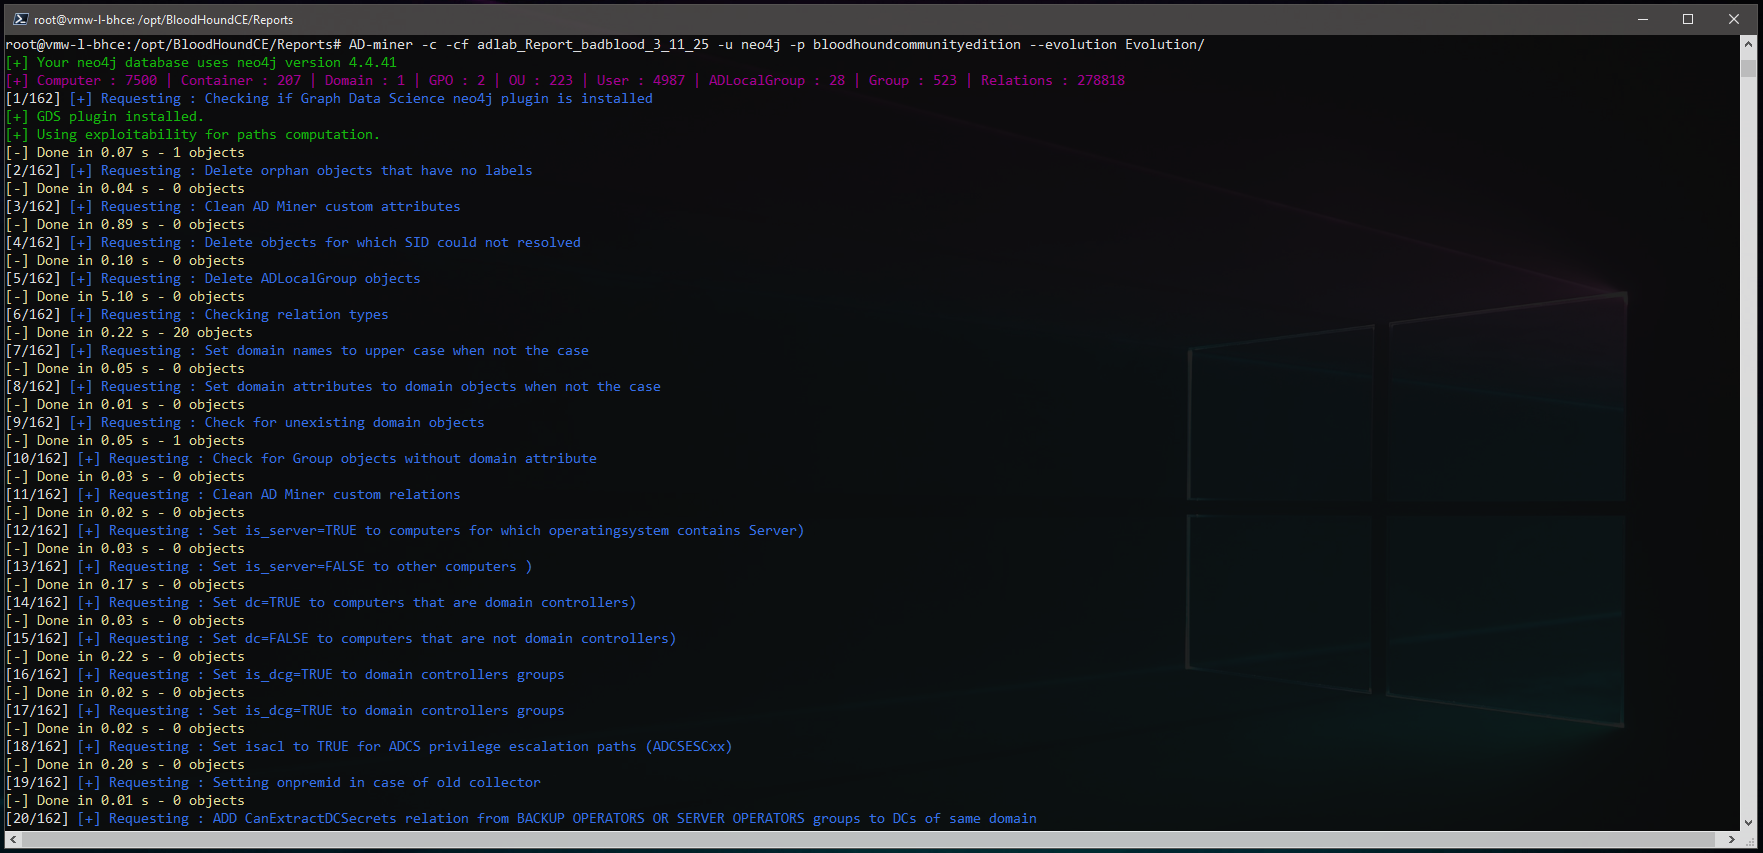
root@vmw-l-bhce:/opt/BloodHoundCE/Reports# AD-miner -c -cf adlab_Report_badblood_3_11_25 -u neo4j -p bloodhoundcommunityedition --evolution Evolution/
The output looks very similar to the first run, but does take a bit longer now with the domain filled out:
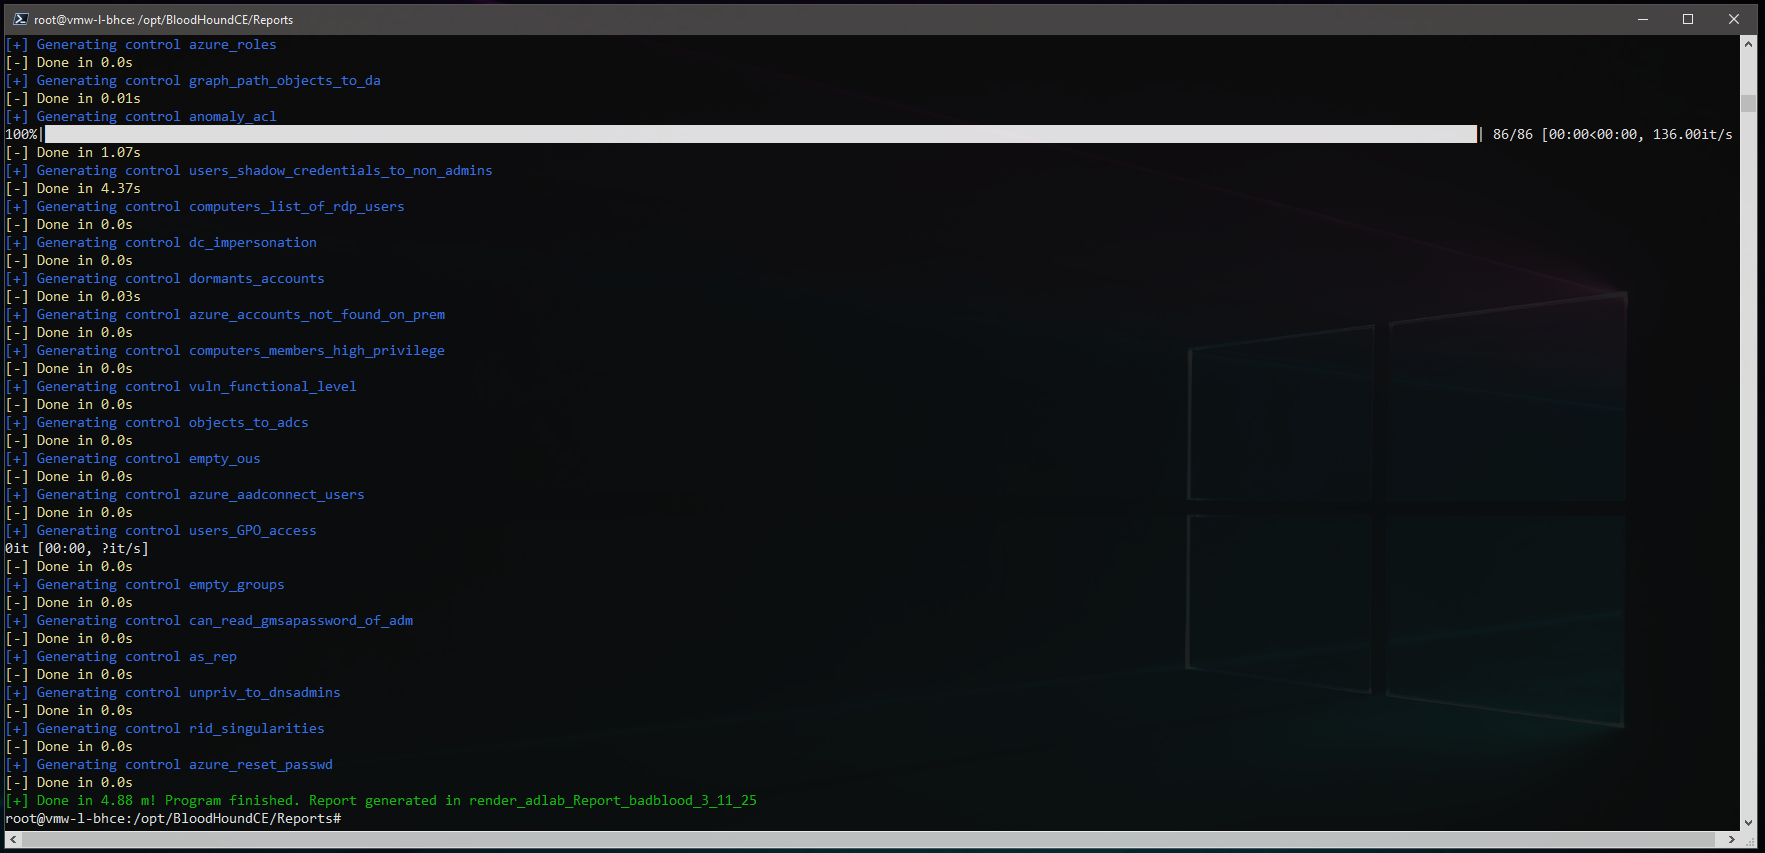
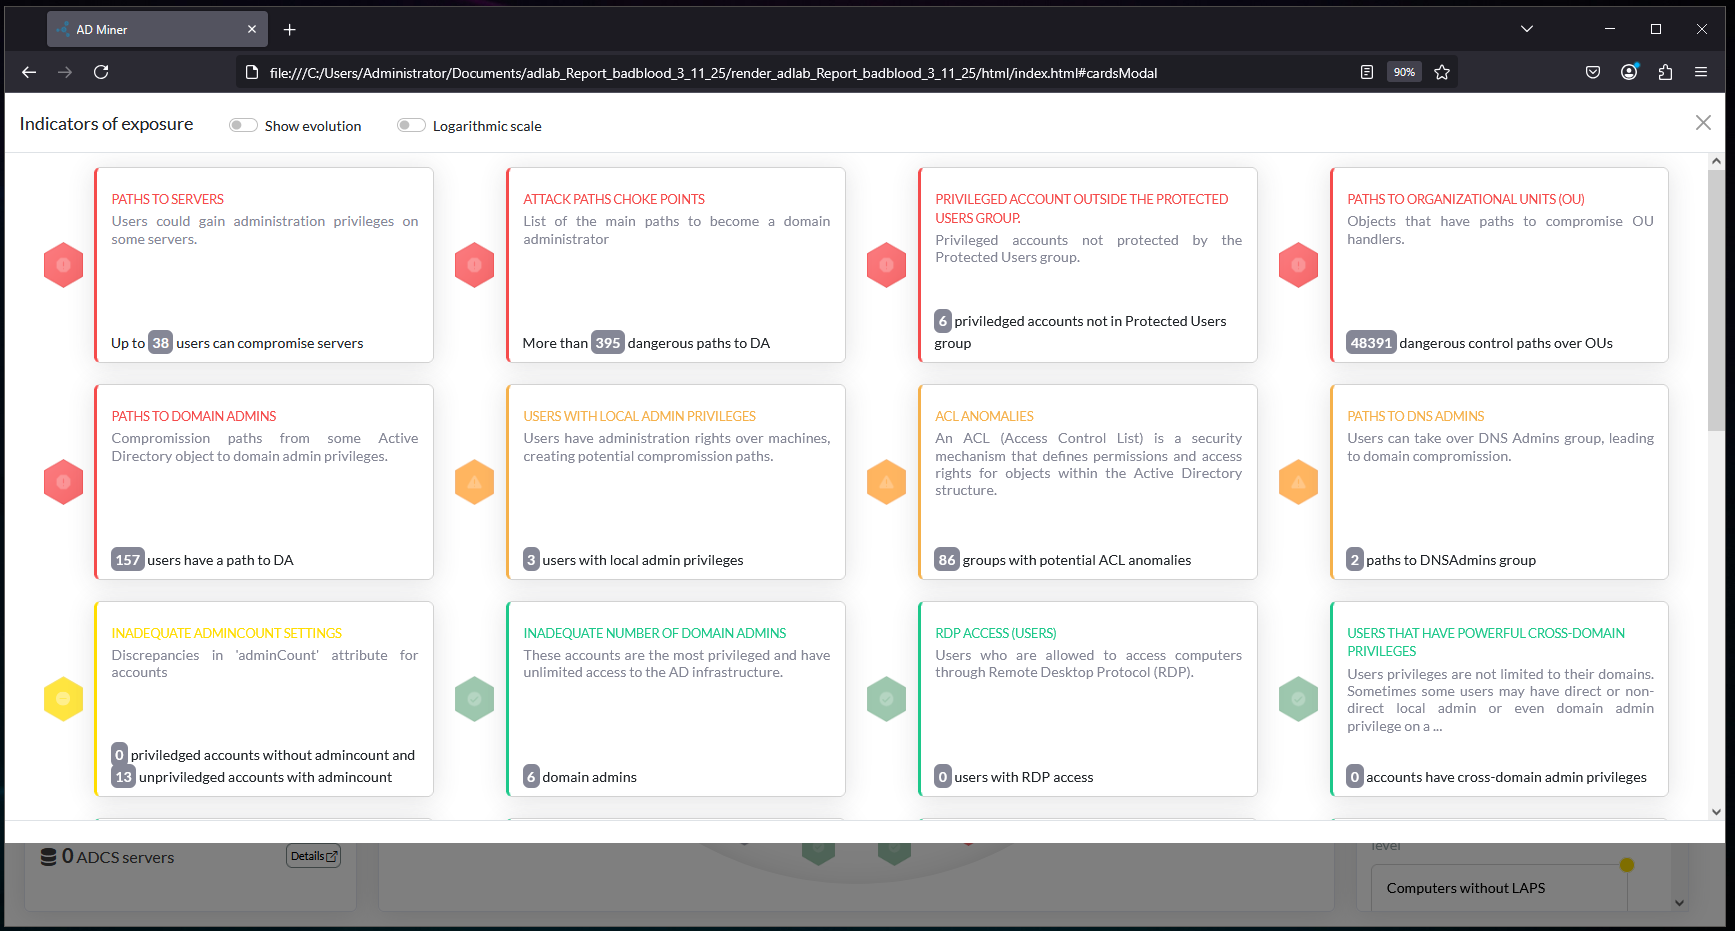
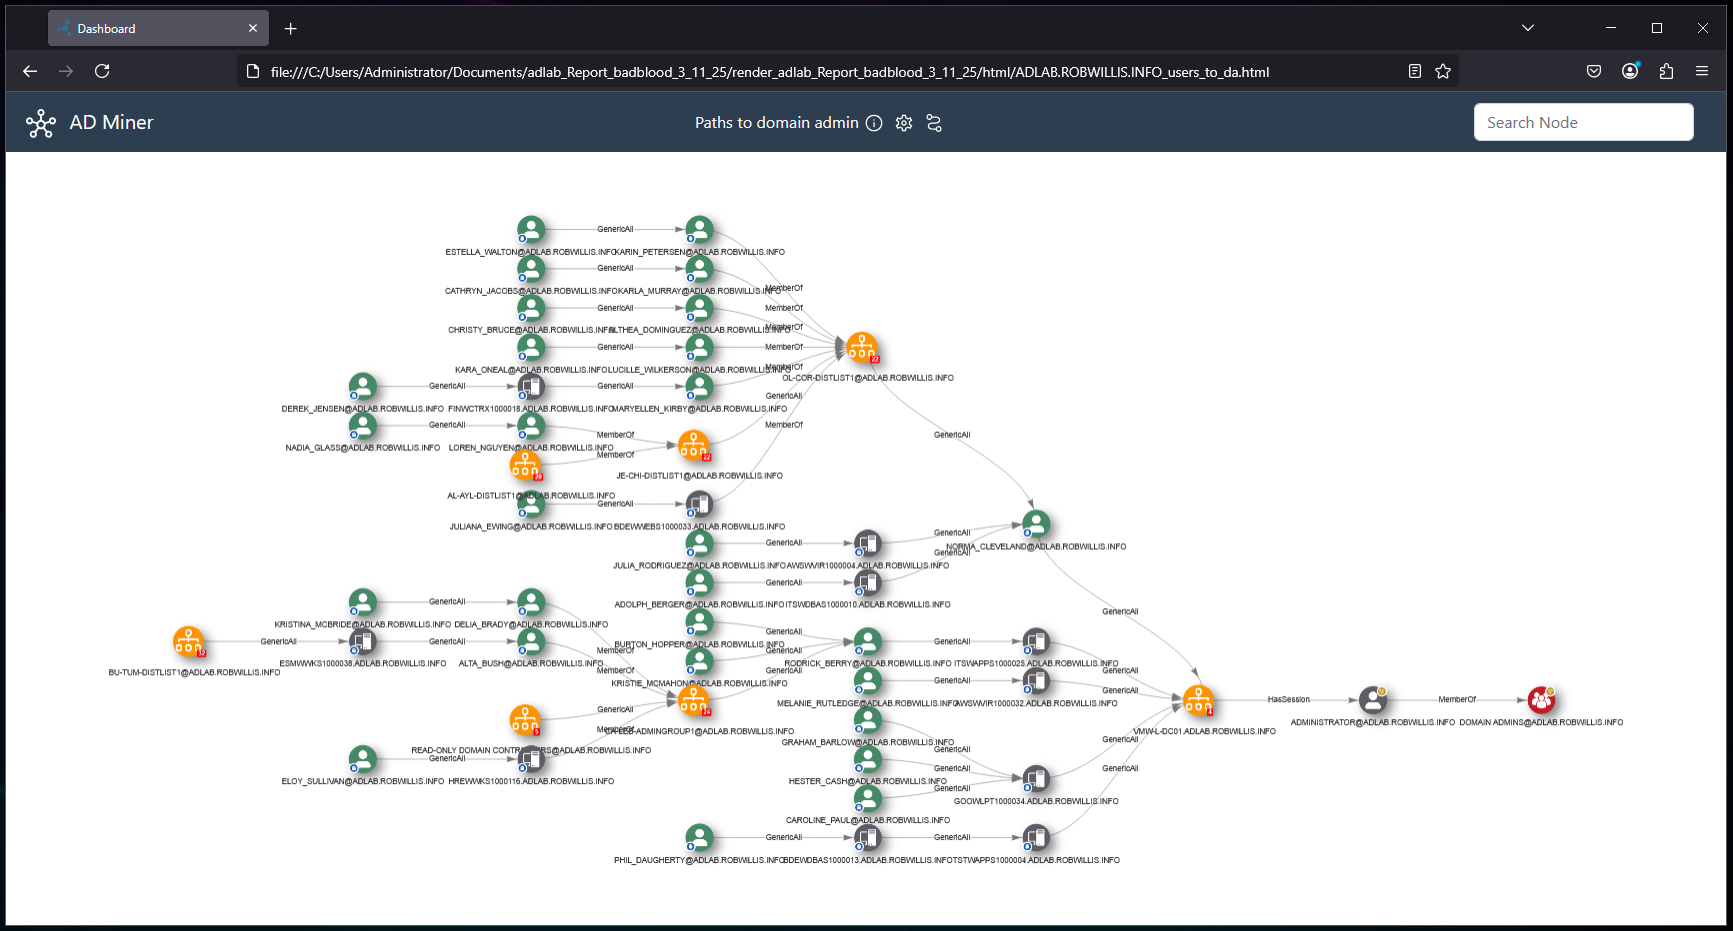
Viewing the report in a browser, a bunch of new attack path issues have shown up (BadBlood) and the Evolution tab is present:
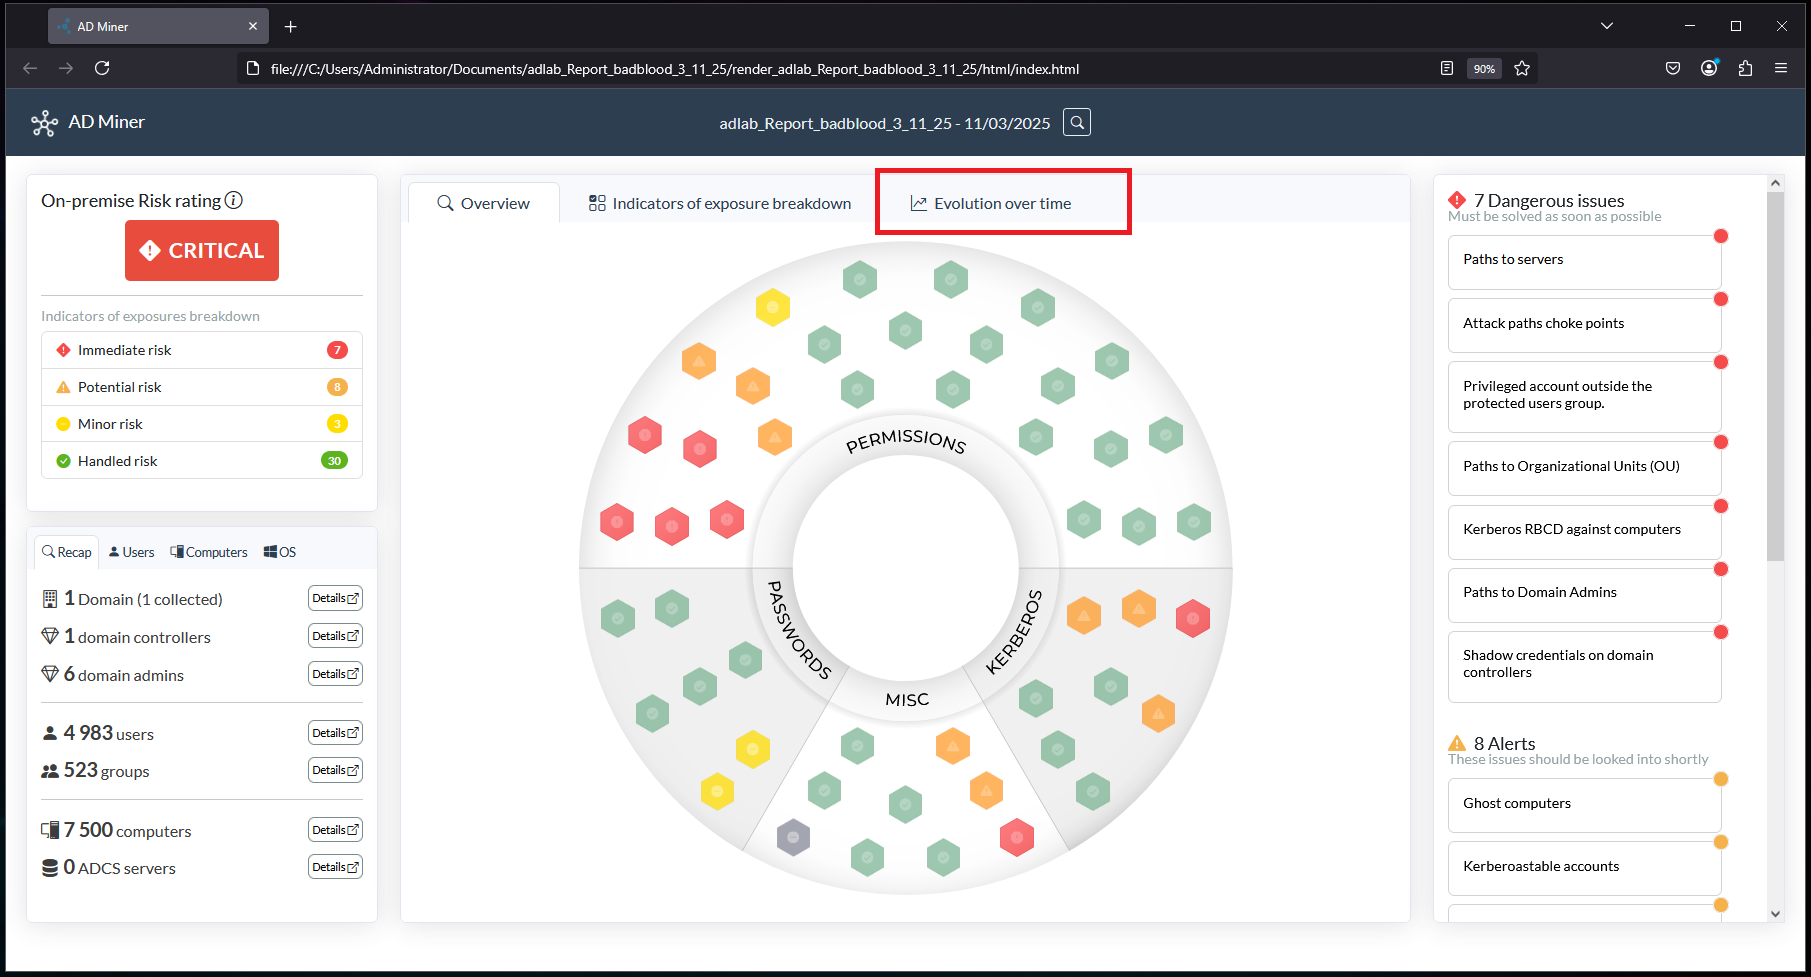
Click on the Evolution tab to view the graphs:

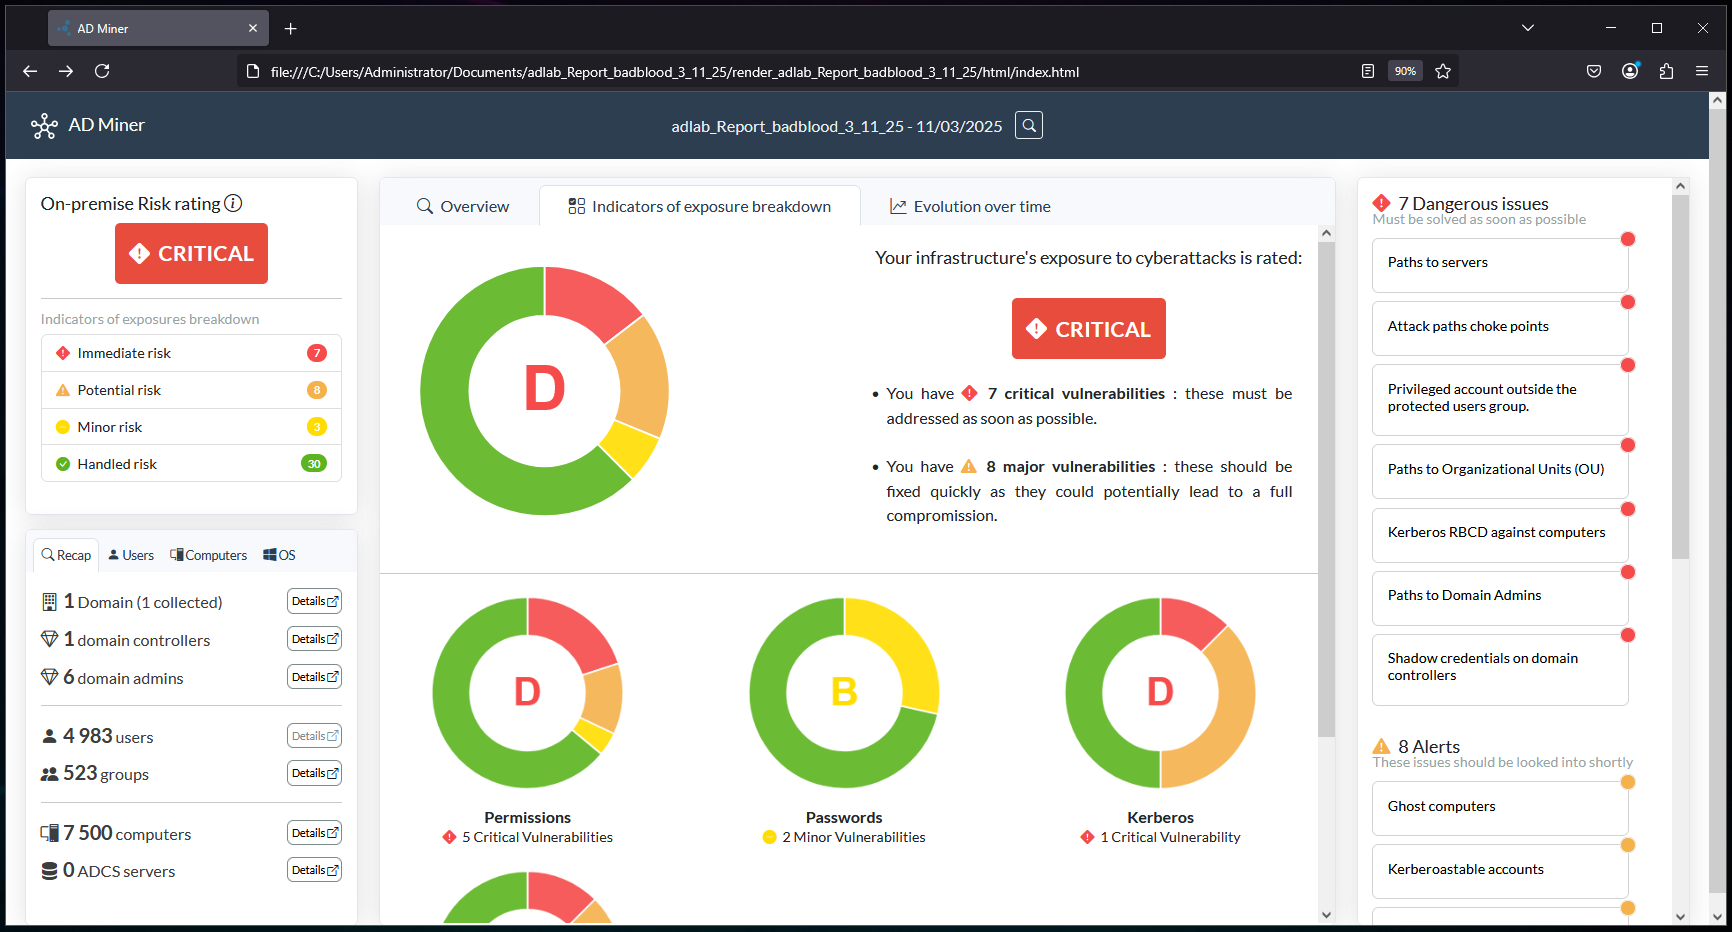
Here are some addition screens of the AD-Miner report:
And with that, we have finally reached the end!
Repeating The Process
It seems like a lot at first glance and even working through all of the steps, but the bulk of the work is really around getting the server side components deployed. If you get the server part right, you should only have to do it once and then just keep it running with the expected regular maintainence.
Moving forward, it now takes only 5 steps to repeat this process going from domain collection to report:
- Capture new domain collection:
PS C:\Users\Administrator\Downloads\sharphound-v2.5.13> .\SharpHound.exe --collectionmethods all --domain adlab.robwillis.info
- Upload collection to BloodHound server.
-
Generate new AD-miner report:
root@vmw-l-bhce:/opt/BloodHoundCE/Reports# AD-miner -c -cf adlab_Report_badblood_3_11_25 -u neo4j -p bloodhoundcommunityedition --evolution Evolution/
- Copy the new reports evolution json file into the Evolution folder for the next report.
-
Package it up:
root@vmw-l-bhce:/opt/BloodHoundCE/Reports# tar -zcvf adlab_Report_badblood_3_11_25.tar.gz render_adlab_Report_badblood_3_11_25/
- Rinse and repeat.
Downloads
Just in case anyone is interested, I’ve put all of the files created during this post into a single zip that can be found here:
- BHCE_AD-Miner_Files_robwillisinfo.zip
- docker-compose.yml – The modified docker-compose.yml
- 20250308023917_BloodHound-Base-All.zip – SharpHound baseline collection
- 20250311033936_BloodHound-BadBlood-All.zip – SharpHound BadBlood collection
- adlab_Report_baseline_3_8_25.tar.gz – SharpHound baseline AD-Miner report
- adlab_Report_badblood_3_11_25.tar.gz – SharpHound BadBlood AD-Miner report
Cheat Sheets
This section is designed to be a quick reference of all of the commands used throughout the post.
Building The BloodHound Server
# Installing Docker

# Check the docker version and info
root@vmw-l-bhce:/home/bit_rot# docker --version
root@vmw-l-bhce:/home/bit_rot# docker info

# Find available docker packages
root@vmw-l-bhce:/home/bit_rot# apt-cache search docker

# Installing the docker packages
root@vmw-l-bhce:/home/bit_rot# apt -y install docker.io docker-compose

# Installing BloodHound

# Make the directory
root@vmw-l-bhce:/home/bit_rot# mkdir /opt/BloodHoundCE
root@vmw-l-bhce:/home/bit_rot# cd /opt/BloodHoundCE

# Download the docker-compose.yml
root@vmw-l-bhce:/opt/BloodHoundCE# curl -L https://ghst.ly/getbhce -o docker-compose.yml

# Edit the docker-compose.yml
root@vmw-l-bhce:/opt/BloodHoundCE# nano docker-compose.yml

# Settings to modify:
# graph-db
- NEO4J_PLUGINS=["graph-data-science"]
# bloodhound
# Original
- ${BLOODHOUND_HOST:-127.0.0.1}:${BLOODHOUND_PORT:-8080}:8080
# Updated
- ${BLOODHOUND_HOST:-0.0.0.0}:${BLOODHOUND_PORT:-8080}:8080

# Running & Managing The BloodHound Server

# Starting the containers
root@vmw-l-bhce:/opt/BloodHoundCE# docker-compose up

# Starting the containers in detached mode
root@vmw-l-bhce:/opt/BloodHoundCE# docker-compose up -d

# Docker-compose logs
root@vmw-l-bhce:/opt/BloodHoundCE# docker-compose logs

# View running docker containers
root@vmw-l-bhce:/opt/BloodHoundCE# docker ps

# Stop the running containers
root@vmw-l-bhce:/opt/BloodHoundCE# docker-compose stop

# View the available local docker images
root@vmw-l-bhce:/opt/BloodHoundCE# docker images

# Update the BloodHound containers to the latest images:
root@vmw-l-bhce:/opt/BloodHoundCE# docker-compose pull

# Reset the BloodHound containers back to their original state:
root@vmw-l-bhce:/opt/BloodHoundCE# docker-compose down -v
Installing AD-Miner
# Verify pipx is installed
root@vmw-l-bhce:/opt/BloodHoundCE# apt install pipx

# Installing AD-Miner
root@vmw-l-bhce:/opt/BloodHoundCE# pipx install 'git+https://github.com/Mazars-Tech/AD_Miner.git'

# Make sure AD-Miner accessible via system path
root@vmw-l-bhce:/opt/BloodHoundCE# pipx ensurepath

# Verify AD-Miner is working
root@vmw-l-bhce:/opt/BloodHoundCE# AD-miner --help
Domain Data Collection
# Domain-Joined

# SharpHound help
PS C:\Users\Administrator\Downloads\sharphound-v2.5.13> .\Sharphound.exe --help

# SharpHound - super limited in memory run
PS C:\Users\Administrator\Downloads\sharphound-v2.5.13> .\SharpHound.exe --memcache --collectionmethods dconly --domain adlab.robwillis.info

# SharpHound - Full collection
PS C:\Users\Administrator\Downloads\sharphound-v2.5.13> .\SharpHound.exe --collectionmethods all --domain adlab.robwillis.info

# Non Domain-Joined

# Verify DNS resolution to the AD domain via ping

# Launch a new cmd prompt
C:\> runas /netonly /user:adlab.robwillis.info\administrator cmd.exe

# Verify access to domain shares
C:\> net view \\adlab.robwillis.info\

# Run SharpHound like normal in the RunAs window
C:\> .\SharpHound.exe --memcache --collectionmethods dconly --domain adlab.robwillis.info
Generating Reports With AD-Miner
# Make the directories
root@vmw-l-bhce:/opt/BloodHoundCE# mkdir Reports
root@vmw-l-bhce:/opt/BloodHoundCE# mkdir Evolution
root@vmw-l-bhce:/opt/BloodHoundCE# cd Reports

# AD-miner help
root@vmw-l-bhce:/opt/BloodHoundCE/Reports# AD-miner --help

# AD-miner basic run
root@vmw-l-bhce:/opt/BloodHoundCE/Reports# AD-miner -c -cf adlab_Report_baseline_3_8_25 -u neo4j -p bloodhoundcommunityedition

# Evolution report run - Make sure to copy the previous report json into the Evolution directory
root@vmw-l-bhce:/opt/BloodHoundCE/Reports# AD-miner -c -cf adlab_Report_badblood_3_11_25 -u neo4j -p bloodhoundcommunityedition --evolution Evolution/

# Compress report
root@vmw-l-bhce:/opt/BloodHoundCE/Reports# tar -zcvf adlab_Report_baseline_3_8_25.tar.gz render_adlab_Report_baseline_3_8_25/