Intro
Previous modules
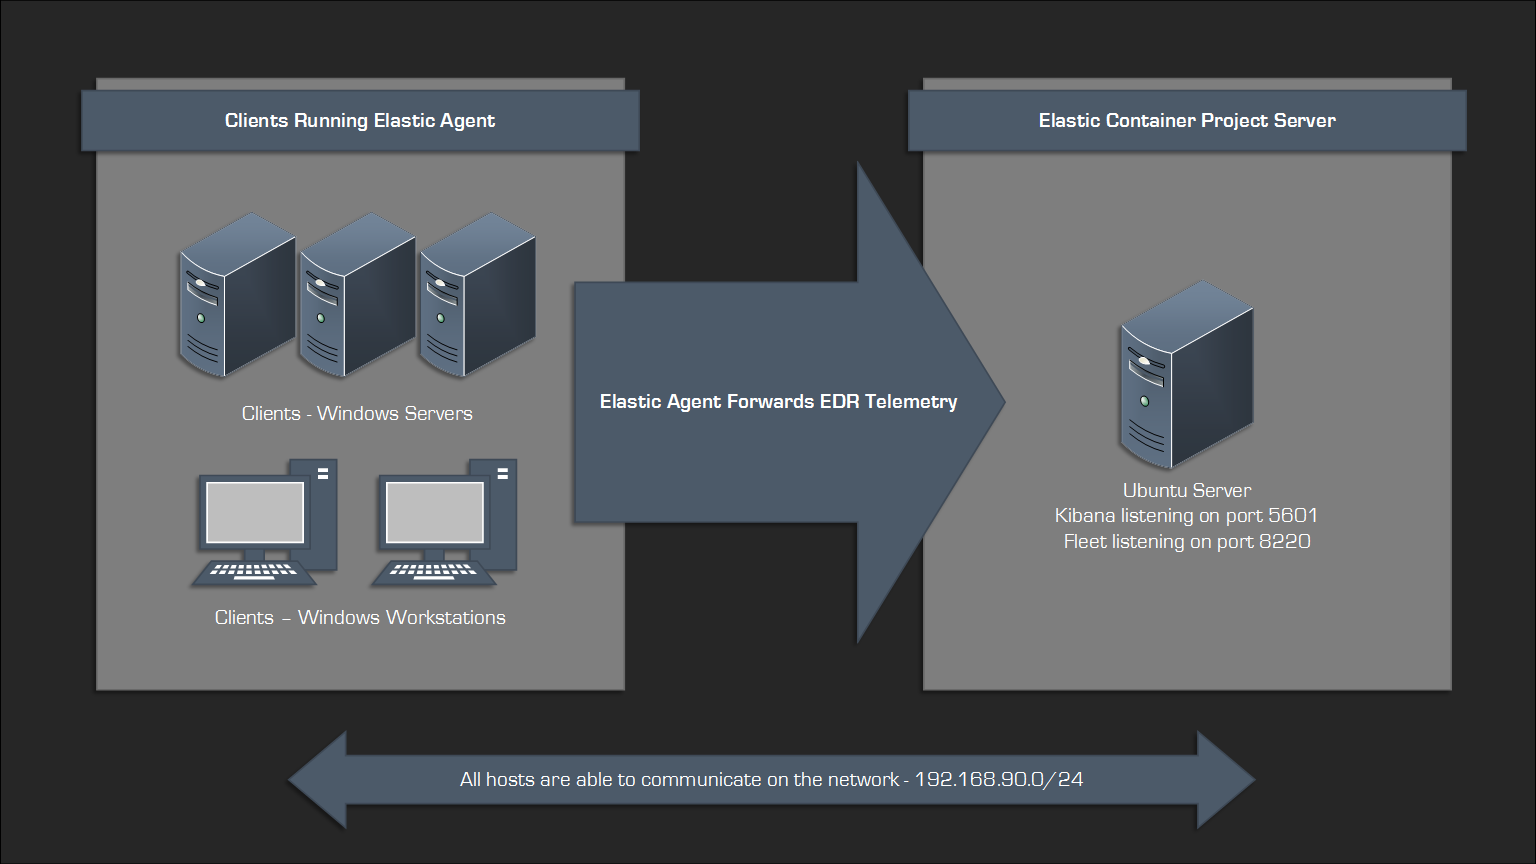
The Elastic Container Project
The Elastic Container Project will serve as our Endpoint Detection & Response (EDR) solution for the lab. It’s incredibly powerful and very easy to get up and running, and it’s free, although additional features are available for a cost. The skills you gain using it will also transfer well to other commercial EDR platforms like CrowdStrike or Microsoft Defender. Another advantage of using Elastic for this project is the open-source nature of their detection rules, which allows us to examine high-quality detection content and gain a deeper understanding of how they work.
You can find more information about the project here:
Elasticsearch, Logstash, and Kibana (ELK) stacks are fairly common in the security community and are often used for centralized logging. The Elastic Container Project is a bit different, it still incorporates the Elasticsearch and Kibana components but adds Fleet and the Detection Engine, gaining the ability to actively respond to activity.
The final component is the Elastic Agent, which needs to be installed on the endpoints to report data back to the Elastic Container Project server:
Installing The Elastic Container Project
Install the prerequisite packages:
# apt install docker.io docker-compose-v2 jq curl git
Change directory to /opt:
# cd /opt
Git clone the repo:
# git clone https://github.com/peasead/elastic-container.git
Change to the elastic-container directory:
# cd elastic-container
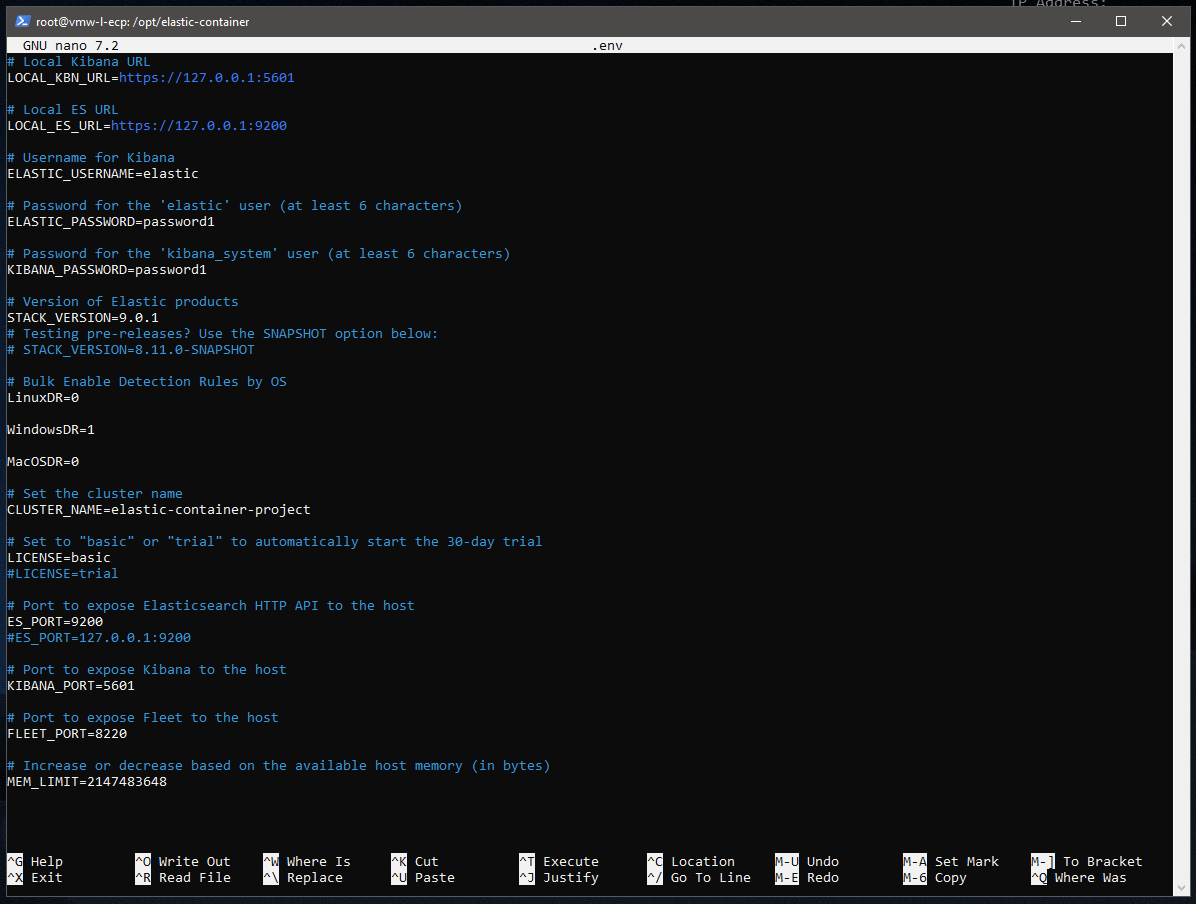
Edit the .env file:
# nano .env
Make the following changes:
- Change passwords
- Bulk Enable Detection Rules By OS
- Stack version (optional)
- License (optional)
Make the script executable:
# chmod +x elastic-container.sh
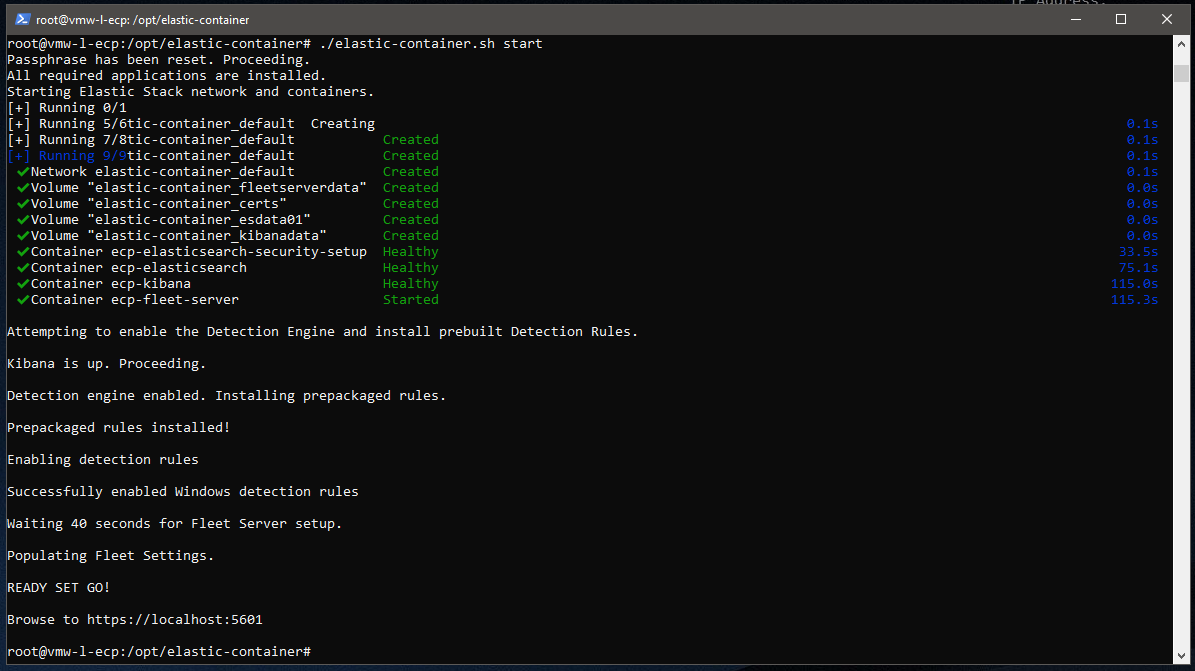
To start the containers, add the start argument to the shell script command, optionally staging the images first:
# ./elastic-container.sh stage
# ./elastic-container.sh start
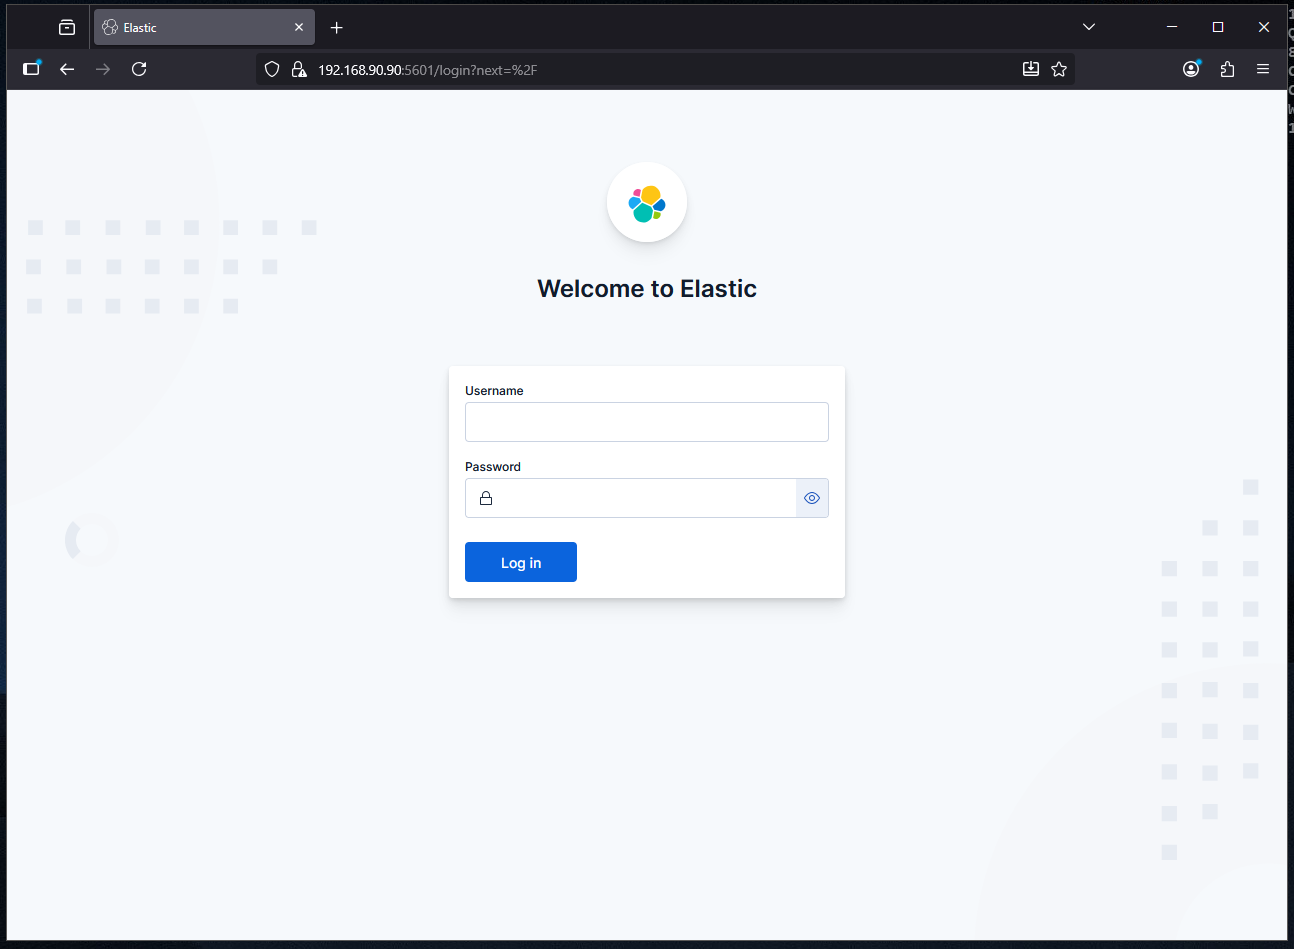
Browse to https://ip-of-server:5601 to access the Kibana instance with the username “elastic” and the password set in the .env file:
Managing The Elastic Container Project
Management is streamlined using the same shell script that starts the containers, making this project particularly useful for Purple Teaming by allowing for easy resets between test cases.
Here are all of the available options:
# ./elastic-container.sh stage
# ./elastic-container.sh start
# ./elastic-container.sh stop
# ./elastic-container.sh restart
# ./elastic-container.sh clear
# ./elastic-container.sh destroy
# ./elastic-container.sh status
Installing The Elastic Agent On Windows
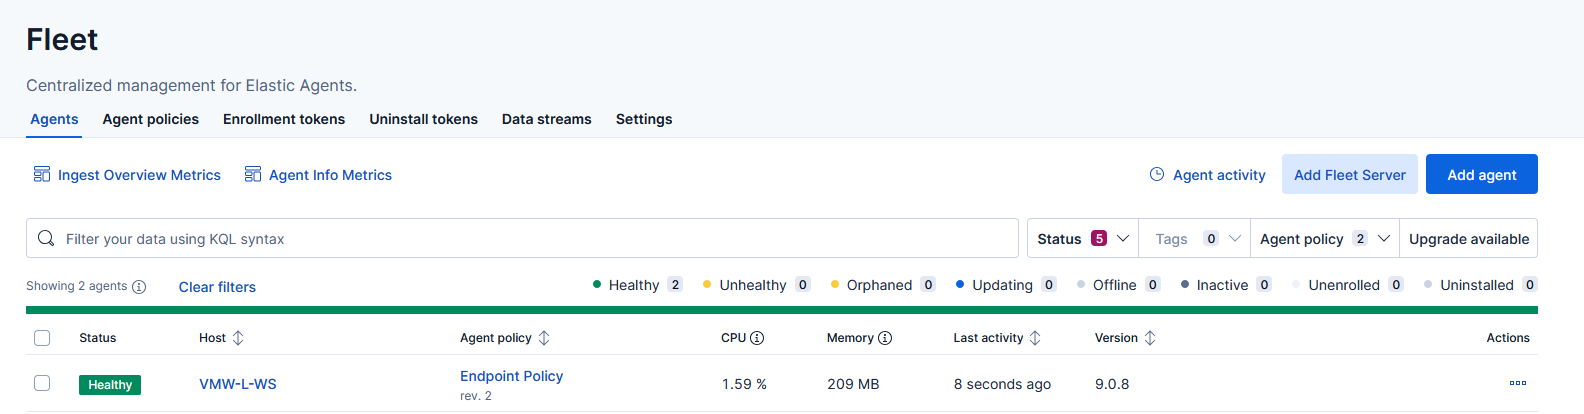
To get the Elastic Agent installation command, go to Management > Fleet in the web interface:
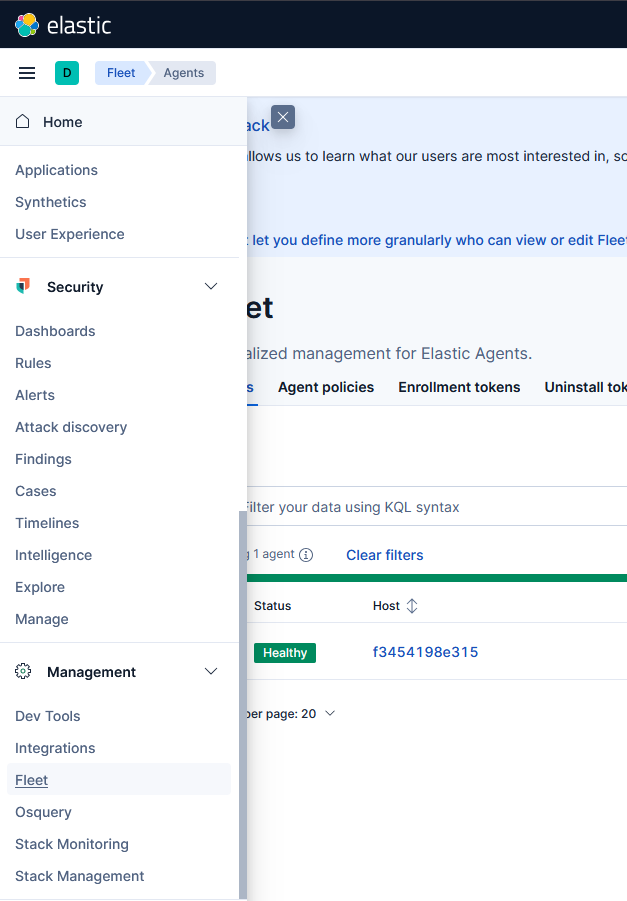
On the right hand side, select Add agent:
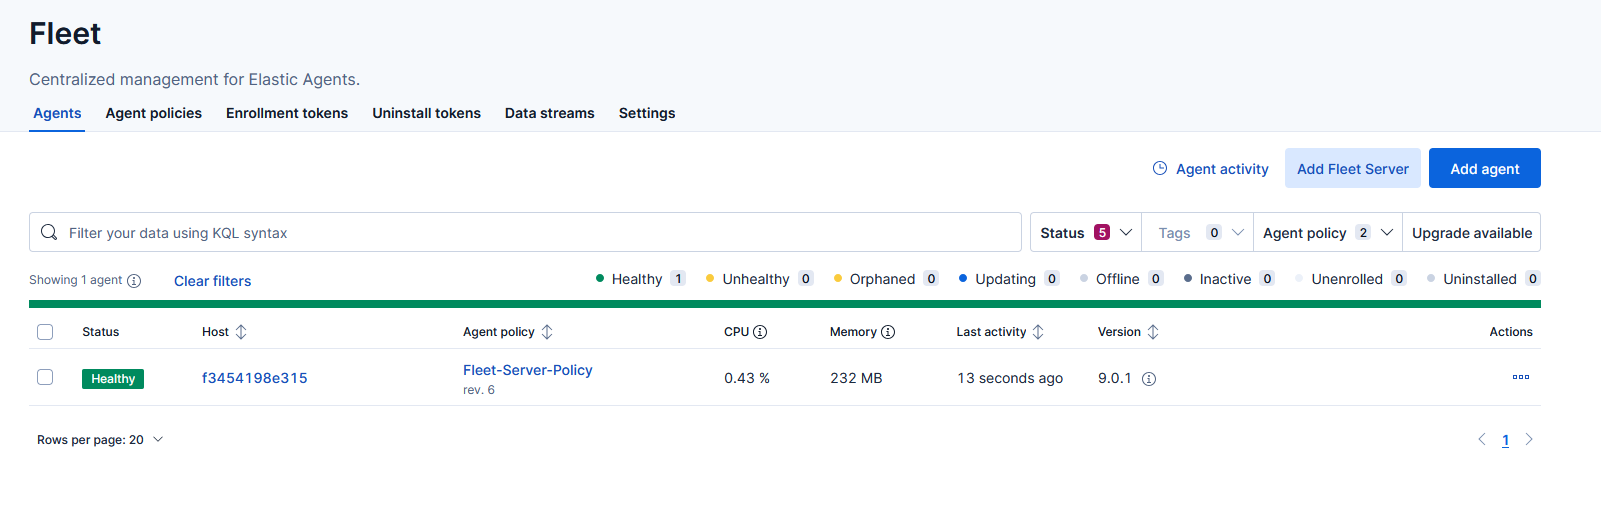
Select the desired agent policy, enroll in fleet, and then select the operating system:

For Windows, you should see something like this:
$ProgressPreference = 'SilentlyContinue'
Invoke-WebRequest -Uri https://artifacts.elastic.co/downloads/beats/elastic-agent/elastic-agent-9.0.8-windows-x86_64.zip -OutFile elastic-agent-9.0.8-windows-x86_64.zip
Expand-Archive .\elastic-agent-9.0.8-windows-x86_64.zip -DestinationPath .
cd elastic-agent-9.0.8-windows-x86_64
.\elastic-agent.exe install --url=https://192.168.90.90:8220 --enrollment-token=NGkwNzFwa0JWcG5sYUtIZlBHQTk6NHdfNDRMaVZudDhMZUVnZnFnc25CUQ==
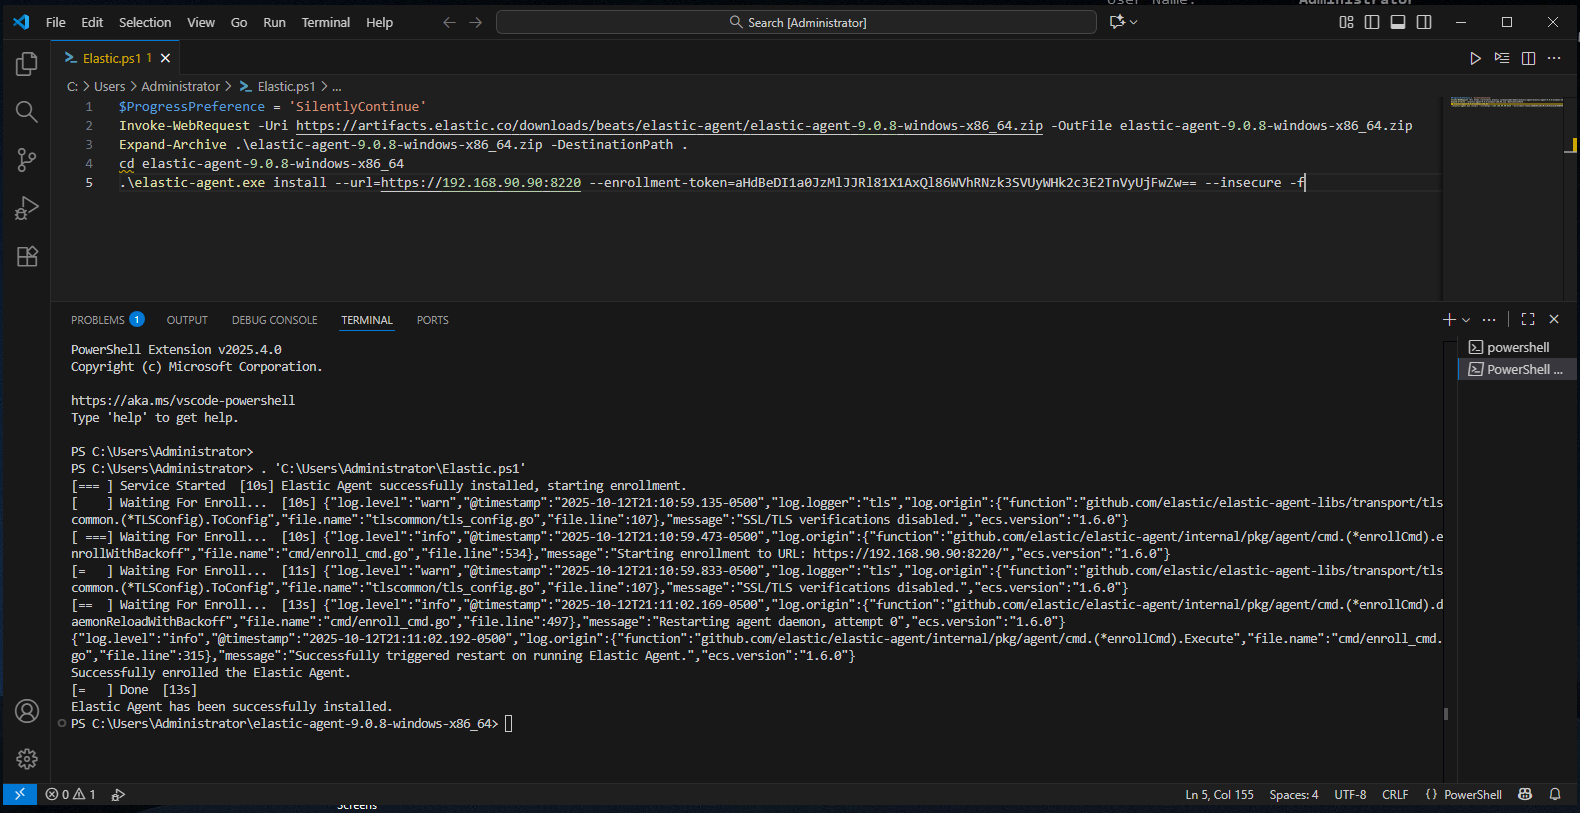
Because we’re using self-signed certificates, you’ll need to add “–insecure -f” to the last line for the installation to work. The updated version would then look like this:
$ProgressPreference = 'SilentlyContinue'
Invoke-WebRequest -Uri https://artifacts.elastic.co/downloads/beats/elastic-agent/elastic-agent-9.0.8-windows-x86_64.zip -OutFile elastic-agent-9.0.8-windows-x86_64.zip
Expand-Archive .\elastic-agent-9.0.8-windows-x86_64.zip -DestinationPath .
cd elastic-agent-9.0.8-windows-x86_64
.\elastic-agent.exe install --url=https://192.168.90.90:8220 --enrollment-token=NGkwNzFwa0JWcG5sYUtIZlBHQTk6NHdfNDRMaVZudDhMZUVnZnFnc25CUQ== --insecure -f
Install with administrator privileges and you should see the following:
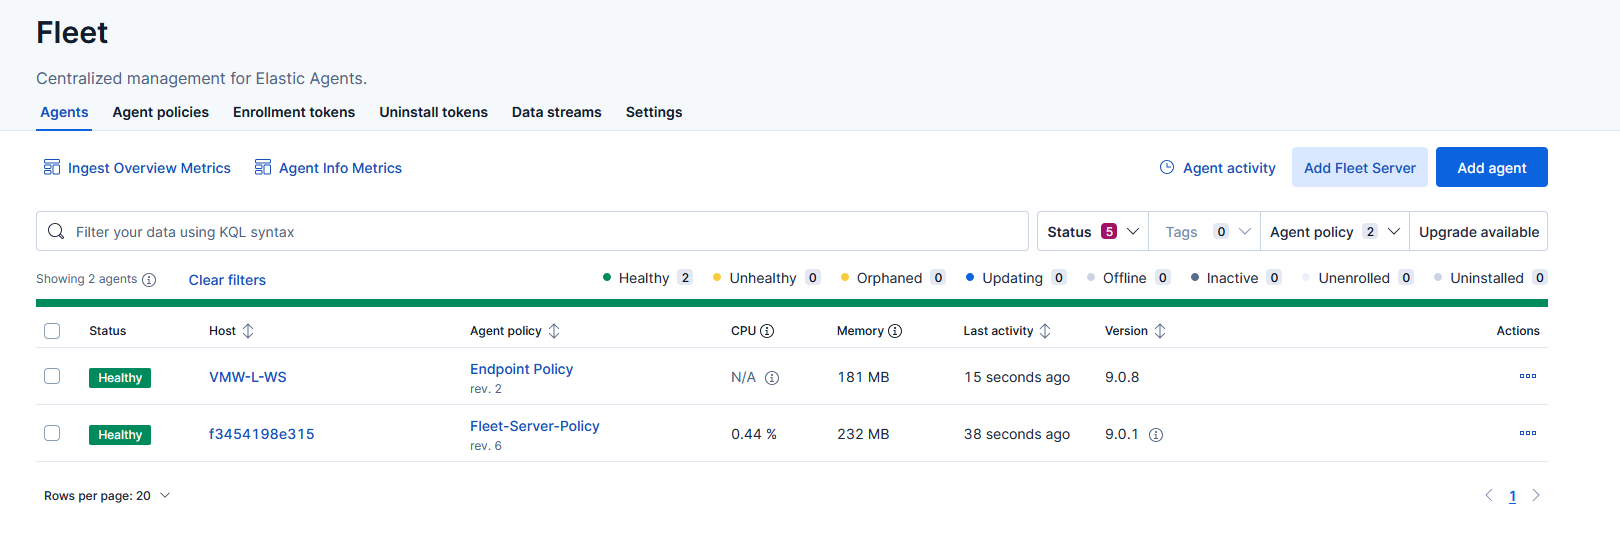
The agent should appear as Healthy under Fleet Agents:
Verifying The Elastic Deployment & Configuration
Agent Policy
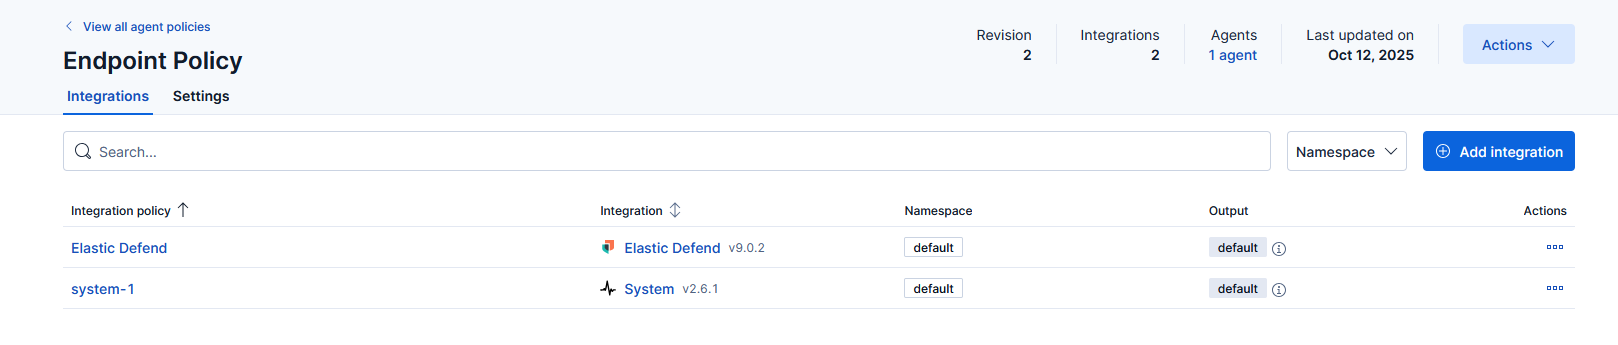
In the Fleet management section, find the Windows host and click on its agent policy – Endpoint Policy:
Detect-Only Mode
Review the Elastic Defend integration policy:
Change the Protection level to Detect:

Because this project will be used for Purple Teaming, we want to ensure our tests run without interruption, allowing us to collect as much telemetry as possible.
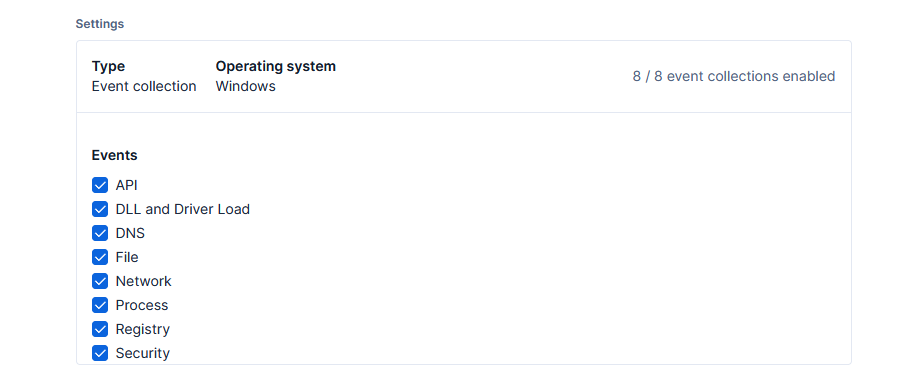
Event Collections
Review the available event collections:
Disable Microsoft Defender
Since the test client is running Windows, it’s important to make sure Microsoft Defender doesn’t interfere with our testing.
While still on the Elastic Defend page, scroll down to the bottom, under Register as antivirus, select Enabled, and then Save Integration:

This should disable Defender, but be aware that this setting has a limitation: it is not supported on Windows Server.
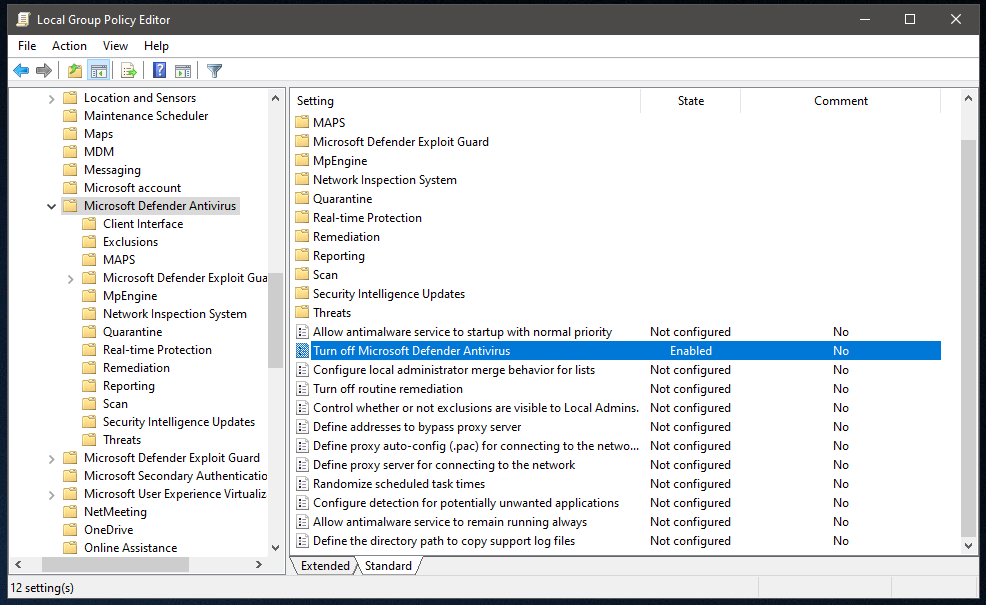
To work around this, you can use Group Policy to permanently disable Microsoft Defender on the Windows host:
PS > gpedit.msc
Enable the following policy:
Computer Configuration > Administrative Templates > Windows Components > Microsoft Defender Antivirus – “Turn off Microsoft Defender Antivirus”
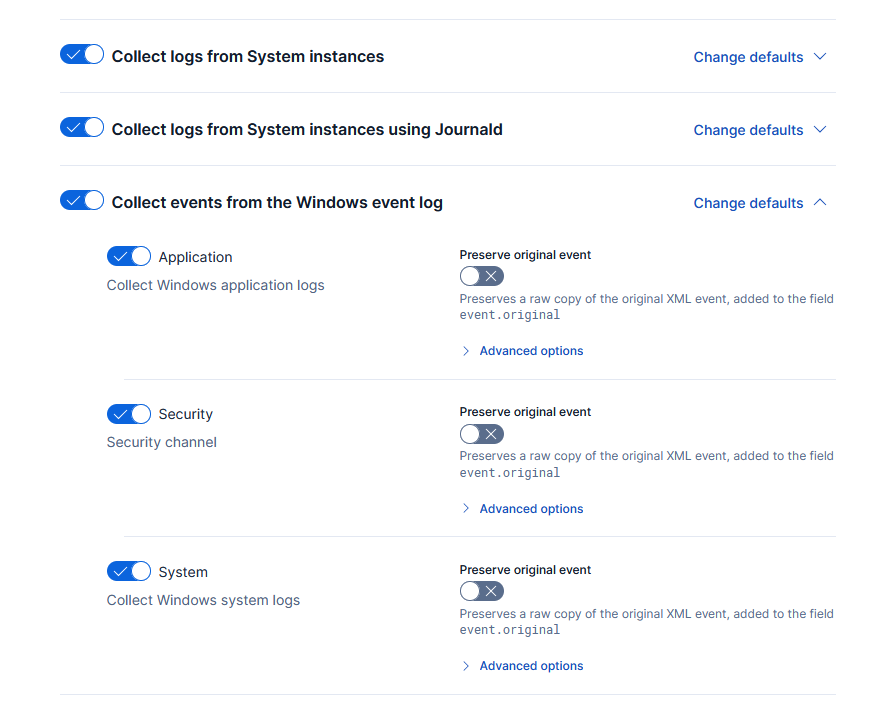
Windows Event Logs
Back in the Endpoint Policy section, review the system-1 policy, and verify the collections are enabled for the Windows event log:
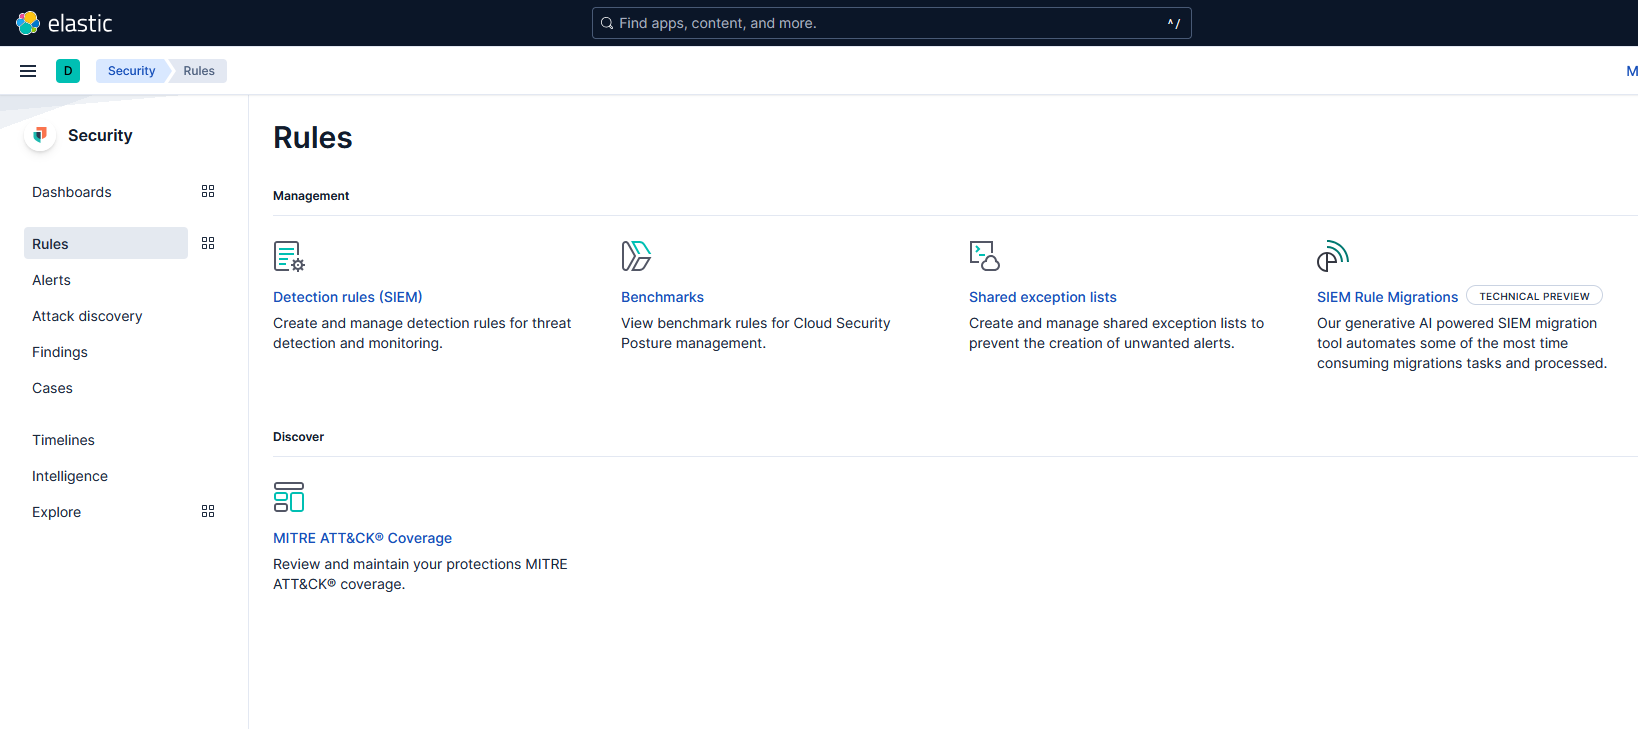
Elastic Security Rules
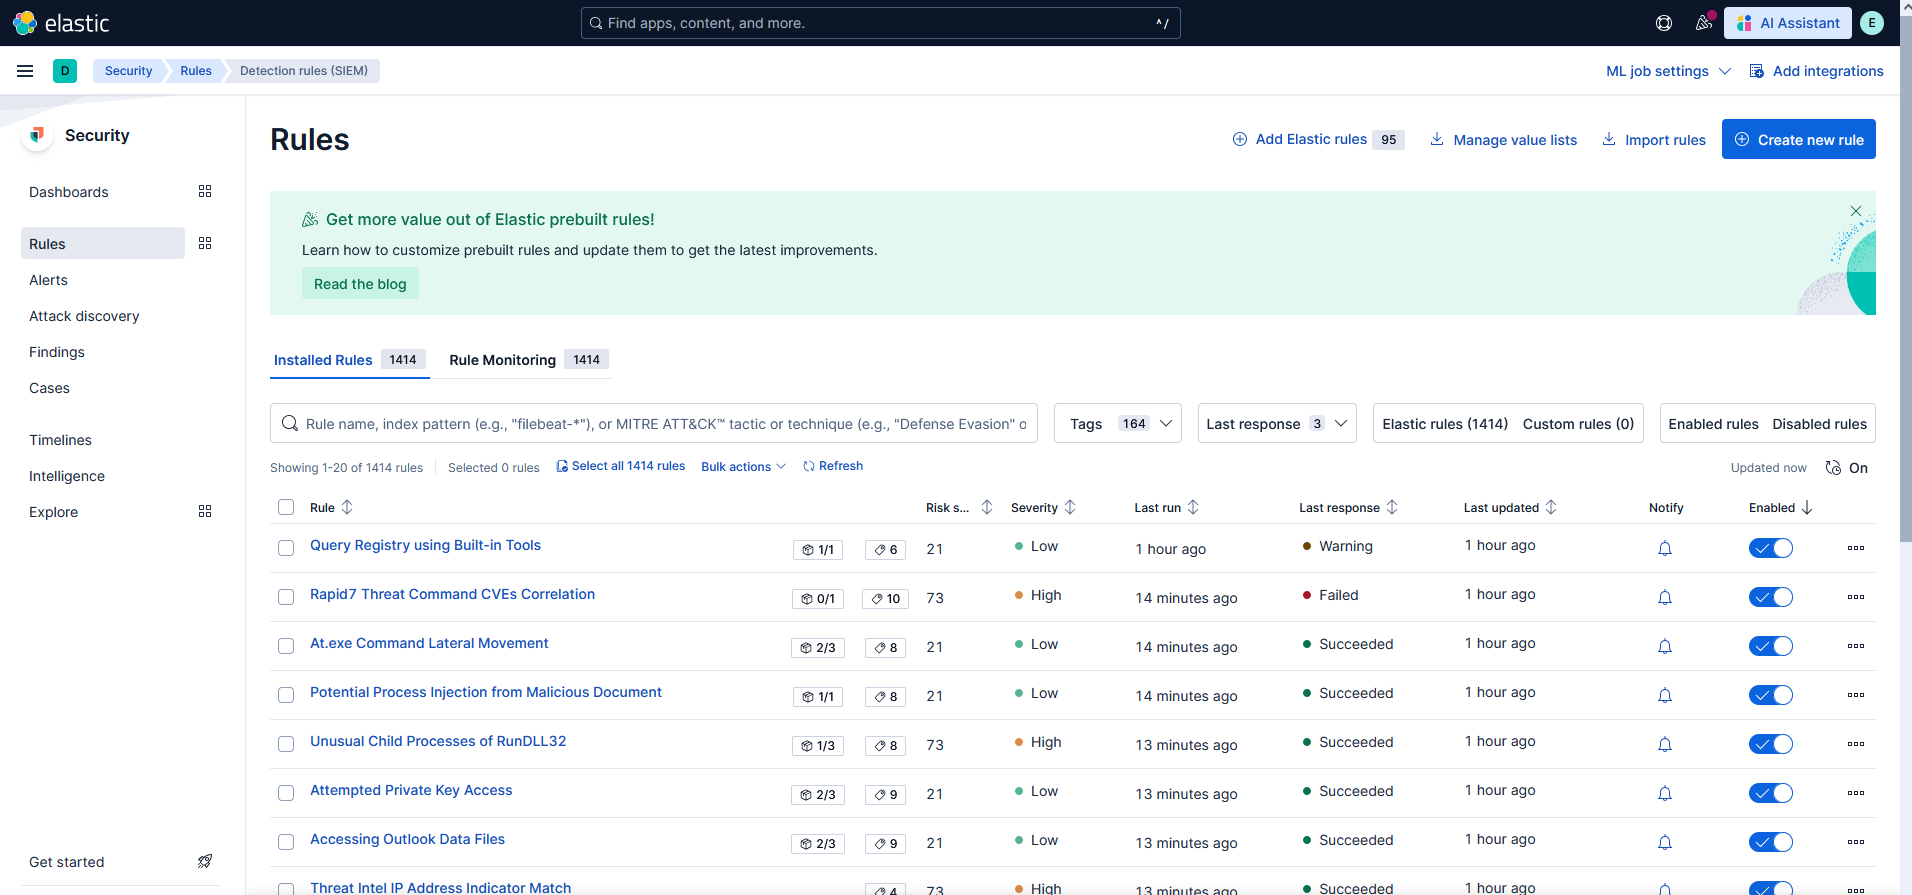
To confirm that the Elastic rules have loaded, navigate to Security > Rules and select Detection Rules (SIEM):
Try selecting one the rules:
This area provides a wealth of information that can really help you understand how these detections work including the source used:
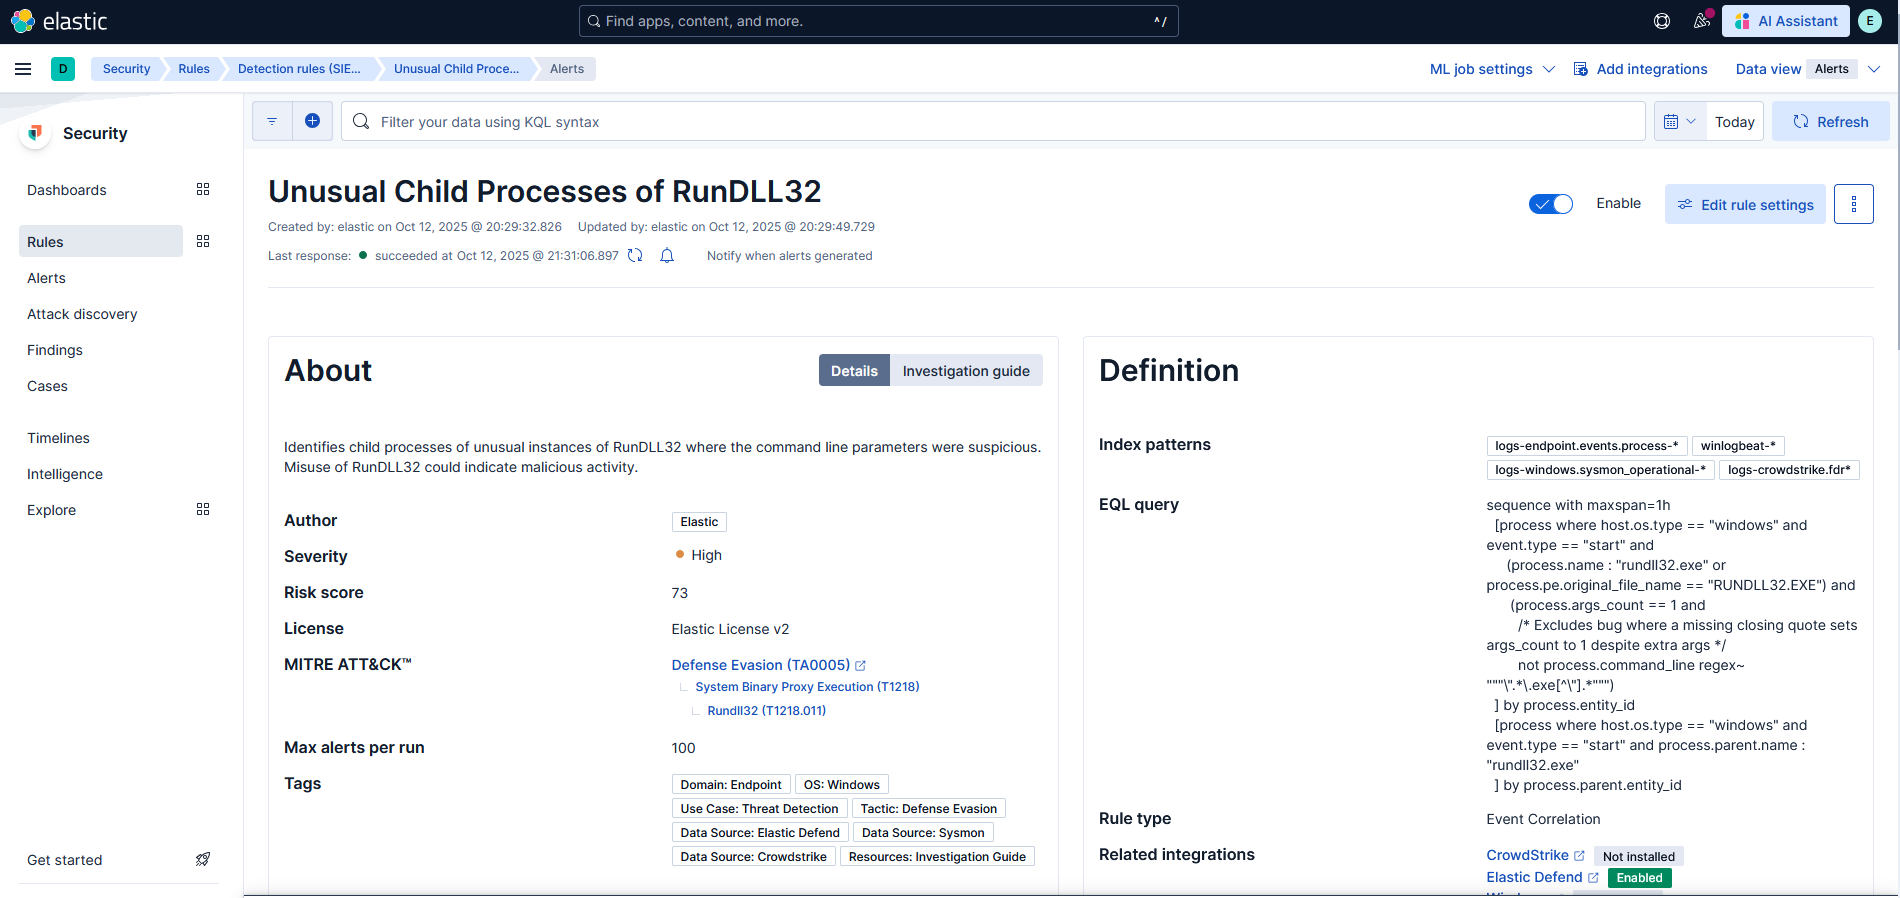
You can find more information on the Elastic detection rule sets here:
Elastic Detection Rules Explorer
GitHub Repo
The Elastic stack should now be fully configured along with a remote Windows client configured in detect-only mode.
Next Steps
In the next post, I will cover the following:
- Installing Atomic Red Team & Invoke-Atomic
- Identify – List & Review Available Atomic Tests
- Test – Execute Atomic Tests Using Invoke-Atomic
- Review – Alerts & Telemetry With Elastic Security